Create and configure a file upload control (Beta)
Create and configure a file upload control (Beta)
This documentation describes one or more public beta features that are in development. Beta features are subject to quick, iterative changes; therefore the current user experience in the Sigma service can differ from the information provided in this page.
This page should not be considered official published documentation until Sigma removes this notice and the beta flag on the corresponding feature(s) in the Sigma service. For the full beta feature disclaimer, see Beta features.
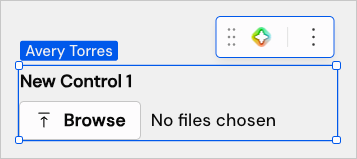
Use file upload controls to upload images, documents, and videos to file columns in input tables. You can add a file upload control as a standalone element in a workbook, or you can use it in a form with Insert row and Update row(s) actions to build an app that supports file uploads.
File columns can accept the following file types, which can be restricted in the control properties or in the destination file column configurations:
- Images: JPEG/JPG, PNG, GIF, TIFF, BMP, WebP, SVG
- Documents: PDF, CSV, DOC/DOCX, XLS, XLSX, Pages, Numbers, Keynote, JSON, Text file, XML
- Videos: MP4, MOV, AVI, MKV, WebM, M4V
You can also limit the number of files per upload and set a maximum size per file.
This document explains how to add a file upload control to a workbook and configure restrictions, format, and upload destinations.
Requirements
The ability to create and configure a file upload control requires the following:
-
Your organization must have an existing storage integration for file uploads. See External storage integration overview to review the available configuration options.
-
You must be assigned an account type with the Create, edit, and publish workbooks permission enabled.
-
You must be the workbook owner or be granted Can edit workbook permission .
Add a file upload control
Add a file upload control to your workbook.
-
Open a workbook draft.
-
In the Add element bar, choose Controls > File upload.
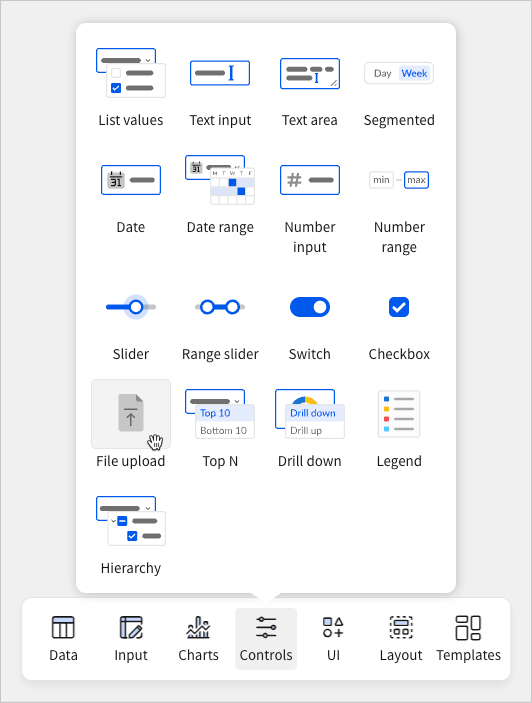
Sigma adds a new file upload control to the workbook.
Configure file upload restrictions
Configure file upload restrictions for security, compliance, and performance purposes. You can add file upload validation to restrict the following:
-
Number of files users can upload simultaneously
-
Accepted file types
-
Maximum size per file
By default, a file upload control allows multiple files per cell (without restriction), accepts all supported file types, and has a 200 MB maximum file size.
File upload restrictions can also be set in the destination file column configurations. When there are different restrictions on the control and the file column, the most restrictive settings are applied when uploading files using the control.
-
With the control selected, open the Properties panel.
-
In the Settings tab, configure the following options:
Format a file upload control
In the Format panel, you can customize the appearance of a file upload control to match the styling of your workbook. Customizable formatting includes the following:
Customize element styles
Customize the appearance of the element container. For more information, see Customize element background and styles.
Customize the element label
Customize the appearance of the element label.
Customize element content alignment
In the Alignment section, you can customize the Vertical setting to reposition the element content relative to the total element height.
Configure the file upload destination
Unlike other control types, file upload controls don’t have a Target tab in the Properties panel. To configure one or more file upload destinations, you must configure an Insert row or Update row action and pass the file upload control object to a file column in an input table.
For more information, see Create actions that modify input table data.