Configure single-select or multi-select columns in input tables
Configure single-select or multi-select columns in input tables
Use single-select and multi-select columns in input tables to enable users to add discrete values as follows:
-
Single-select: Users can select one value in each row from a predefined list of options. A new selection replaces the existing row value.
-
Multi-select: Users can select one or more values in each row from a predefined list of options. New selections are added to the existing row values.
You can manually create and manage a list of distinct and repeatable options, or you can populate the list of options from a column in an existing data source or element in the workbook. Values can then be formatted as pills and assigned different colors for visual differentiation and clarity.
This document explains how to add a single-select or multi-select column to an input table and configure the list of options available for users to select. For information about using existing single-select and multi-select columns in an input table, see Add or edit input table data, or try the interactive demo in this document.
System and user requirements
The ability to create a new input table and configure a single-select or multi-select column requires the following:
- You must have Can use access to a connection that supports input tables and has write access enabled.
- If using input tables on an OAuth-enabled connection, see About OAuth with write access for additional requirements.
- If using input tables on an Amazon Redshift connection, the
enable_case_sensitive_identifierconfiguration value in Redshift must be set tofalse. If set totrue, attempts to create or edit input tables will fail.
- You must be assigned an account type with the Create input tables and Create, edit, and publish workbooks permissions enabled.
- You must be the workbook owner or have Can edit access to the workbook. Unlike other workbook elements, input tables cannot be created in custom views. You can only create new input tables in the workbook draft.
For information about permissions required to edit input table data, see Add or edit input table data.
Add a single-select column to an input table
Add a single-select column that allows users to select one value in each row from a predefined list of options. Single-select columns support text, number, and date data.
-
Create a new input table or select an existing one.
-
In the input table, click the plus icon (
 ) at the end of the column header, then hover over Single-select and select a data type (Text, Number, or Date) from the dropdown.
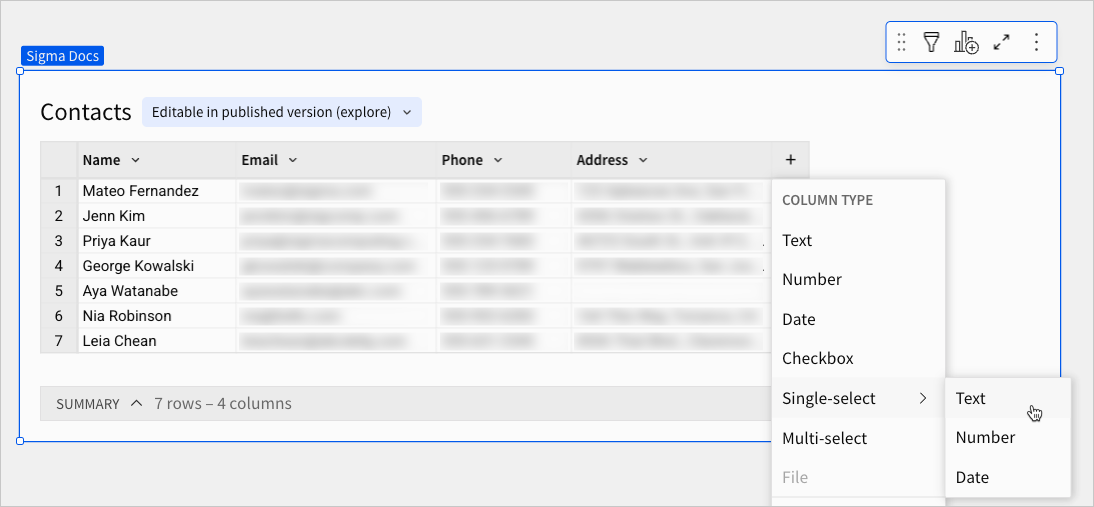
Sigma adds a single-select column to the input table and opens the Edit options popover, which allows you to define and format a list of available options.
In a published workbook, a single-select column can appear as shown in the following image. Try the interactive demo in this document to see how users can view, select, and remove values in single-select columns.

Add a multi-select column to an input table
Add a multi-select column that allows users to select one or more values per row from a predefined list of options. Multi-select columns are variant columns that support text arrays.
This feature isn’t supported by all data platform connections. To check if your connection supports it, see Supported data platforms and feature compatibility.
-
Create a new input table or select an existing one.
-
In the input table, click the plus icon (
) at the end of the column header, then select Multi-select from the dropdown.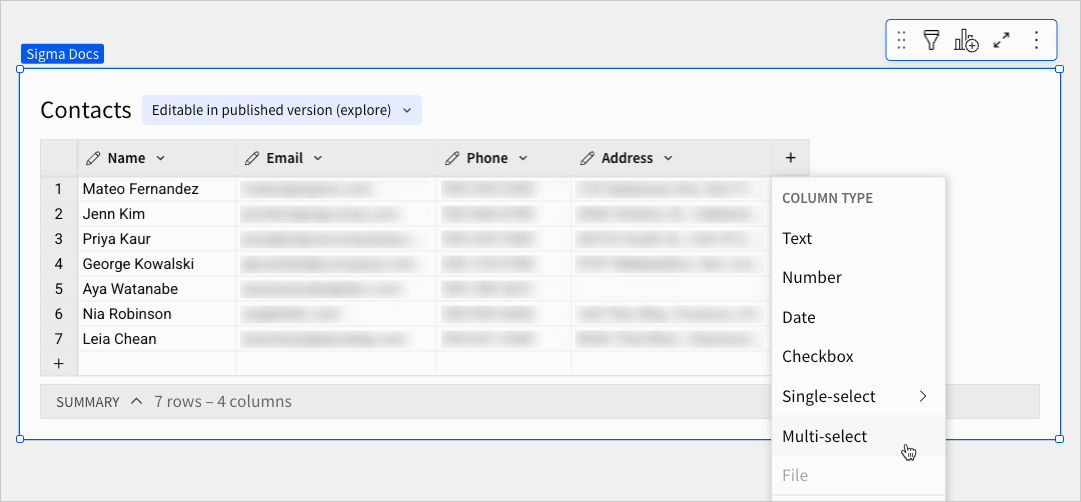
Sigma adds a multi-select column to the input table and opens the Edit options popover, which allows you to define and format a list of available options.
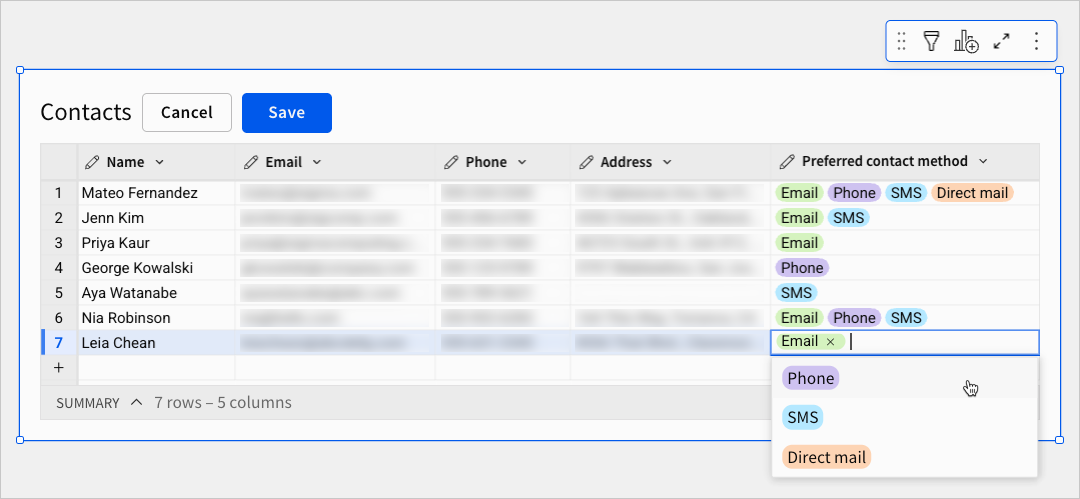
In a published workbook, a multi-select column can appear as shown in the following image. Try the interactive demo in this document to see how users can view, select, and remove values in multi-select columns.
Define and format the list of available options
There are two ways to define the list of available options in a single-select or multi-select column:
- Manually create and manage the list of options
- Choose an existing data source or element to populate the list of options
Multi-select column values are always formatted as pills (with a round-ended background behind the text) in both the cell and the selection dropdown. The pill format helps differentiate between individual options and selected values. When managing a single-select column, however, you can choose whether or not to format values as pills.
Manually create and manage the list of options
Manually create a list of options, then reorder the list and customize display colors. For single-select columns, you can also choose whether or not to format listed options and selected values as pills.
-
In the single-select or multi-select column’s header, click the down arrow (
 ) and select Edit options from the column menu.
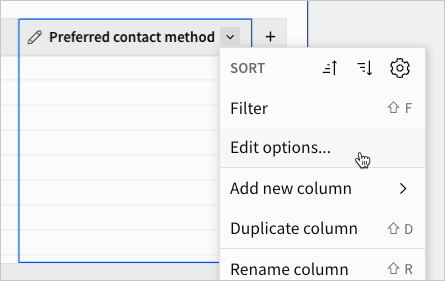
-
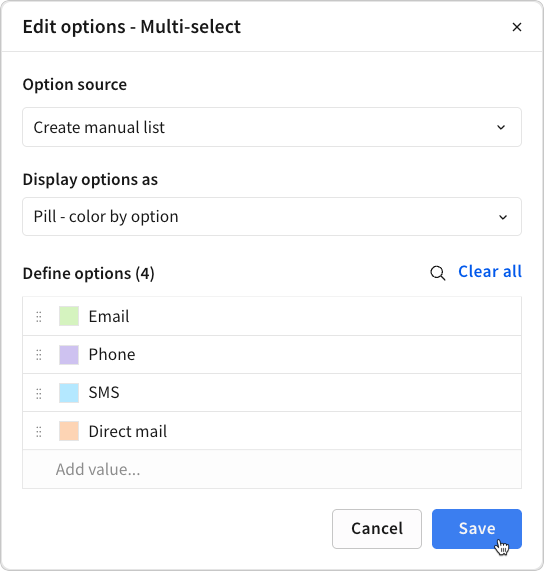
In the Edit options modal, create the list of options:
-
In the Option source field, select Create manual list.
-
In the Display options as field, select one of the following options:
- Plain text: Display listed options and selected values without a pill background. Available for single-select only.
- Pill - single color: Display the same pill color for all listed options and selected values.
- Pill - color by option: Display a different pill color for each listed option and selected value.
Display options are inherited by child table elements. When listed options and selected values display as pills in the single-select or multi-select column, the corresponding column in a child table reflects the same pill formatting.
-
In the Define options section, add, edit, or remove values:
- To add a new option, click the Add <data type> value input field (for single-select) or the Add value input field (for multi-select), then enter a value. Press the Enter key to open a new input field and add another option.
- To edit an existing option, click the applicable field and edit the value.
- To remove a specific option, hover over the applicable field and click
 Remove.
 - To remove all options, click Clear all.
-
(Optional) To reorder the list, click and drag any option’s drag handle (
 ).
). -
(Optional) To customize pill color, click the color swatch for an individual option and choose a color from the color picker. If you choose to display a single color for all options, changing the color for one option automatically changes the color for all other options.
-
Click Save.
With multi-select columns, you can also add to the list of available values by entering a new value directly in a cell (in the workbook draft only). To reorder or manually assign a pill color to a new value, however, you must access the Edit values modal.
-
Choose an existing data source or element to populate the list of options
Automatically populate a list of options by referencing a column from an existing data source or element in the current workbook. You can customize display colors or, for single-select columns, choose whether or not to format listed options and selected values as pills.
The options a user can select in the column are based on values in the source column, which will change in real time as the source data is updated.
- You can only reference a text, number, or date column.
- For a single-select column, the data type automatically changes to the source column data type.
- For a multi-select column, the data type is always text. If the source column contains numbers or dates, the values convert to text.
-
In the single-select or multi-select column’s header, click the down arrow (
) and select Edit options from the column menu. -
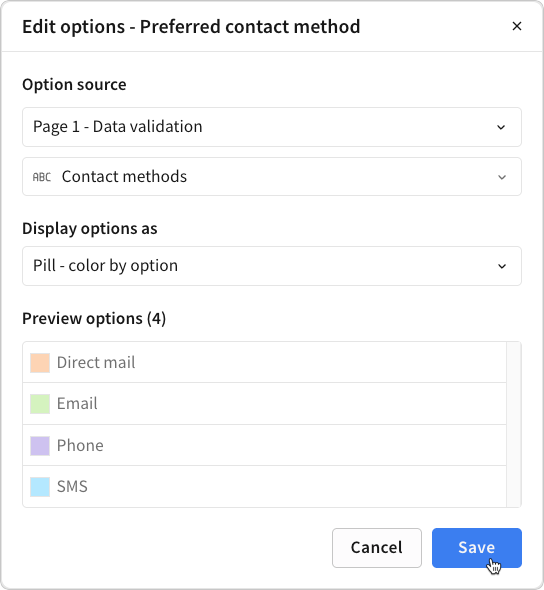
In the Edit options modal, configure the list of options:
-
In the Option source field, select a data source or element.
-
After you select a data source or element, a secondary Option source field appears. Choose a column from the selected data source or element. The values in this column populate the list of options.
The list of options supports up to 100,000 distinct values. When the source column exceed the limit, Sigma applies an arbitrary subset of 100,000 values.
-
In the Preview options section, confirm that these are the values users must be able to select in the column.
-
In the Display options as field, select one of the following options:
- Plain text: Display listed options and selected values without a pill background. Available for single-select only.
- Pill - single color: Display the same pill color for all listed options and selected values. Not available when the source column contains more than 100 distinct values.
- Pill - color by option: Display a different pill color for each listed option and selected value. Automatically assigns colors, except when the source column contains more than 100 distinct values.
Display options are inherited by child table elements. When listed options and selected values display as pills in the single-select or multi-select column, the corresponding column in a child table reflects the same pill formatting.
-
(Optional) To customize pill color, click the color swatch for an individual option and choose a color from the color picker. If you choose to display a single color for all options, changing the color for one option automatically changes the color for all other options.
-
Click Save.
-
Interactive demo
The following embedded example demonstrates a project tracking use case that includes a single-select column (Project status) and a multi-select column (Teams assigned) in an input table. To interact with the table, click Edit data.
Example interactions
The following interactions are supported in the published version of a workbook and available to users based on their workbook access and the individual input table’s data entry permission.
- To view the list of options, click the down arrow () in any cell in the Project status or Teams assigned columns (or double-click the cell).
- To select an option, use any of the following methods:
- Click an option directly in the list.
- Use the arrow keys on your keyboard to navigate the list, then press Enter to select the highlighted option.
- Manually enter a partial value in the cell to filter the list, then select an option.
- Manually enter a value that matches an existing option (case-sensitive), then press Enter to select the value.
- To remove or replace a selected value,use any of the following methods:
- Select the cell, then press Delete to remove all selections.
- In a single-select column, select a different option to replace the existing value.
- In a multi-select column, double-click a cell, then click the remove icon (
 ) on a specific pill to remove the value.