Use related columns in a workbook or data model
If the data source of your data element in a workbook or data model is a data model table with one or more relationships, you can add columns from the related tables to your data element. Any child elements that you create can also access the related columns.
You can use relationships created in a data model in the same data model if you first create a child table from the primary source element.
Requirements
- The data source must be a table element in a data model with one or more relationships defined.
- You must be the workbook or data model owner or be granted Can explore or Can edit access to the document.
Add a related column to a data element
If the data source of your data element in a workbook or data model has one or more relationships defined, you can add the related column to your data element:
-
Customize the workbook or open the workbook or data model for editing.
-
Select the data element.
-
In the editor panel, for columns, select + (Add columns...).
-
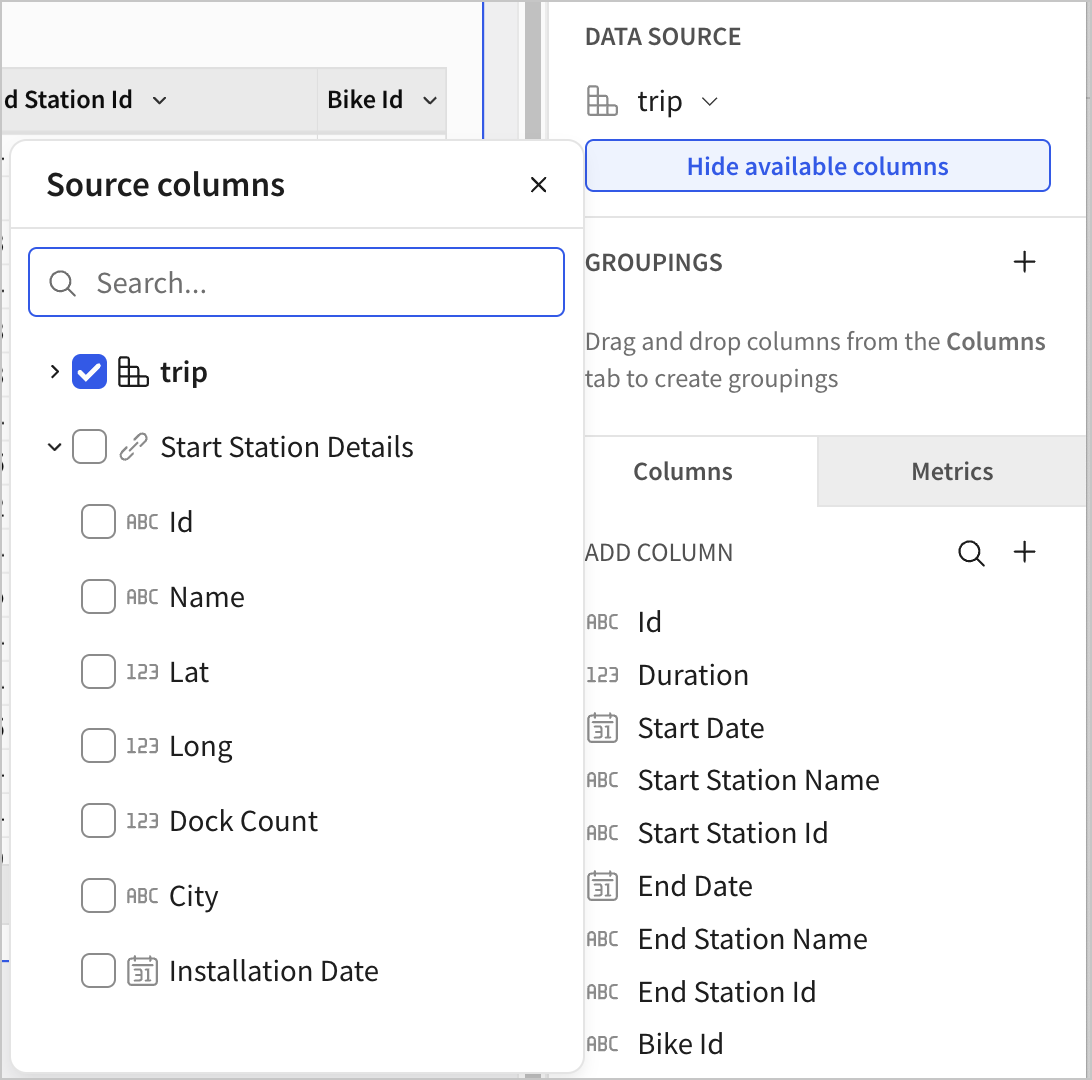
In the menu, choose Show available columns to open the list of Source columns from the data source.

-
Review the Source columns list for available columns from tables linked through data model relationships. You can see directly related table columns, as well as columns from inherited relationships.
-
Select the checkbox for a column to add it to your data element.
The related column appears in your data element, titled Column Name (Relationship Name).
Use a related column in a formula
If the data source of your data element in a workbook has one or more relationships defined, you can also use the related column in the formula of a calculated column in the data element.
You do not need to add the related column to the data element before using it in a formula.
-
Explore the workbook or open the workbook for editing.
-
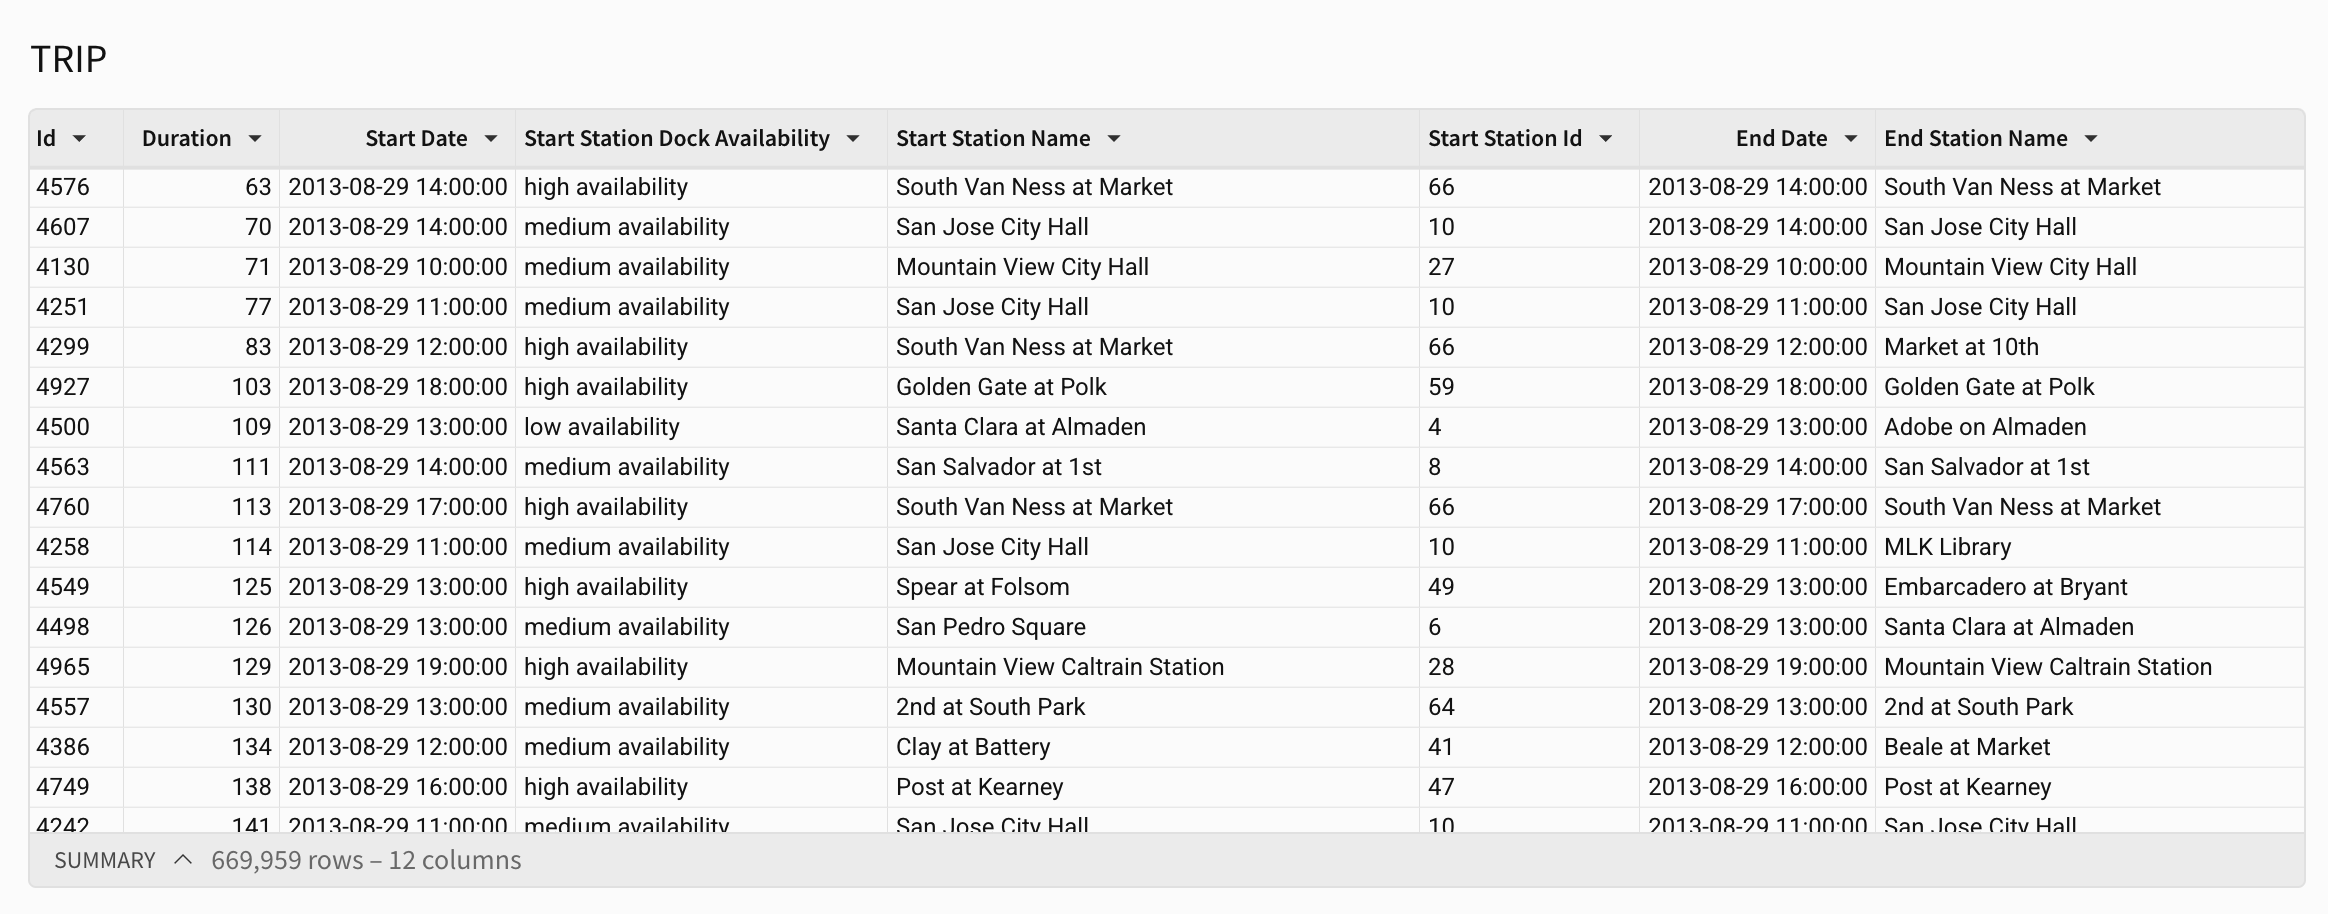
Select the data element. For example, a table of bike trips taken from one rental bike docking station to another, called TRIP.
-
In the element, or in the editor panel, select + (Add column...).
-
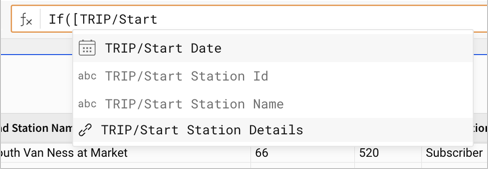
In the formula bar, enter a formula that references the related column. As you type, the related columns appear in the list of autocomplete suggestion:

For example, to evaluate the availability of docking stations at the start station, you might write the following formula:
If([TRIP/Start Station Details/Dock Count] > 15, "high availability", [TRIP/Start Station Details/Dock Count] = 15, "medium availability", [TRIP/Start Station Details/Dock Count] < 15, "low availability")The resulting table includes the calculated column, named Start Station Dock Availability:

Updated 12 days ago
