Review and manage your data catalog
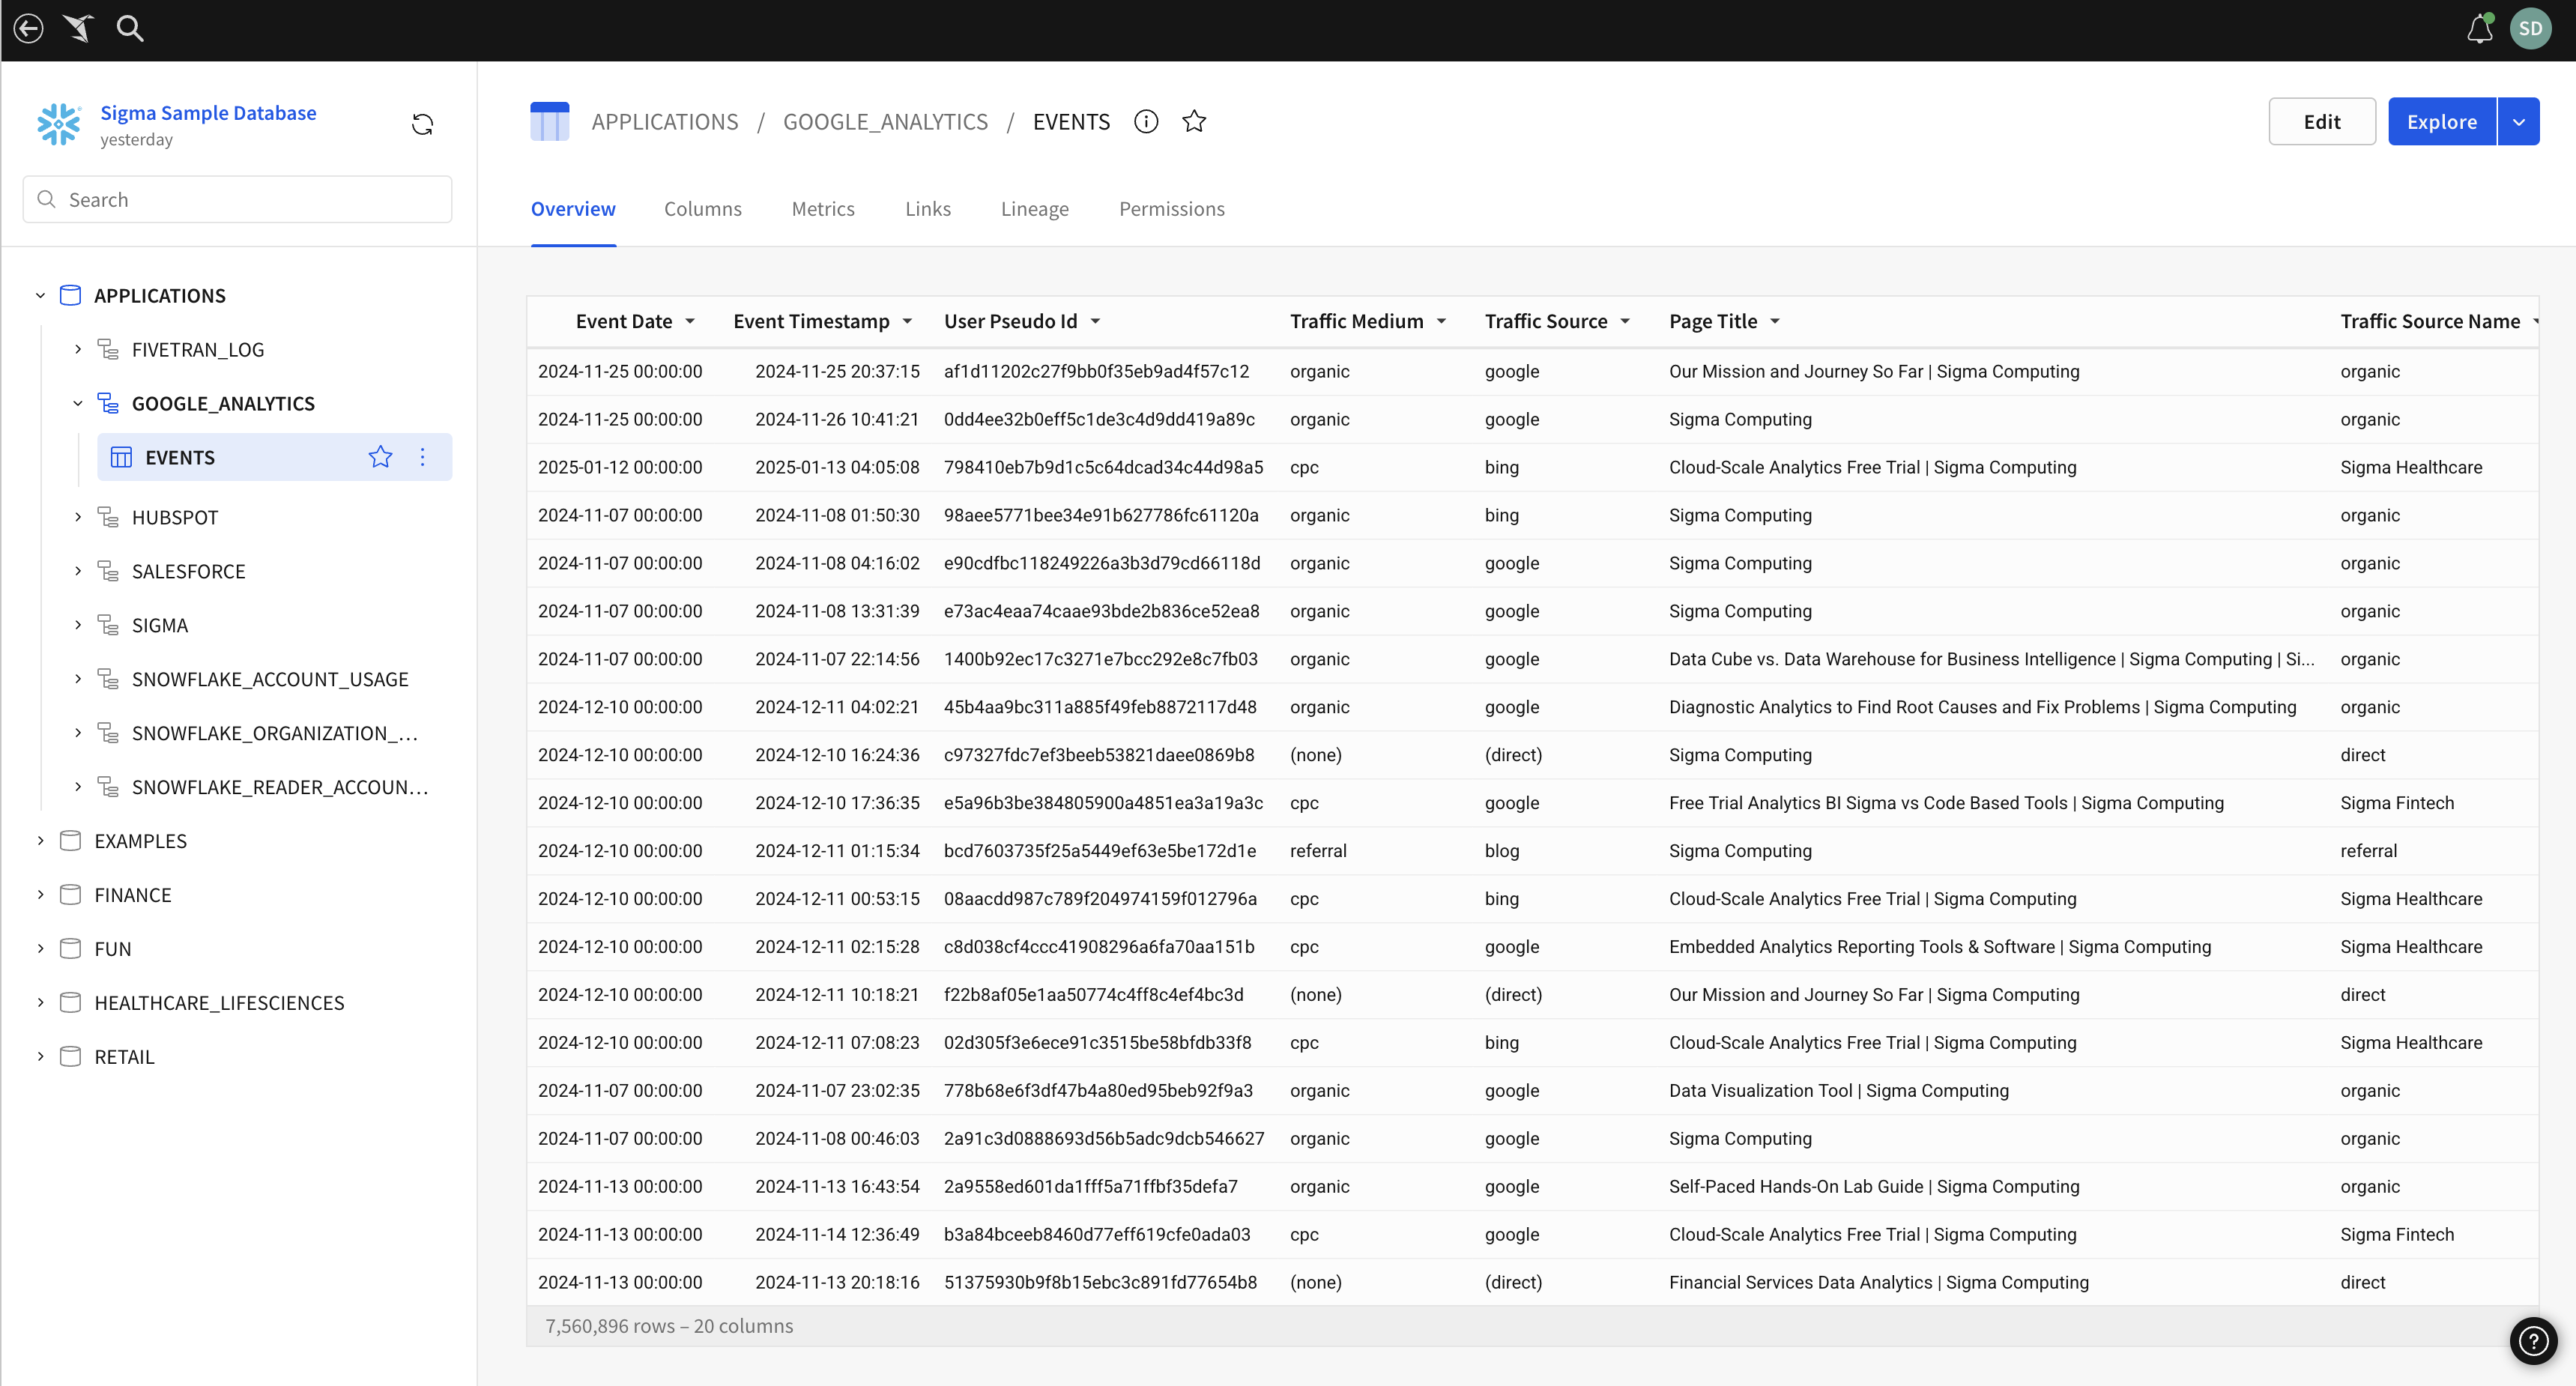
For each data source connected to Sigma, you can review and manage the data catalog. Explore the databases or catalogs, schemas, and tables available in Sigma, and add descriptions and other metadata to tables and columns.
Comments in your database or catalog information schema are automatically available in Sigma.
Table badges, descriptions, and column descriptions are available downstream, helping business users make decisions about which tables and columns to use in a given analysis.
To further model the data from your data platform, you can also create a data model or dataset in Sigma:
- Create a data model from a table.
- Create a dataset from a table (Deprecated).
System and user requirements
The ability to manage your data catalog in Sigma requires the following:
- Your organization must be connected to a data source.
- You must be assigned an account type with the Manage connections permission enabled.
- You must be granted Can use & annotate access to the connection.
Annotate tables with metadata
Add metadata to data catalog tables in Sigma, such as table descriptions, a badge to indicate certification status, column descriptions and data types, and configure additional column settings.
Table and column descriptions are visible to business users interacting with the data table, either by hovering over a given column in a workbook or when viewing the lineage of a data model using the database table as a data source.
Find relevant tables
Start by locating the relevant tables that you want to annotate:
-
From Sigma Home, select Connections to open the list of connected data sources.
-
Select the data connection with the data catalog that you want to view.
-
In the left navigation panel, search or browse the data catalog to locate the table that you want to annotate.
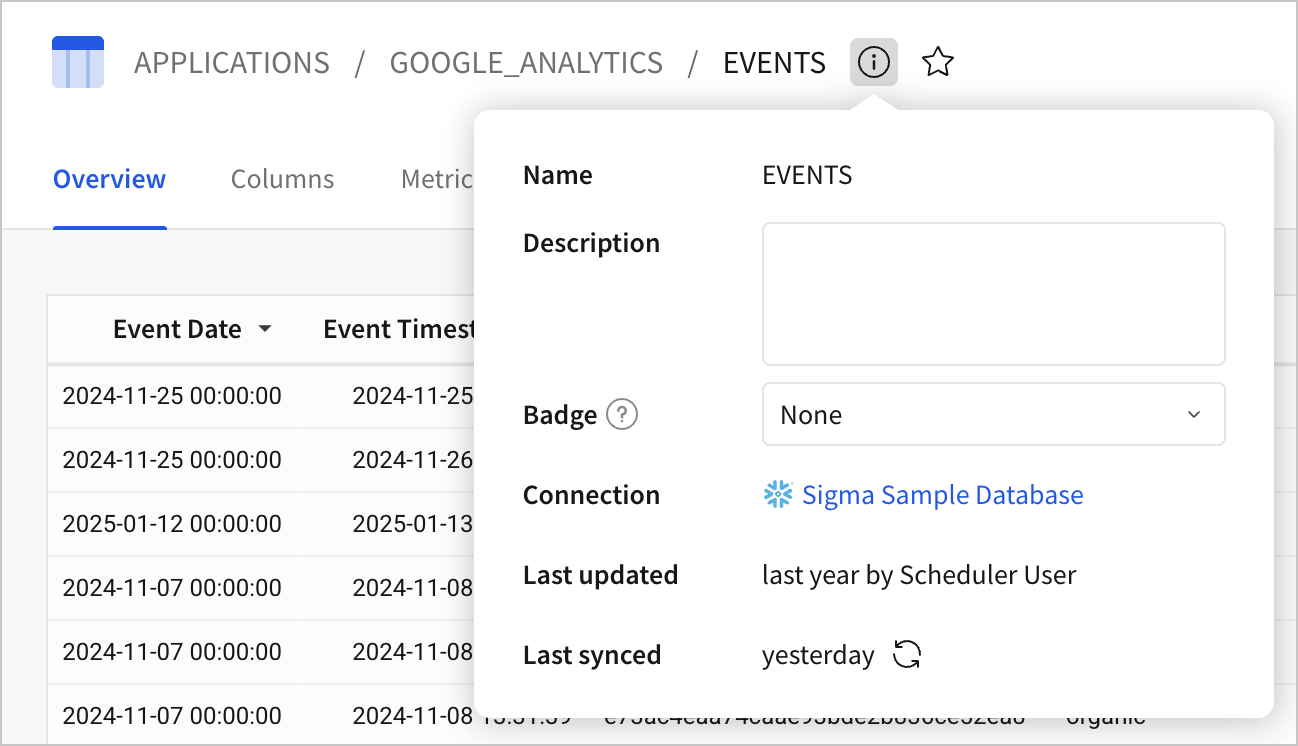
Add table descriptions
After locating the table in your data catalog, add a description:
-
Navigate to the table in the data catalog.
-
Select the table name to open the table.
-
In the upper right, select Edit.
-
Next to the table name, select More info (
 ).
). -
In the popover that appears, enter a description in the Description field.
-
To save your changes, select Publish.
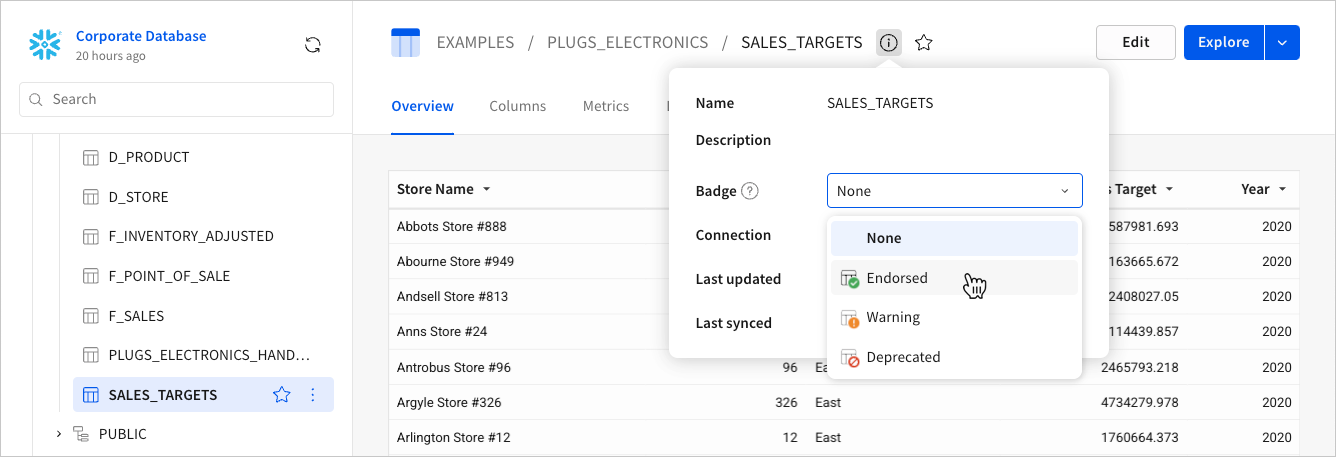
Add or update a badge
Add or update a certification badge to indicate the status, quality, and reliability of the data.
-
Navigate to the table in the data catalog.
-
Select the table name to open the table.
-
Next to the table name, select More info (
). -
In the popover, select an option from the Badge dropdown.
-
(Optional) When you select a badge, the popover displays the Badge note field. Add a note to provide context about the badge.
 The badge is automatically saved and immediately reflected by the table icon in the left panel.
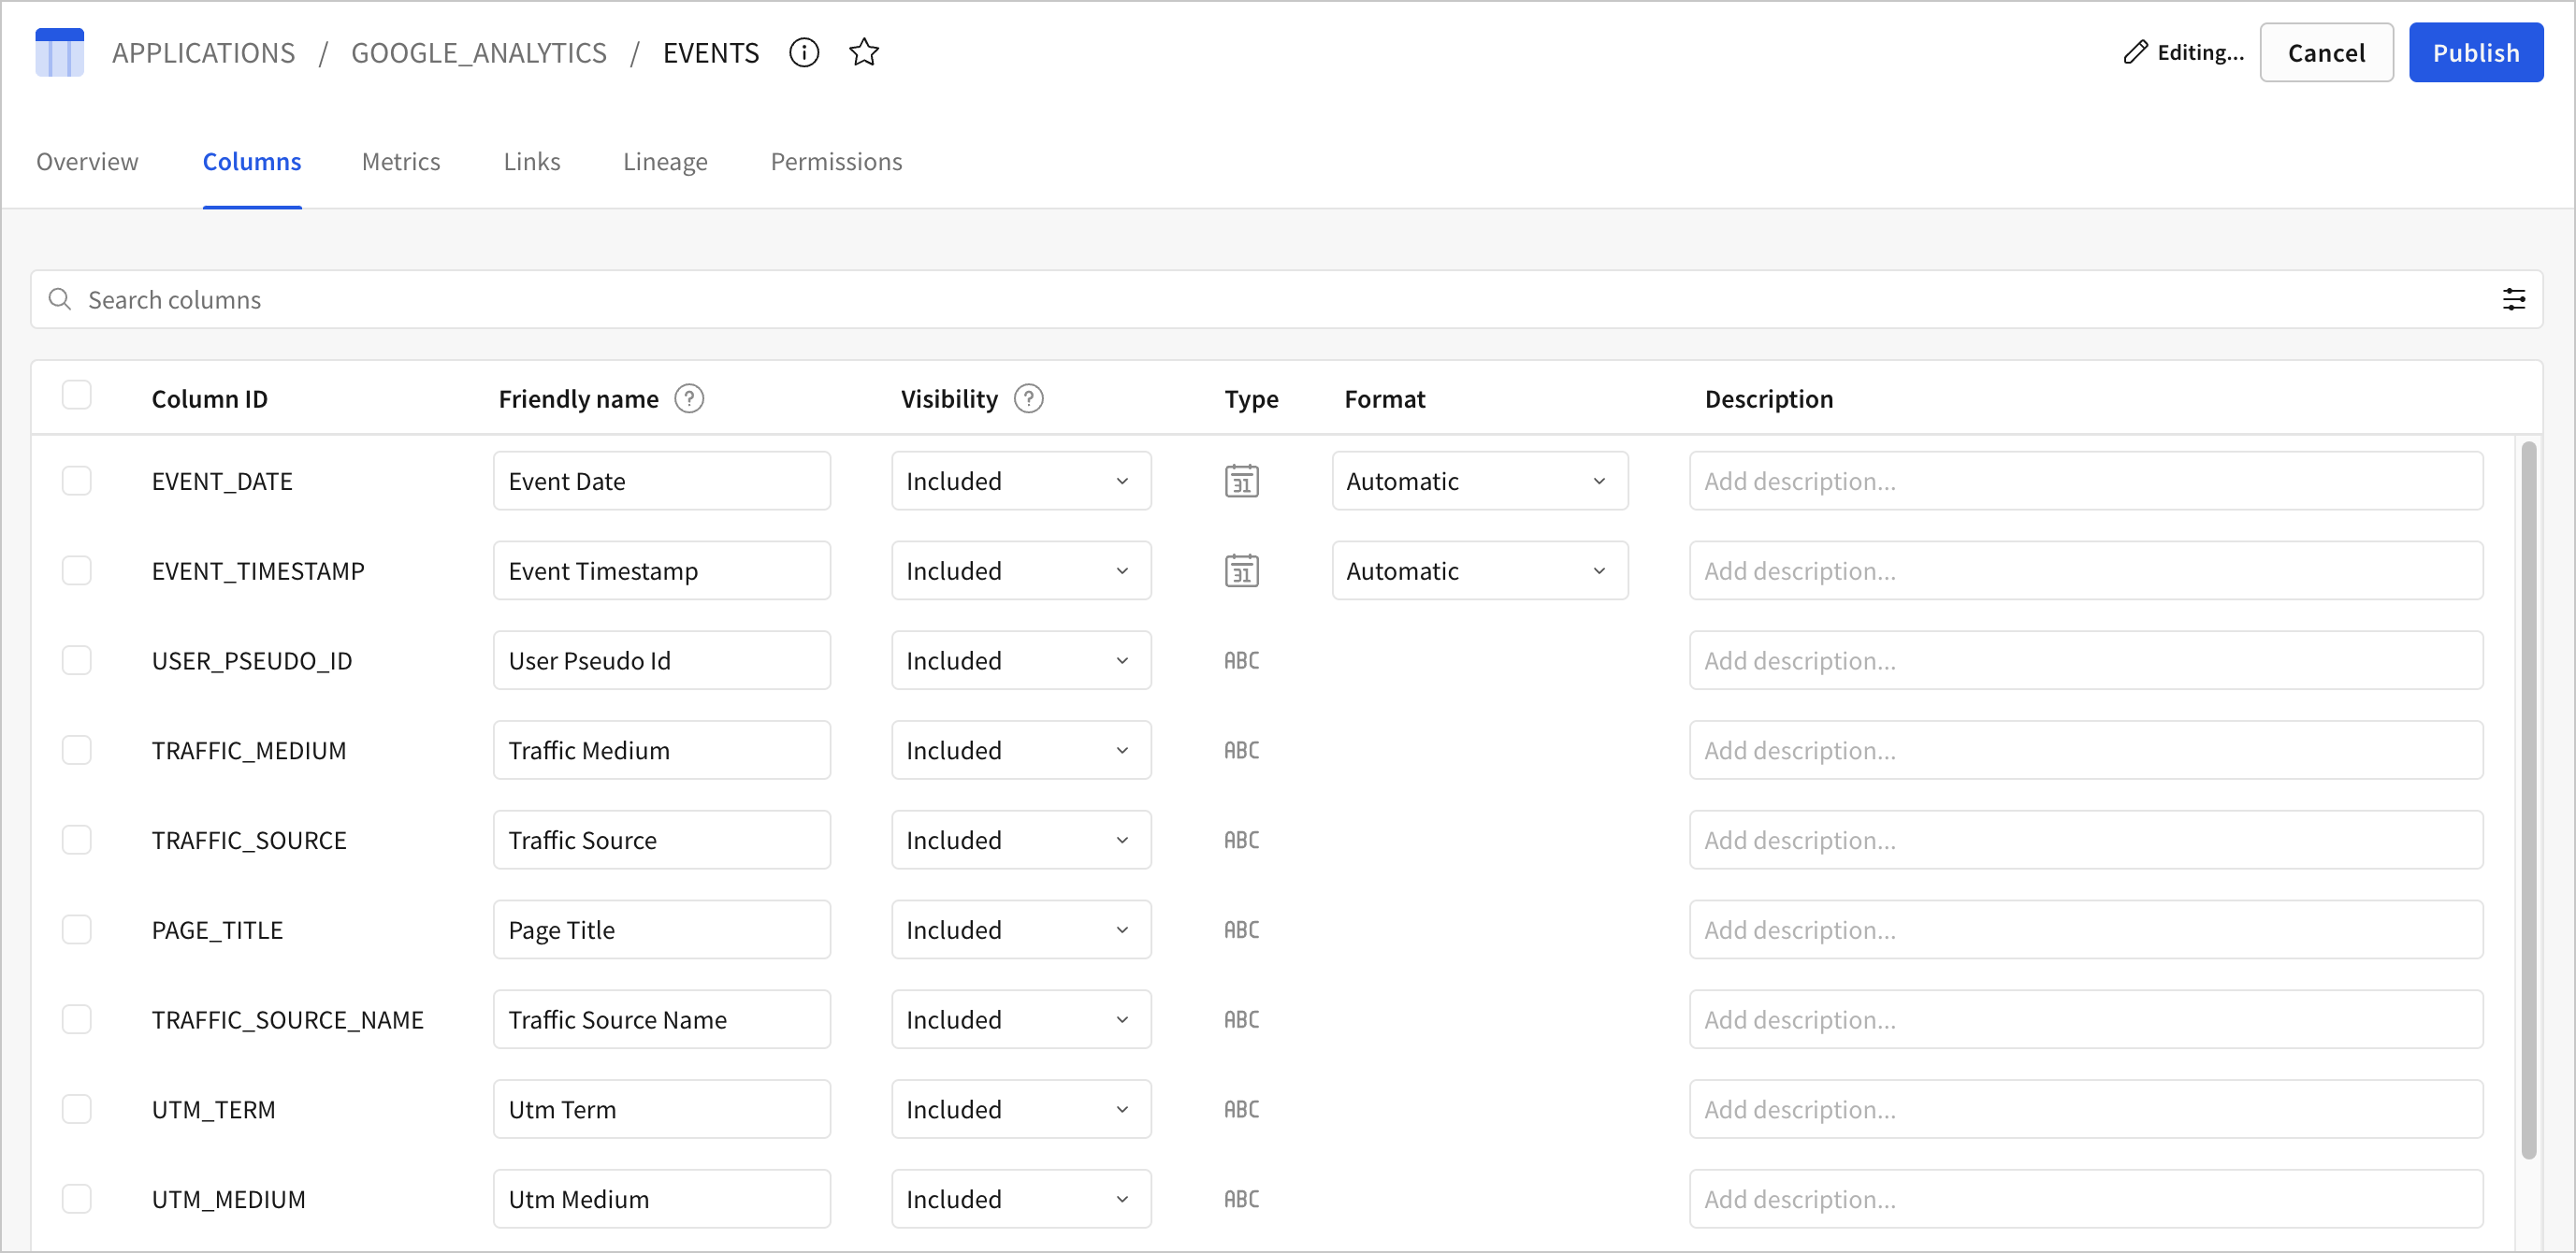
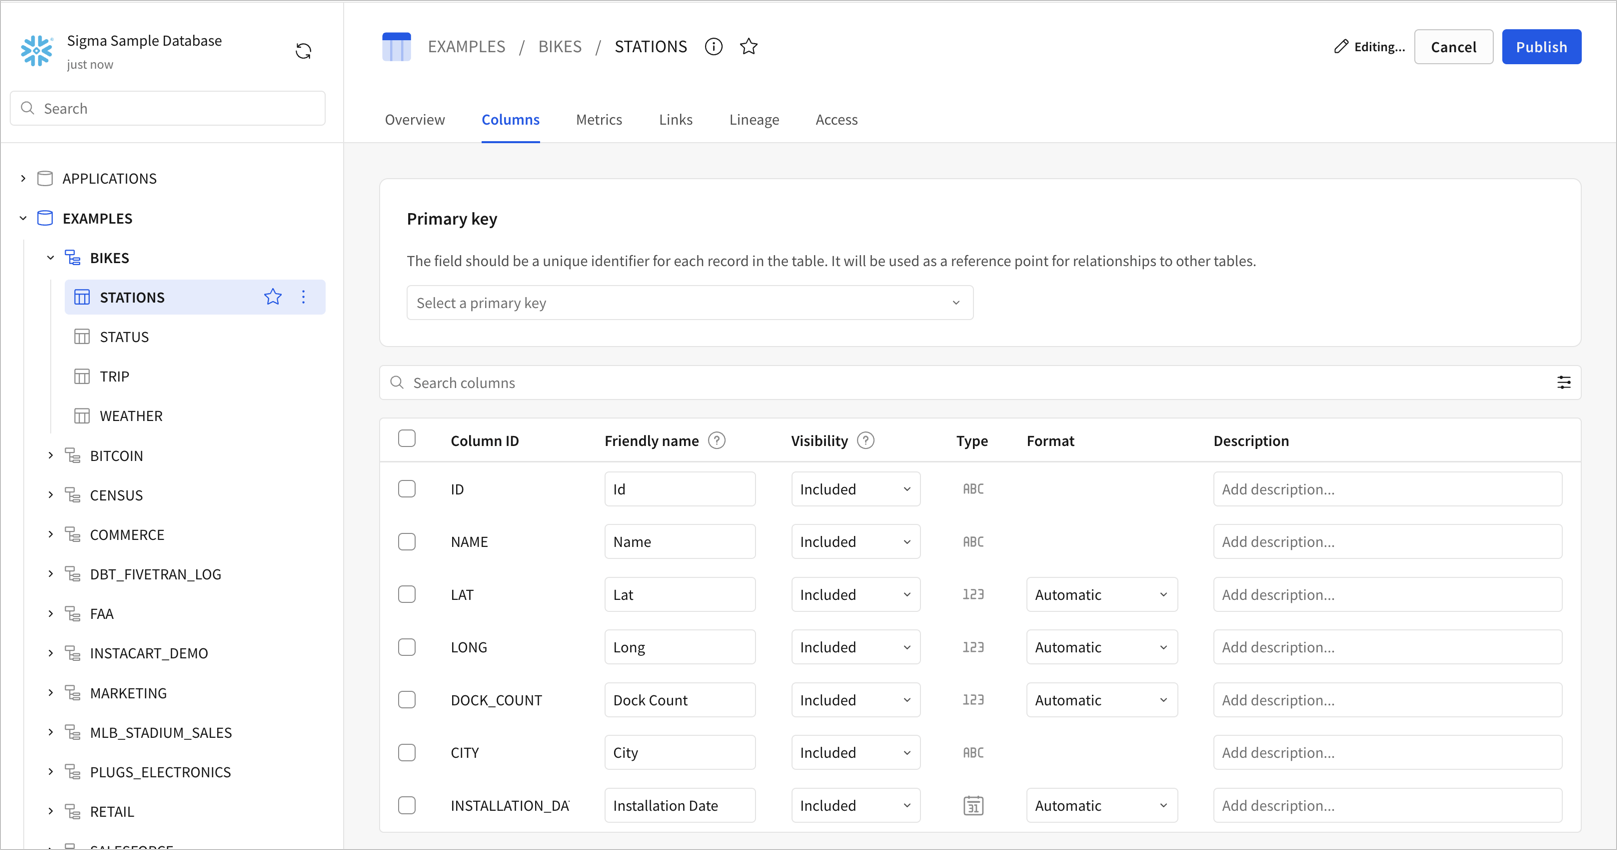
Add column descriptions
Add descriptions to your columns to provide additional metadata and guidance for users of the data source:
-
Navigate to the table in the data catalog.
-
Select the table name to open the table.
-
In the upper right, select Edit.
-
Select the Columns tab.
-
In the Description column, add a description for any column in the table.
-
To save your changes, select Publish.
Format columns
To change the format of data in a column, for example to display numeric data with currency formatting, format columns in the table:
- Navigate to the table in the data catalog.
- Select the table name to open the table.
- In the upper right, select Edit.
- Select the Columns tab.
- Locate the column that you want to format.
- For Format, choose the formatting option that you want to apply to the column. Formatting options depend on the data type of the column. For example, for a numeric column, select Currency.
- To save your changes, select Publish.
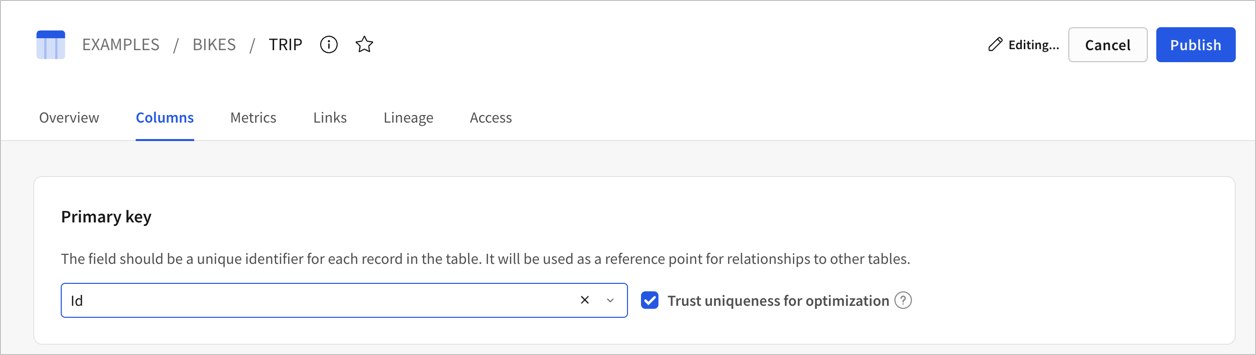
Specify a primary key
Specify a primary key column for a table in your data source that Sigma can use to optimize the SQL generated for performing joins when related columns are added to a workbook and when columns are added via lookup, such as with the Lookup() function.
When related and lookup columns are added to a workbook, Sigma performs a lookup join. If you have a primary key specified on the data source table used in the data model that is part of a relationship, Sigma can instead perform a more efficient left join, generating more performant SQL and making it more efficient to use related columns in workbooks. For more details, see the Snowflake documentation on Understanding How Snowflake Can Eliminate Redundant Joins.
This feature isn’t supported by all data platform connections. To check if your connection supports it, see Supported data platforms and feature compatibility.
-
From Sigma Home, select Connections to open the list of connected data sources.
-
Select the data connection with the data catalog that you want to view.
-
In the left navigation panel, search or browse the data catalog to locate the table to which you want to add a primary key.
-
Select the table name to open the table.
-
In the upper right, select Edit.
-
Select the Columns tab.
-
In the Primary key section at the top of the columns list, choose one or more columns to use as the primary key when performing joins. If you choose more than one column, the columns are combined to function as a composite primary key.
If you have a primary key specified on a table in your data platform, it is already selected.
-
Leave the Trust uniqueness for optimization checkbox selected to indicate that the selected column, or combination of selected columns, contains a unique value for every row in the table.
If you have the RELY constraint property set in Snowflake for the table, the checkbox is automatically selected.
-
To save your changes, select Publish.
Ask a question about a data source table
When you view a table in your data catalog, you can use Sigma Assistant to ask questions about the contents of the table. You can ask a question of any data source visible to you. You must have the Use Assistant permission enabled on your account type and there must be an AI provider configured for your organization.
The use of AI features is subject to the following disclaimer.
Ask a question of a data source from the Overview tab:
- From Sigma Home, select Connections to open the list of connected data sources.
- Select the data connection with the data catalog that you want to view.
- In the left navigation panel, search or browse the data catalog to locate the table that you want to ask.
- Select the table name to open the table.
- In the Assistant question bar, enter a question.
- Sigma opens Assistant in a new browser tab, populated with the question that you asked. You can continue to ask follow-up questions.
For more details about Sigma Assistant, see Ask natural language queries with Sigma Assistant.