About version tags to workbooks, data models, and reports
Add a tag to a version of a workbook, data model, or report, to create a read-only view of that document version. You can then share the tagged version with another team for their exclusive use, embed the tagged version of the document in your application, or implement a development lifecycle with version control using tagged versions.
When you tag a workbook, data model, or report version, you can continue iterating on the source document in a typical draft and publish workflow, without affecting the tagged version. For more details, see Version tagging workflow.
You can tag multiple versions of a workbook, data model, or report, but you cannot have multiple versions of a document tagged with the same tag.
Admins can create and manage version tags, including creating protected tags that require an approval flow. See Create and manage version tags.
Version tagging workflow
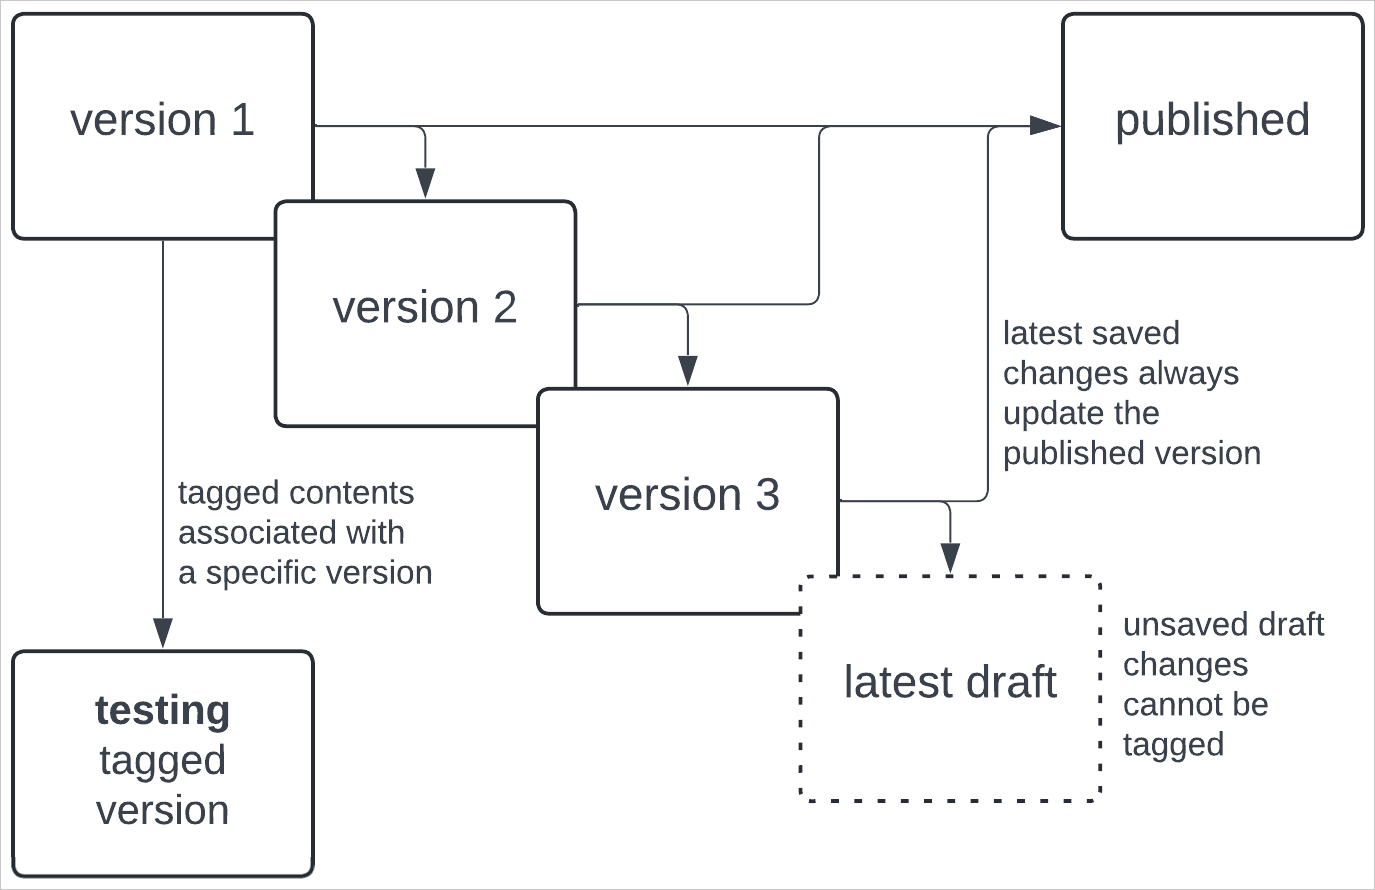
All workbooks, data models, and reports have published versions and drafts. All changes made to a document are visible in the version history.
You can tag a specific document version to indicate something about the status of that document version. For example, tag a version of a workbook or report to indicate that the contents need to be reviewed for accuracy, or that it is ready to be used in production.
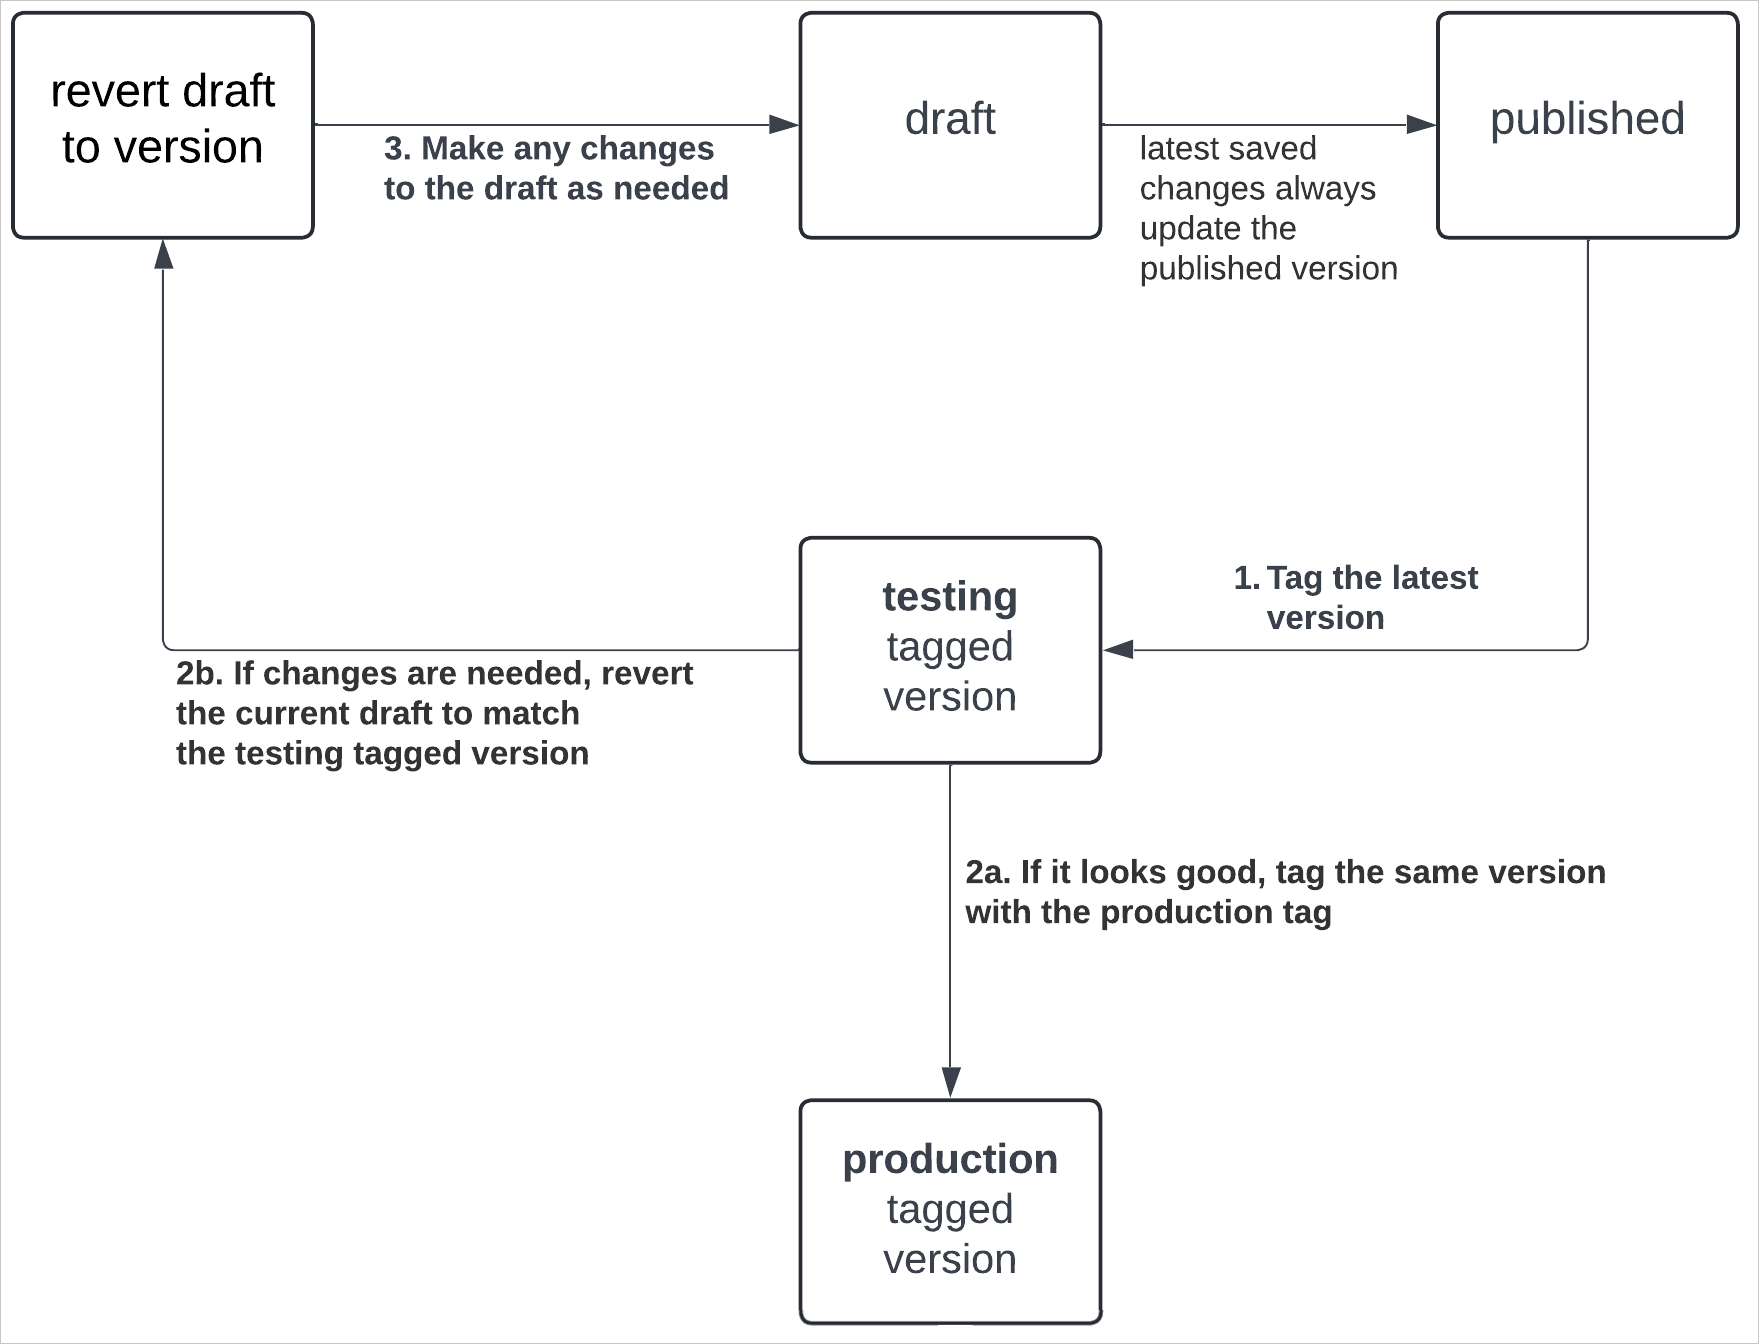
You can also tag data models, and use a similar workflow to tag specific data model versions for testing or production use.
You can continue iterating on the draft while a tagged version is being reviewed. Changes made to the draft or published version do not affect the tagged version. See Make changes to a tagged document version for more details.
How version tagging affects datasets and data models
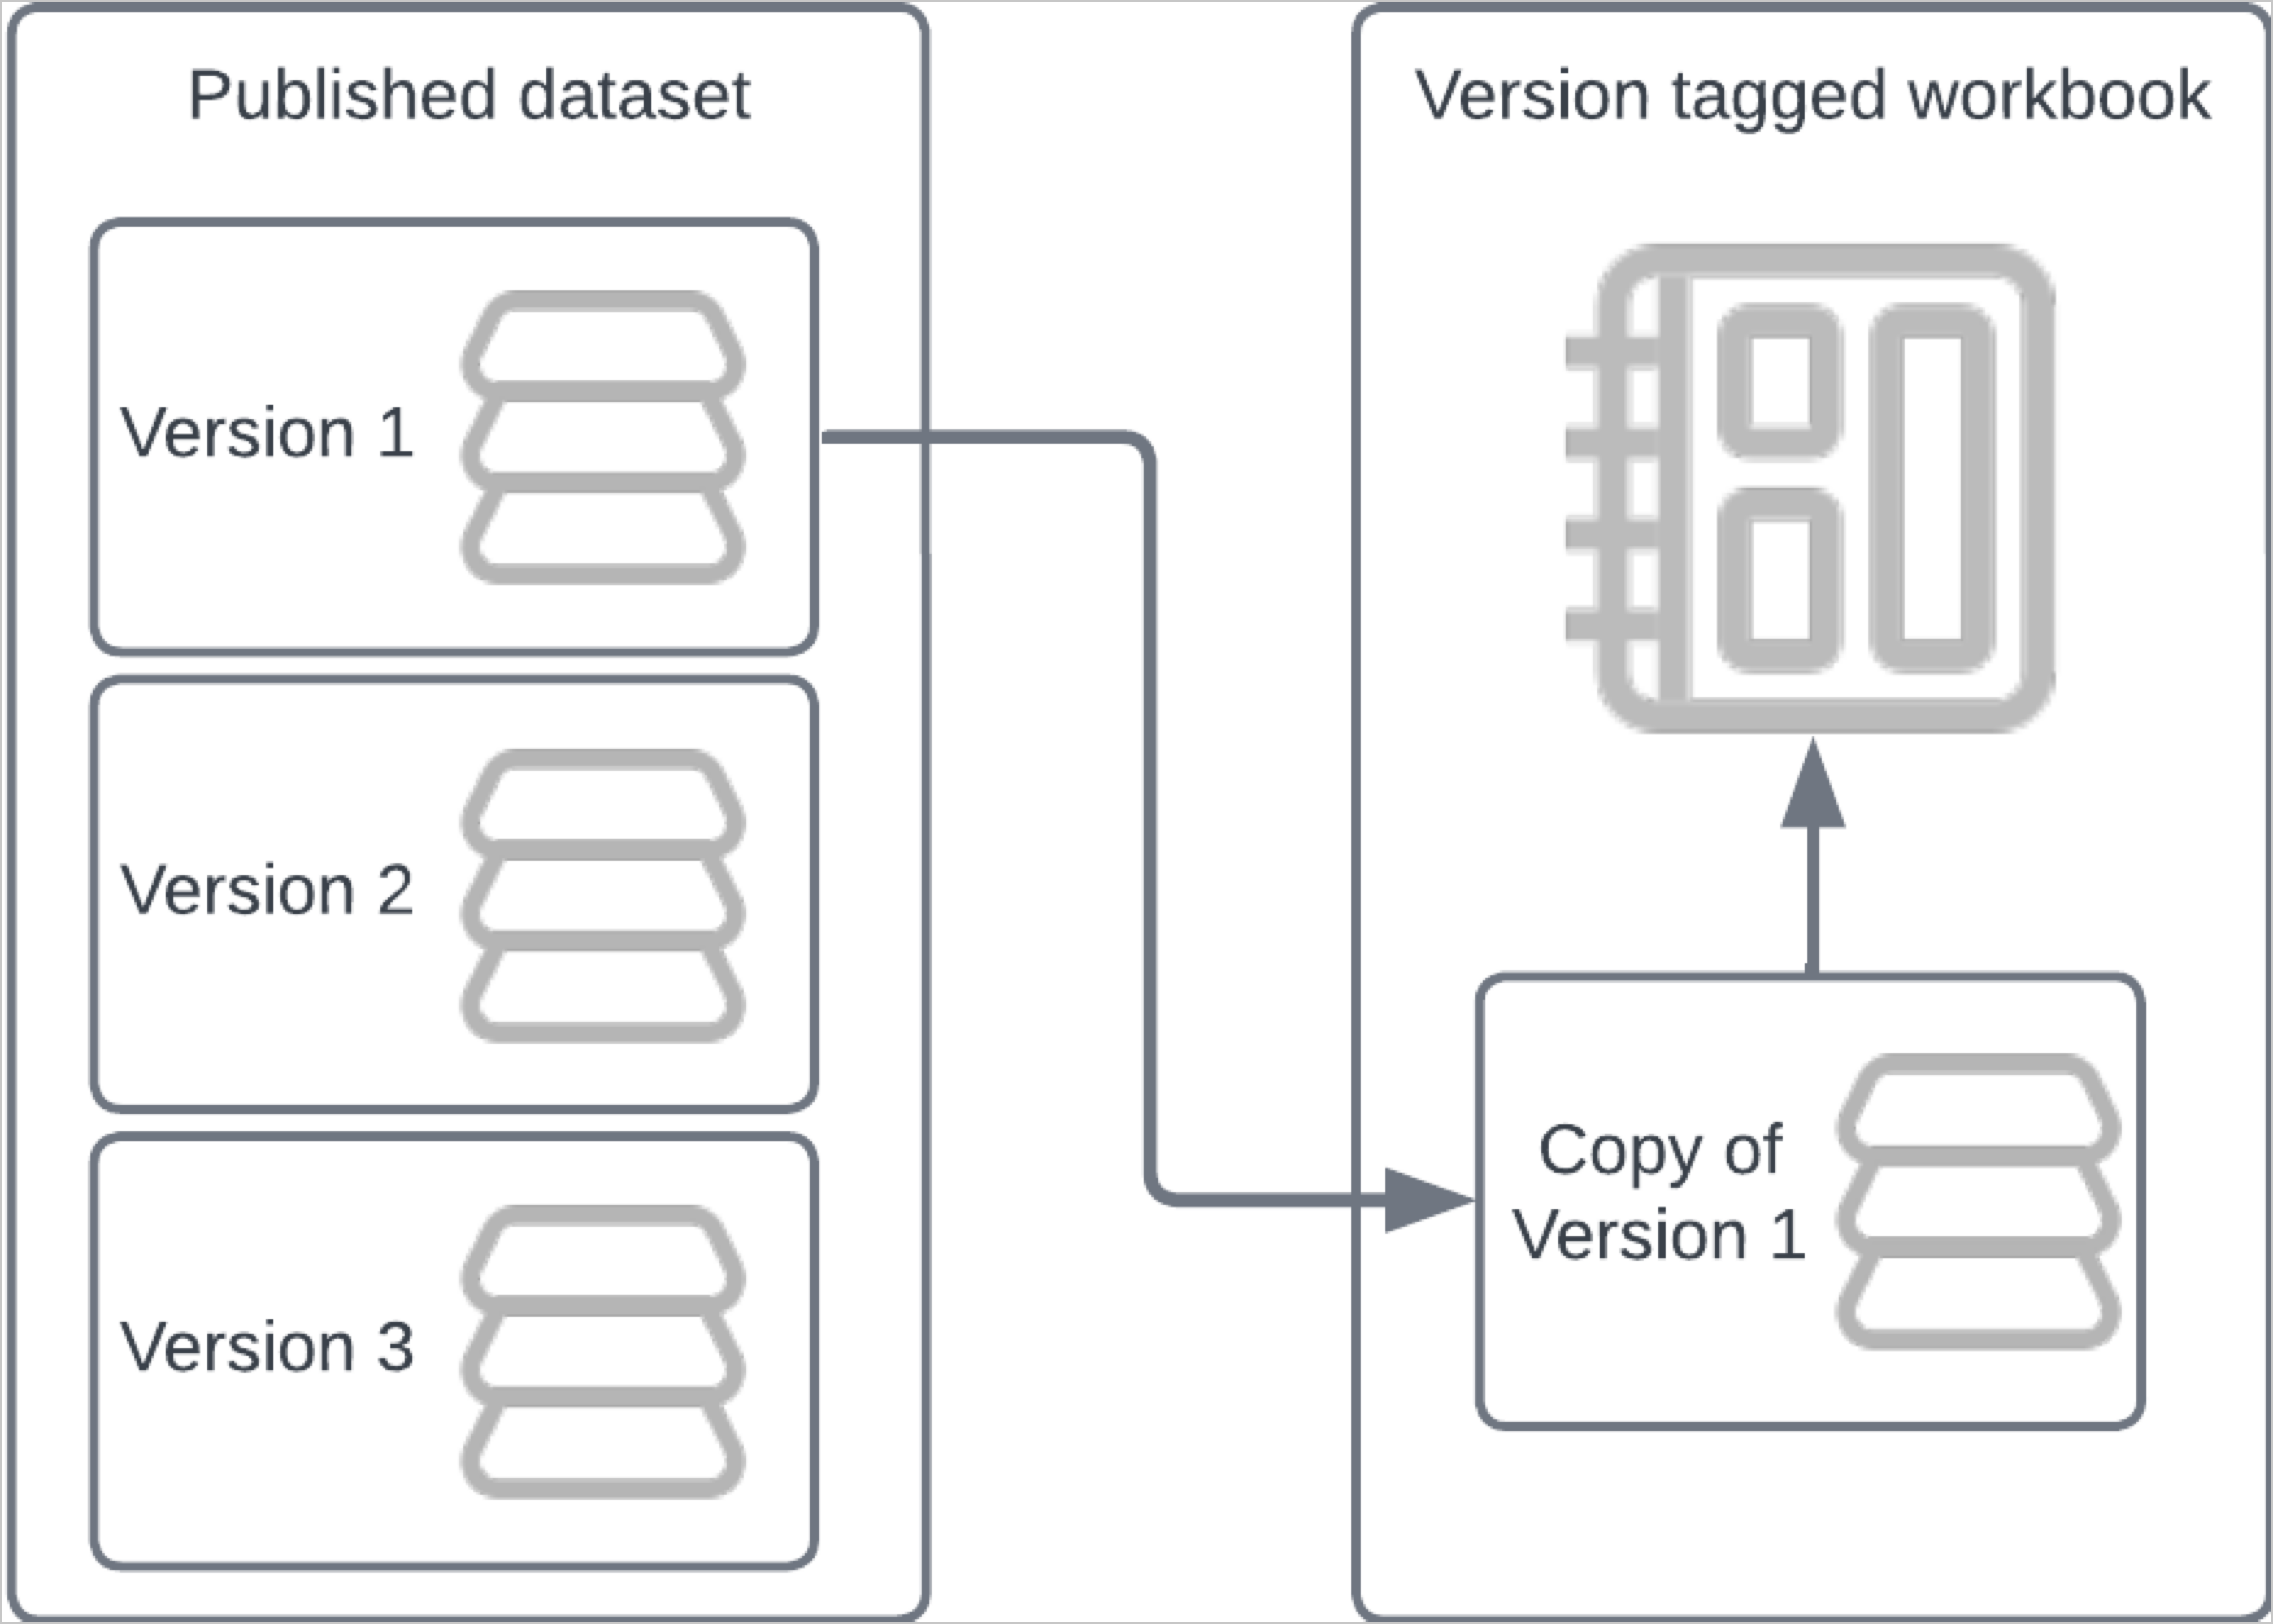
When you tag a workbook version that uses a dataset as the data source, a copy of the dataset version in use is created to use with the tagged workbook version. The dataset associated with the tagged workbook version no longer updates even if changes are made to the original dataset, effectively freezing the version of the dataset that was in use when the workbook version was tagged. The data source itself is not affected in any way by a version tag.
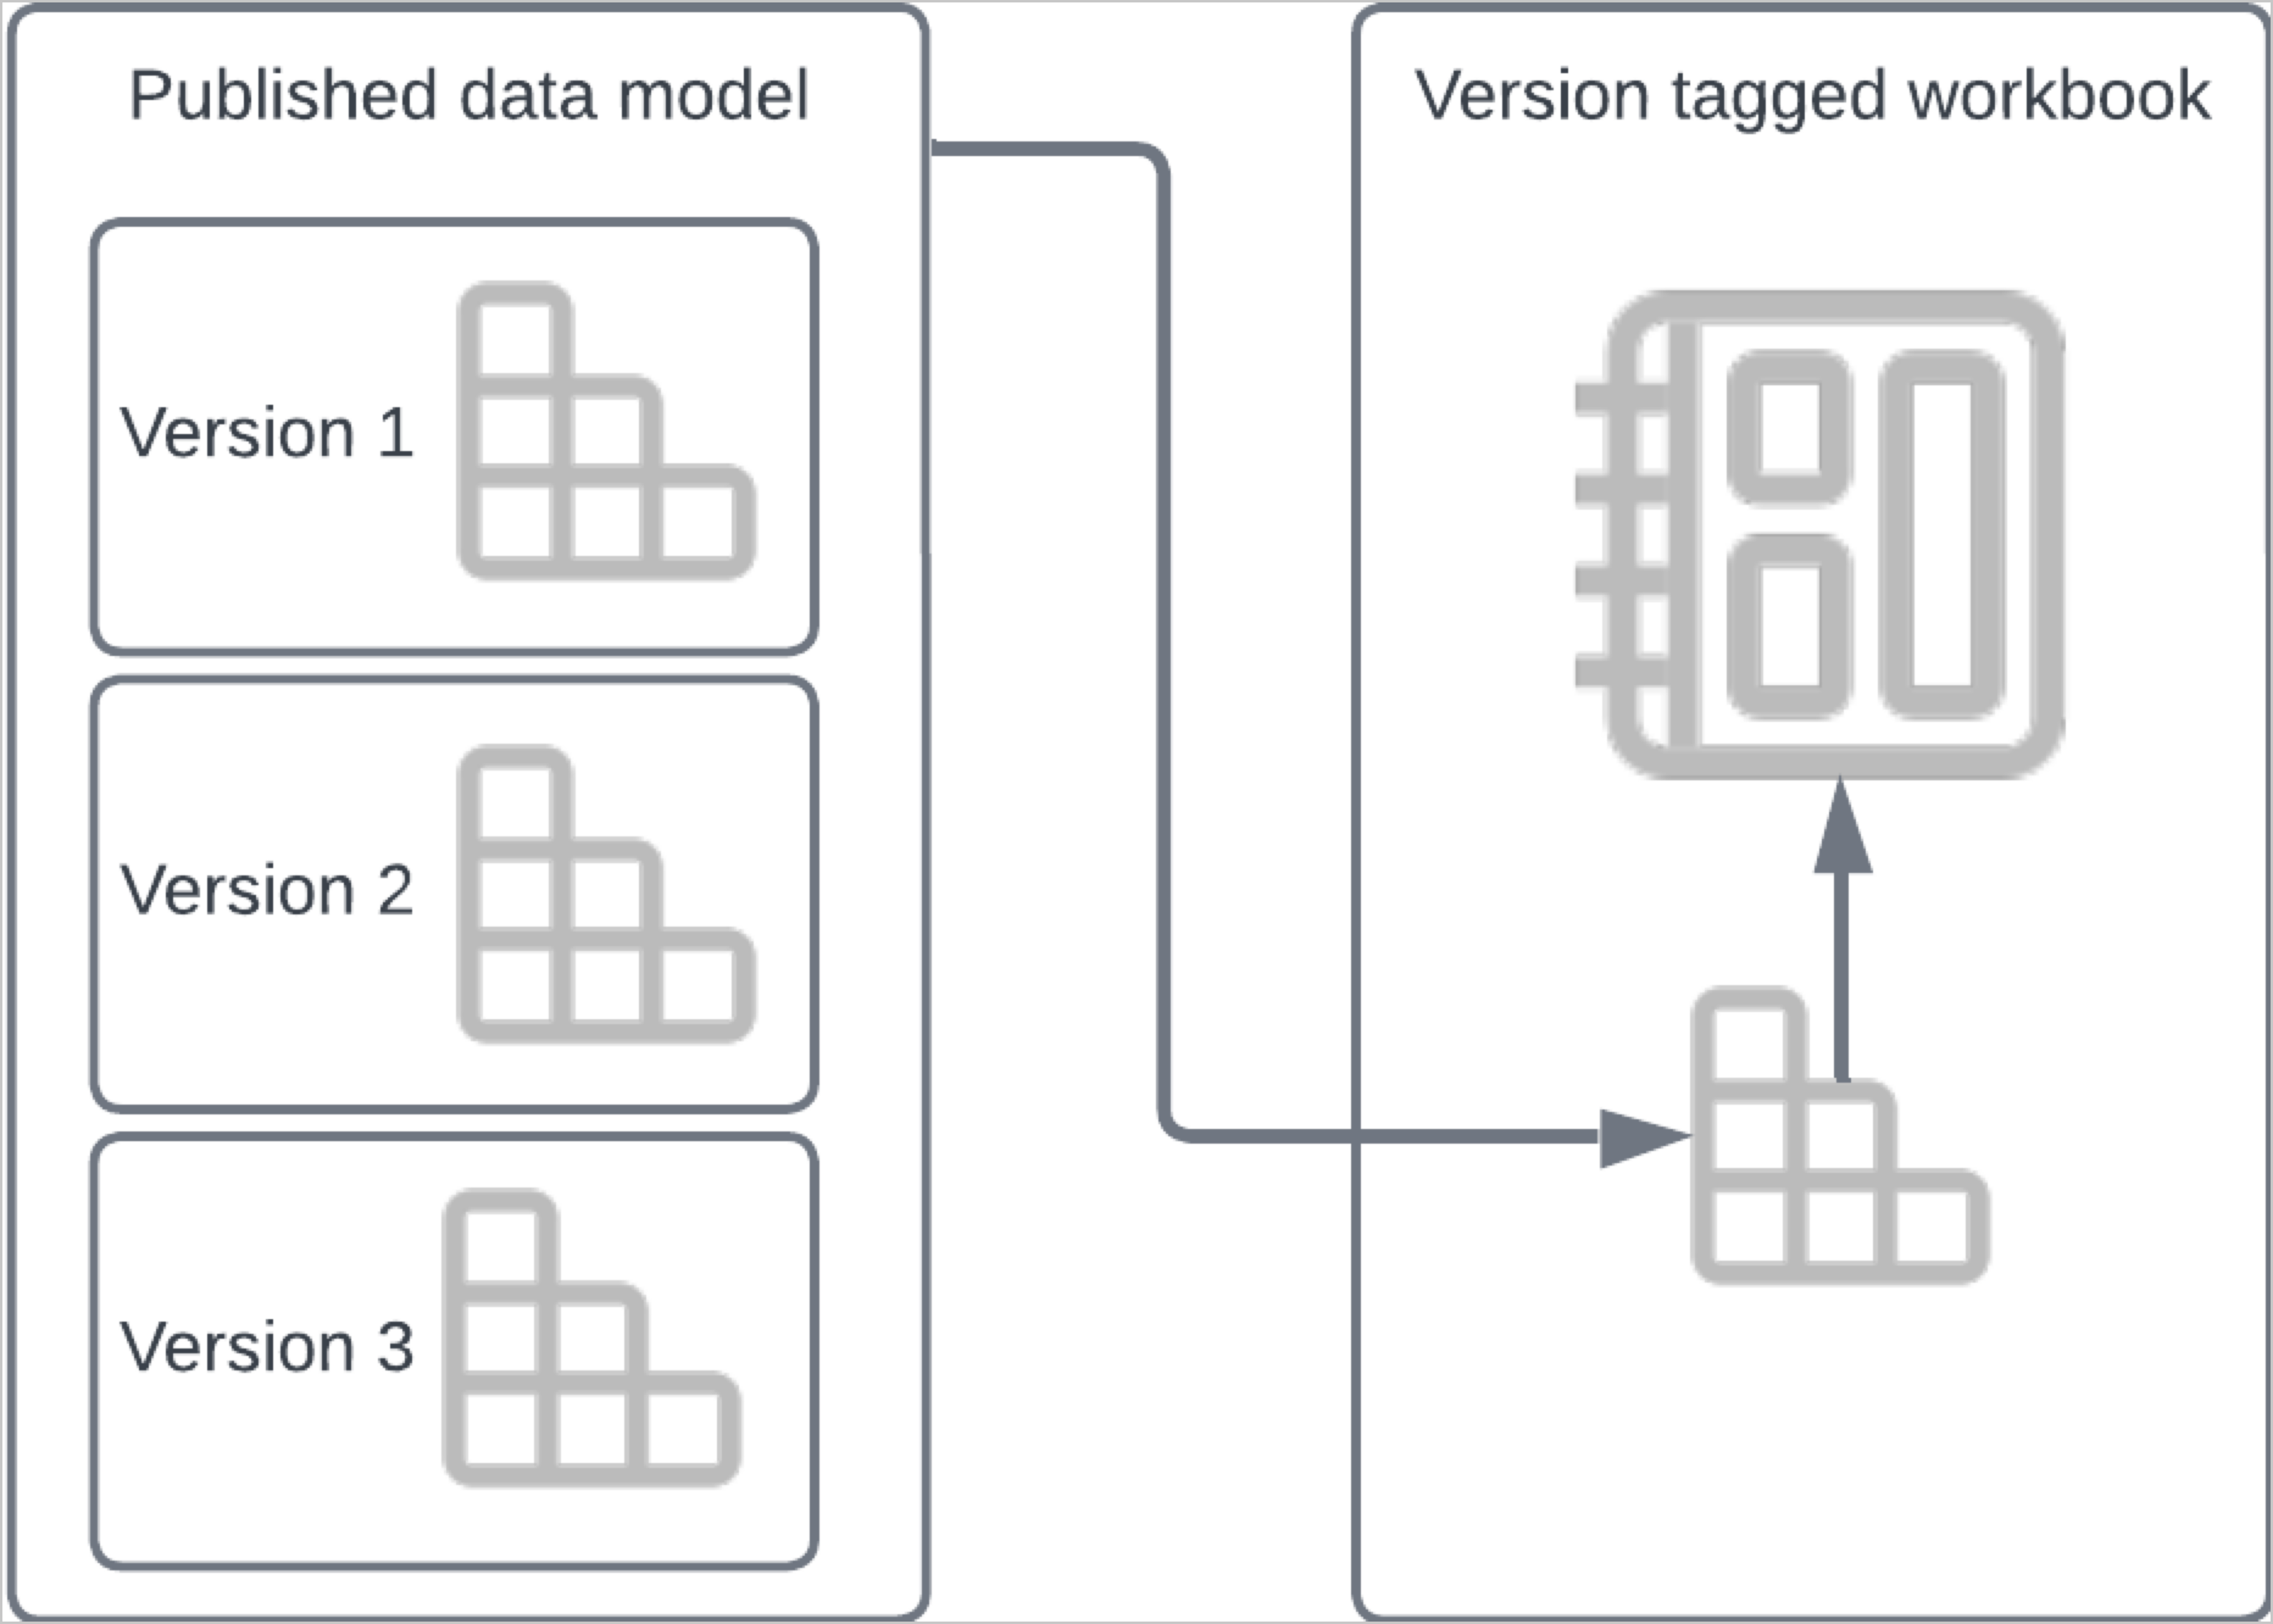
Documents that use a data model as the data source work differently. For example, when you tag a document version that uses a data model as the data source, the workbook version is tagged but the data model version is not. Any future changes made to the data model, such as adding new columns or changing the data type of an existing column, are synced with the versions of the workbook that depend on the data model.
If you want to “freeze” the data model used as the data source of a tagged version of a document, you can tag both the data model and the document, and use the tagged data model as the data source for the tagged version of the workbook. See Swap the source of a tagged document version.
Embedding tagged workbook and report versions
If you embed your workbook or report, you can use version tags to manage promoting content between environments. For example, use “test” and “production” tags to help manage changes and protect the version that is used in production. You can then use a link directly to a tagged version in your embed. See Link to a tagged version of a document.
For more details about version tag workflows and restricting access to tagged versions of documents, see Make changes to a tagged document version and Share tagged versions of a document.
For details about creating tags and protecting tags to enforce a request approval flow, see Create and manage version tags.
If you want to integrate version tagging in Sigma with the source control platforms already integrated with your development workflow, you can use the Sigma REST API. For a recipe, see QuickStart - Embedding 10: Version Tagging.
Version tagging and materialization
When you tag a version of your workbook or report that relies on a materialized data source, the tagged version might not use the materialized data source.
- Materialized dataset: The materialized dataset is not used by the tagged version of the workbook or report. Instead, the tagged version of the document relies on a copy of the dataset made when the tag was applied.
- Materialized data model: The materialized data model is used by the tagged version of the workbook or report. If the document uses a tagged version of the data model, materialize the elements in the tagged version of the data model. See Schedule materialization for a version-tagged data model.
See About materialization for more details on materialization.
Tag a workbook, data model, or report version
You can tag a version of a workbook, data model, or report to create a read-only version of the document that you can then share with others or embed. For step-by-step instructions, including guidance on swapping sources, see Tag a workbook, data model, or report version.
Restrict access to a folder using a version tag
If you use version tags to manage access to documents, you can set up a workspace or folder to manage access more easily. See Restrict access to a folder using a version tag.
Link to a tagged version of a document
If you want to link directly to a tagged version of a document, for example to embed the tagged version of a workbook, reference the tag name in the URL.
For example, if you add a staging tag to a workbook, the URL for the workbook version tagged with staging contains the following:
To securely embed the tagged version of the workbook, use the URL containing the tag name.
The same construct applies for public embeds. The staging tag is appended to the URL:
Like other URL parameters, version tag names with a space or special characters are encoded. For example, staging%20copy for a version tag named “Staging Copy”. See Embed URL parameters.