Define custom datetime formats
Sigma enables you to define custom datetime formats to control how date data displays in workbooks.
This document provides an overview of custom format strings and explains how to use them to display custom date formats.
This document specifically refers to custom datetime formatting in the Sigma UI. For information about datetime formats supported by functions, see DateFormat and DateParse.
User requirements
To define a custom datetime format, you must be the workbook owner or be granted Can explore workbook permission.
Custom format strings
Custom format strings support individual format specifiers and combinations of multiple specifiers and characters, including letters, numbers, and symbols.
For example, the following table demonstrates the output of three different custom format strings applied to the value 2018-07-08 00:34:59:
Common format specifiers
The following table defines commonly used format specifiers. For a complete set of supported specifiers, reference the d3-time-format module.
Define a custom datetime format
-
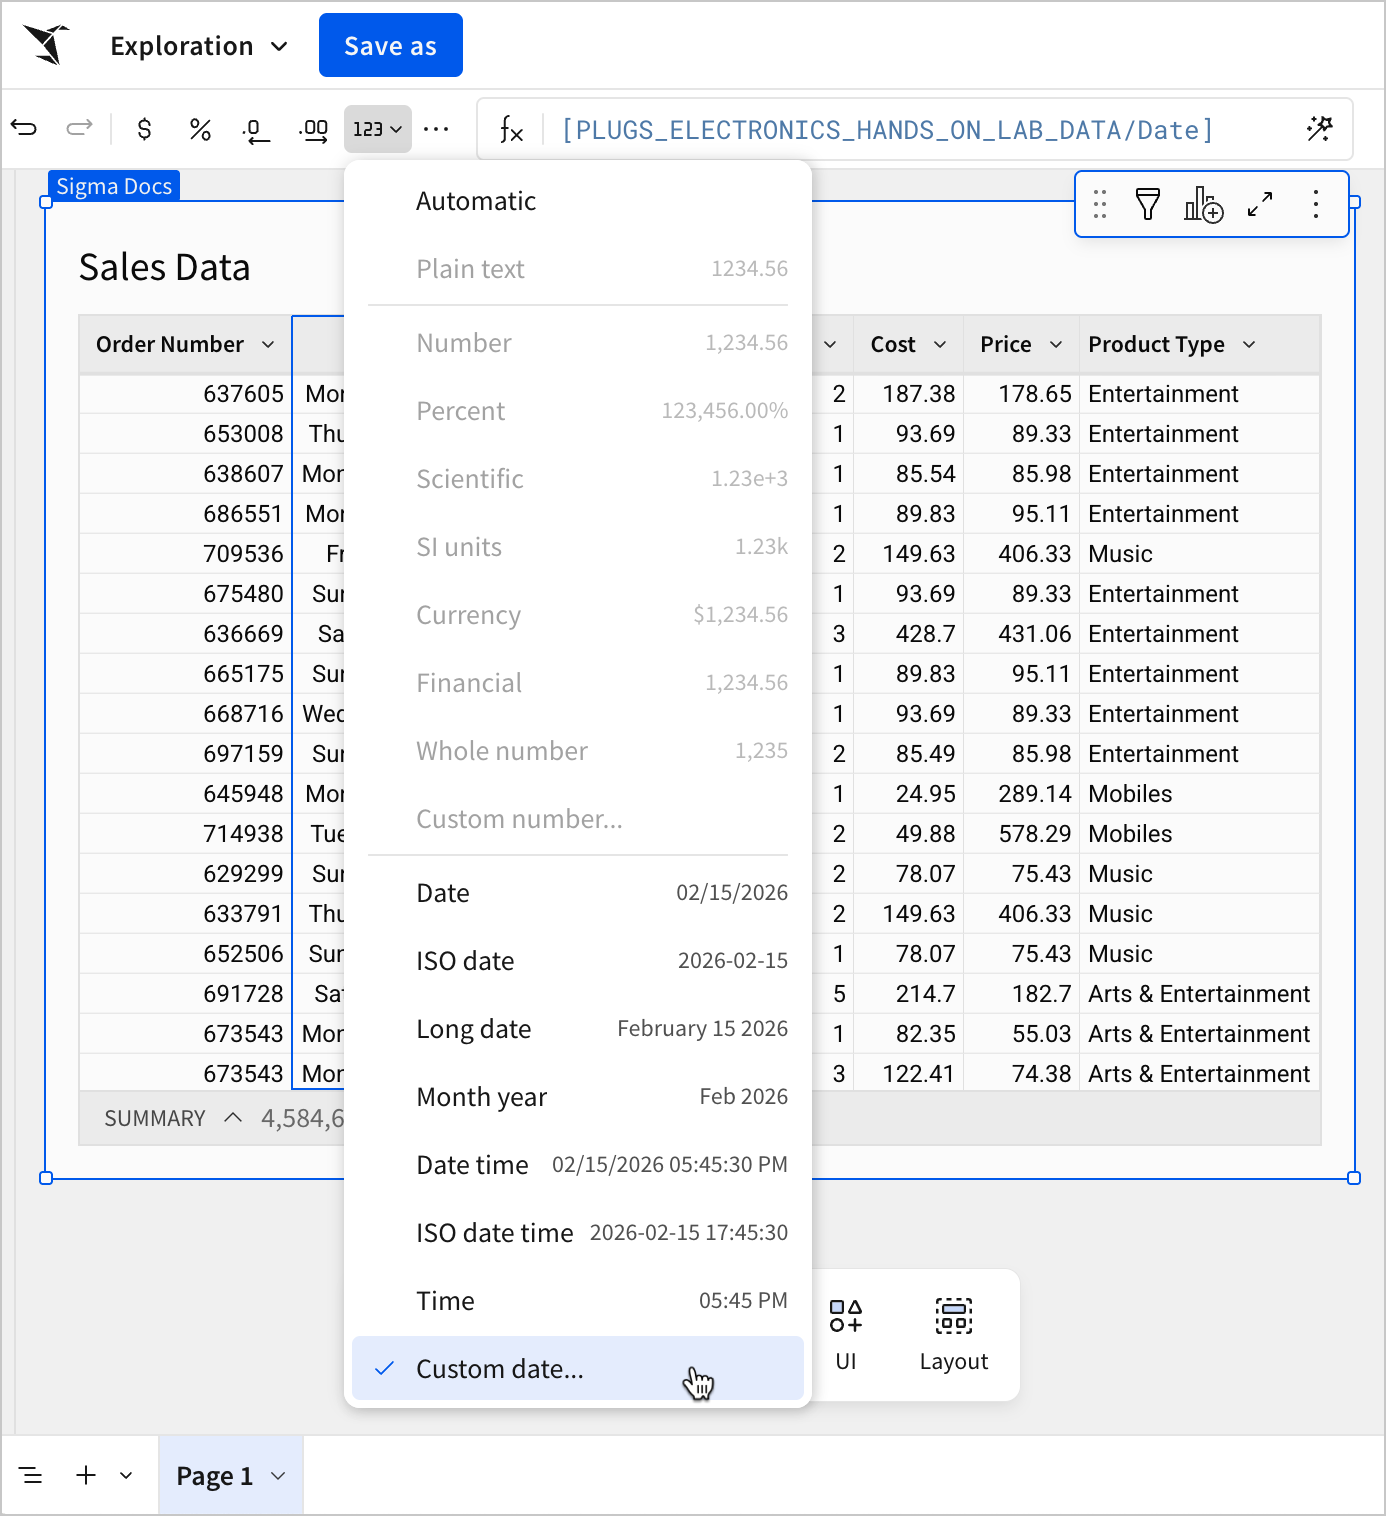
Use one of the following methods to access the Custom format modal:
-
Column menu: In the header of the column you want to format, click the down arrow (
 ) to open the column menu, then select Format > Custom.
-
Toolbar: Select the column you want to format, then click the Format option in the workbook toolbar and select Custom date.
-
-
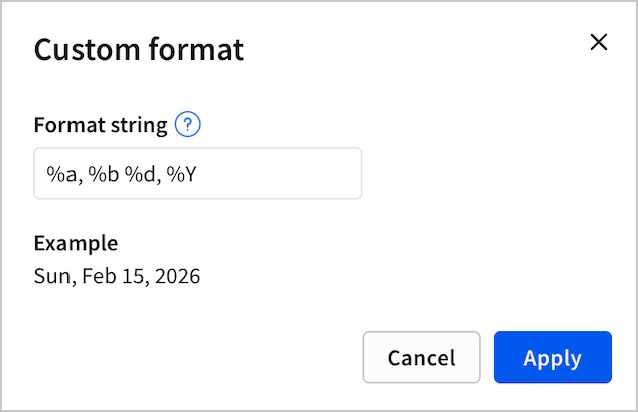
In the Custom format modal, enter the format string and confirm that the Example field reflects the datetime format you want to display.
-
Adjust the format string, if needed, then click Apply. The column updates to reflect the custom datetime format.
