

Upload custom fonts
Sigma supports custom fonts for workbooks and worksheet visualizations. Custom fonts can be uploaded at the organization level and used on any workbooks and worksheet visualizations in that organization.
Organizations are not limited to one custom font.
User requirements
To upload a custom font, you must be assigned an account type with the Manage all workbook themes and fonts or Manage branding settings permission enabled.
Upload a Custom Font
-
Open your Admin Portal.
-
At the top of the Account page, click Brand Settings.

-
Find the Custom Fonts and click Add.

-
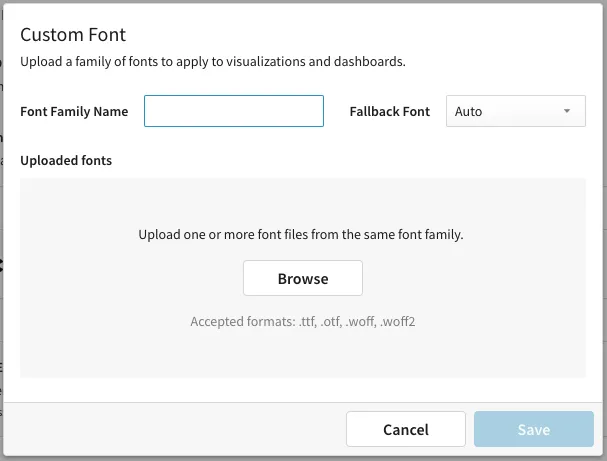
In the Custom Font modal, enter the Font Family Name of your font.
Your team will use this name to select the font family from their dashboards’ settings menu.
-
(Optional) Select a Fallback Font in case of any issues displaying your custom font.
-
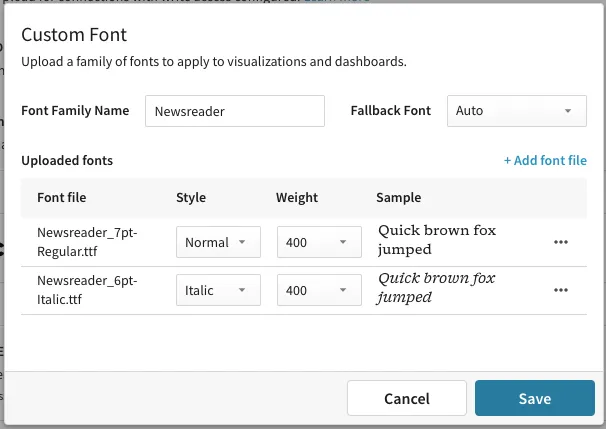
Click Browse to select your font. You may choose to upload one or more fonts from the same font family.
-
Select a Style and Weight for each uploaded font.
-
Click Save.
Your custom font family will now be listed under Custom Fonts in your Admin Portal.

Apply a Custom Font
- Enter Edit mode.
- Select
 Workbook settings.
 - Select Font.
- Select your desired Text font or Data font.