Use popovers to simplify a workbook interface
Use popovers to display contextual information (tables, charts, filters, text, etc.) in floating containers anchored to specific trigger buttons. Popovers open on demand without obscuring the rest of the workbook page, which can help create a more efficient and simplified workbook interface.
Popovers are a layout element, allowing you to guide users and create focused interfaces as you build AI apps in Sigma.
Use a popover when you want to:
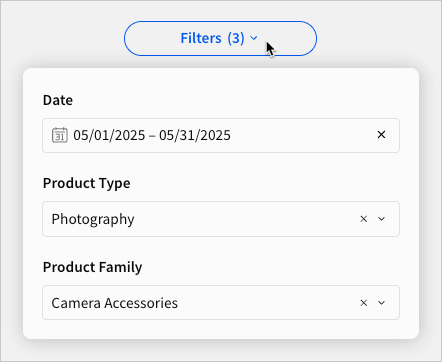
- Display multiple filters for one table with a single button.
- Reduce visual clutter by grouping filters, controls, and buttons.
- Provide additional functionality to a user without navigating them away from the current page.
To create a floating container that obscures the workbook page, and that isn’t anchored to workbook elements, see Create and customize modals.
User requirements
The ability to create and customize a popover requires the following:
- You must be assigned an account type with the Create, edit, and publish workbooks permission enabled.
- You must be the workbook owner or be granted Can edit access to the workbook.
Limitations
Sigma does not currently support nesting popovers inside other popovers. Popovers can, however, be nested inside modals.
Create a popover
To create a popover, first add a Popover element to your workbook.
-
Open a workbook draft.
-
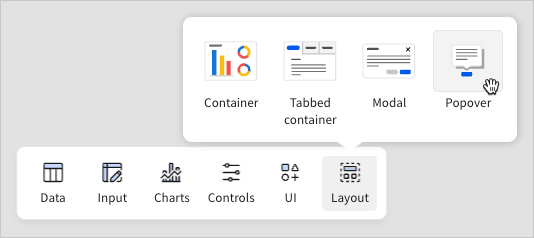
In the Add element bar, select Layout, then select Popover.
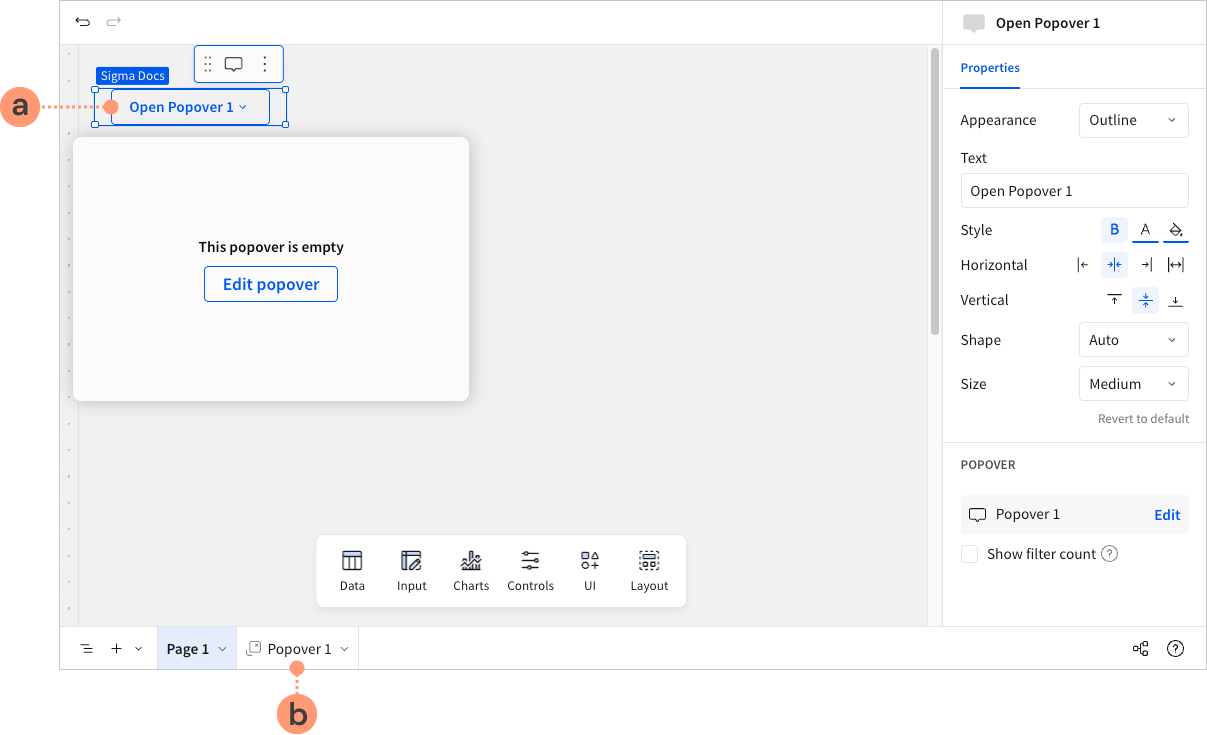
Sigma adds the two popover components described below and identified in the following screenshot:
-
Trigger button: Opens the popover.
-
Popover configuration page: Allows you to customize the content, properties, and style of the popover. The configuration page and corresponding tab are visible in the workbook draft only.
-
Customize a popover
To customize the content, width, or style of a popover, see the following sections:
- Add or edit the popover content
- Change the popover width
- Customize the popover style
- Customize a popover trigger button
Add or edit the popover content
Add or edit contextual information to display in the popover.
-
Select the tab for the popover configuration page.
-
Use the Add element bar to add elements in the same way you would add them to a workbook page. You can include any data, input, chart, control, UI, or layout element with the exception of popovers. Sigma does not support nested popovers.
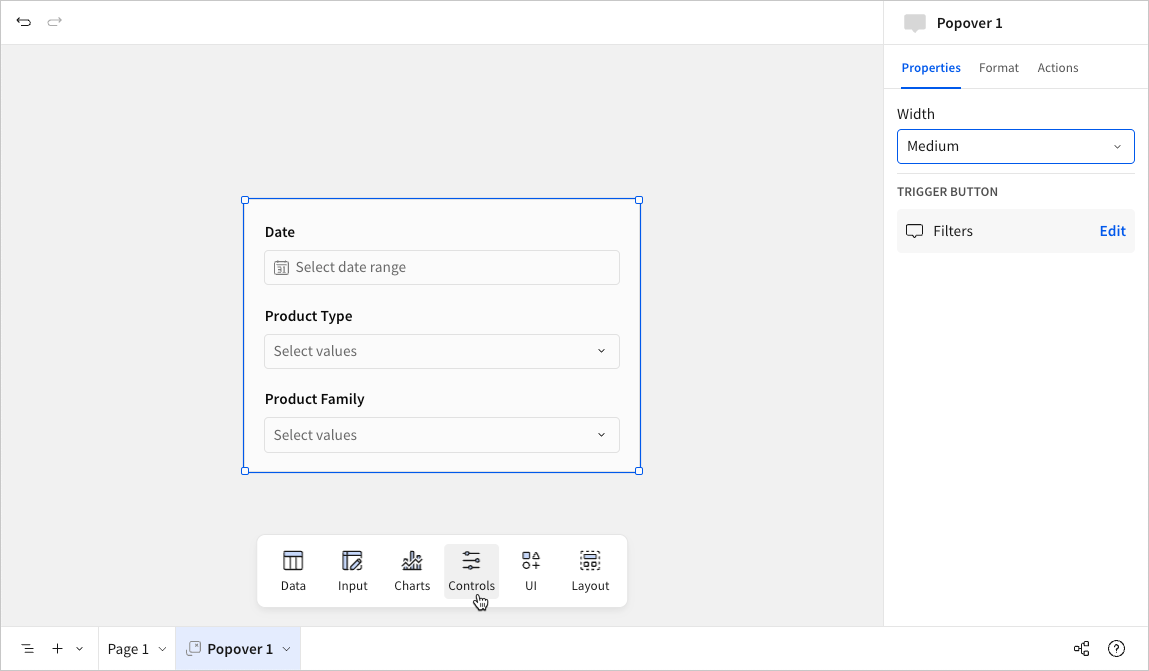
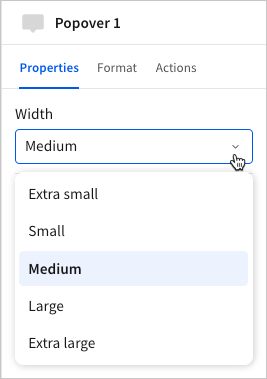
Change the popover width
Adjust the width of the popover to accommodate its contents and placement in the workbook.
-
Select the tab for the popover configuration page.
-
In the editor panel, select the Properties tab.
-
In the Width dropdown, select an option to adjust the width of the popover.
Customize the popover style
Configure the popover spacing, padding, background color, and element gap.
-
Select the tab for the popover configuration page.
-
In the editor panel, select the Format tab.
-
Expand the Popover style section to view the style settings.
-
Configure the style settings:
-
Spacing: Select the size of the padding and element gap.
-
Padding: Enable or disable the space between the border of the popover and its content.
-
Background color: Select the color displayed behind the elements in the popover.
-
Element gap: Enable or disable the space between elements in the popover.

-
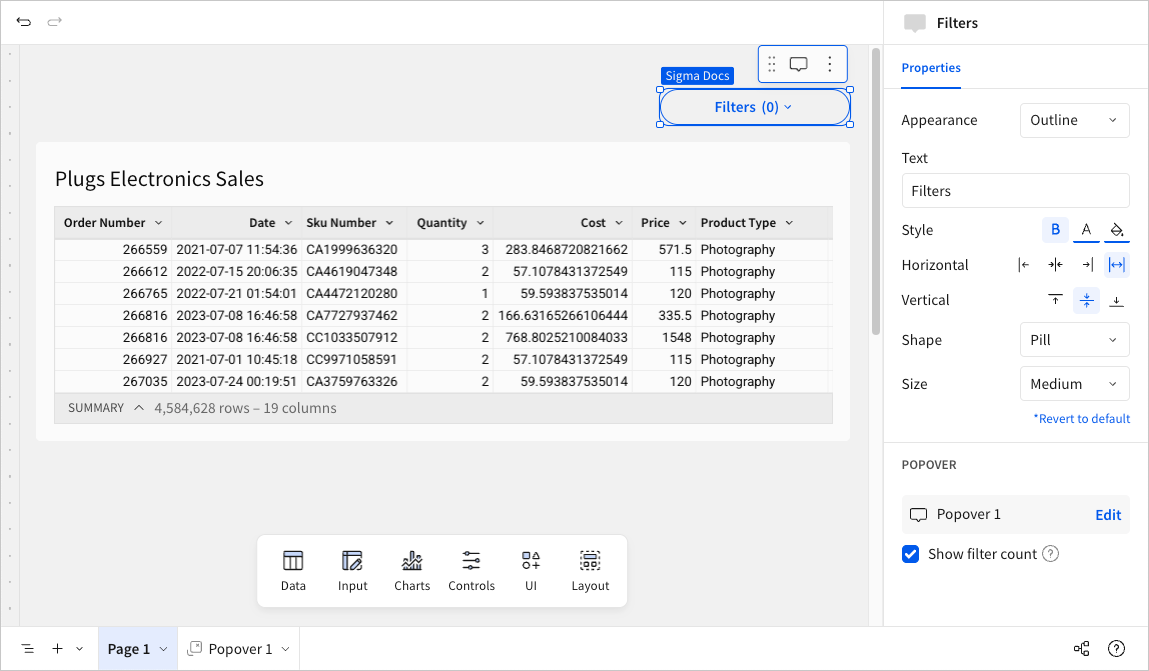
Customize a popover trigger button
Customize the trigger button that the popover is anchored to. You can configure properties that define the button’s appearance, including the label, style, alignment, shape, and size.
-
To navigate directly to the trigger button:
-
Select the tab for the popover configuration page.
-
In the editor panel, select the Properties tab.
-
In the Trigger button section, click Edit.
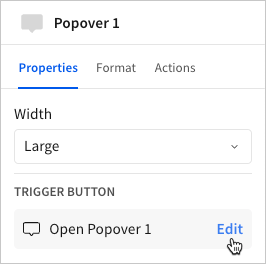
Sigma opens the workbook page containing the trigger button and automatically opens the button properties in the editor panel.
-
-
In the editor panel, configure the button properties:
-
Appearance: Select a button variant.
-
Text: Add a label or call to action (CTA) to display in the button. Enter
=to include a dynamic value defined by a formula expression. -
Style: Customize the font weight, text color, and button color.
-
Horizontal: Align or stretch the button relative to the total element width. The popover mirrors the alignment setting of the button. I.e. a left-aligned button opens a left-aligned popover.
-
Vertical: Align the button relative to the total element height. The popover mirrors the alignment setting of the button. I.e. a top-aligned button opens a popover above the button as long as there is enough space onscreen.
-
Shape: Select a button shape.
-
Size: Select a button size.
-
Show filter count: Select the checkbox to display the number of active filters originating from the popover. An active filter is any control element in the popover that has been modified from its default value.
-
Delete a popover
Use one of the following methods to delete a popover, including its trigger button, configuration page, and all elements within the popover.
Delete a popover from the trigger button
-
Open the workbook page containing the trigger button.
-
Hover over the trigger button, then click
 More.
More. -
In the element menu, select Delete element.
Delete a popover from the configuration page tab
- In the popover configuration page tab, click the down arrow (
 ).
). - In the page menu, select Delete.j