Use single row containers to show records in detail
Use single row containers to show individual records from a data source in detail. Single row containers show the details of one row from a data source at a time and can be updated by actions to change which row is on display. You can configure connected elements, such as text, images, and value lists to display dynamic content from the selected row.
Single row containers are a layout element, allowing you to guide users and create focused interfaces as you build AI apps in Sigma.
Use a single row container when you want to:
- Present details from one row in a clear, accessible layout.
- Contextually show details from different rows based on user input.
- Display a row from a table without showing the table.
User requirements
The ability to create and customize a single row container requires the following:
- You must be assigned an account type with the Create, edit, and publish workbooks permission enabled.
- You must be the workbook owner or be granted Can edit or Can explore permissions on the workbook.
About single row containers
Single row containers connect to a data source and, using a key column, can select a specific row from the data source. They can then provide content from that selected row to any connected elements. For more information, see Select a row to display in a single row container.
While many elements can be added to a single row container, certain elements - text, image, embed, and value list - can be configured to display data from the selected row in the data source. For more information, see Add connected elements to a single row container.
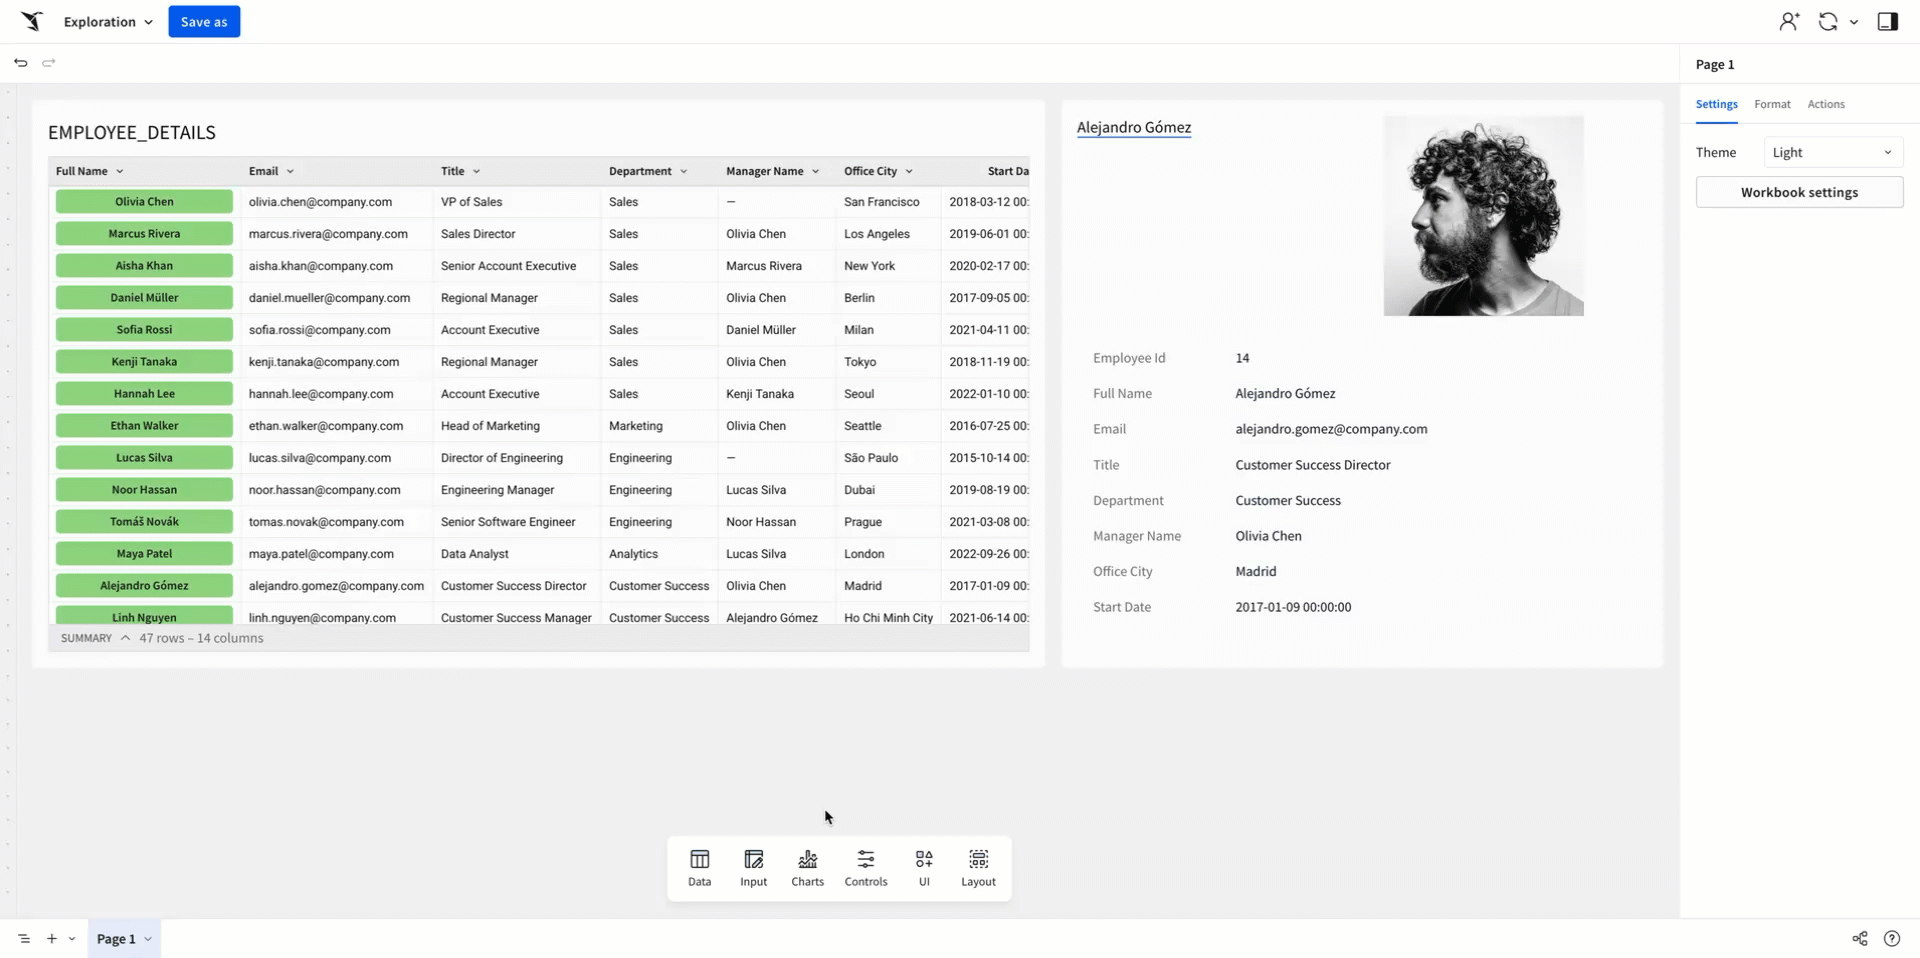
For example, adding a value list element to a single row container allows you to display data from the selected row in the value list. When the single row container updates to select a new row, the value list updates to display data from the new row. For an example of this, see Example: Create an interactive employee directory.
Considerations
- Single row containers can only be created from a table or input table, and require you to select a unique identifier column. Though you can select a column with non-unique values, this can lead to a poor user experience and ambiguous results. See Add a unique identifier column for more information.
Add a single row container to a workbook
You can add a single row container from the Add element bar or add one as a child element of a data source:
- Add a single row container from the Add element bar
- Add a single row container as a child element of a data source
Add a single row container from the Add element bar
-
In the Add element bar, select Layout > Single row container.
-
In the Select source table for single row container modal, select a data source for the single row container.
-
Select a column to use as the unique identifier for the single row container.
-
(Optional) Turn the Add action on table to select row toggle on to configure additional options:
-
Select a Trigger column to configure an action that updates the single row container when a user clicks on a cell in the selected trigger column.
-
Set Display view in to choose whether the single row container displays in a Modal or in a Container on the workbook page.
-
-
Click Create.
The single row container appears on the workbook page.
Add a single row container as a child element of a data source
-
Navigate to the element you want to use as the data source for the single row container.
-
Select
 Create child element > Single row container.
 -
(Optional) Turn the Add action on table to select row toggle on to configure additional options:
-
Select a Trigger column to configure with an action that updates the single row container to show the details of the selected row.
-
Set Display view in to choose whether the single row container displays in a Modal or in a Container on the workbook page.
-
-
Click Create.
The single row container appears on the workbook page.
Select a row to display in a single row container
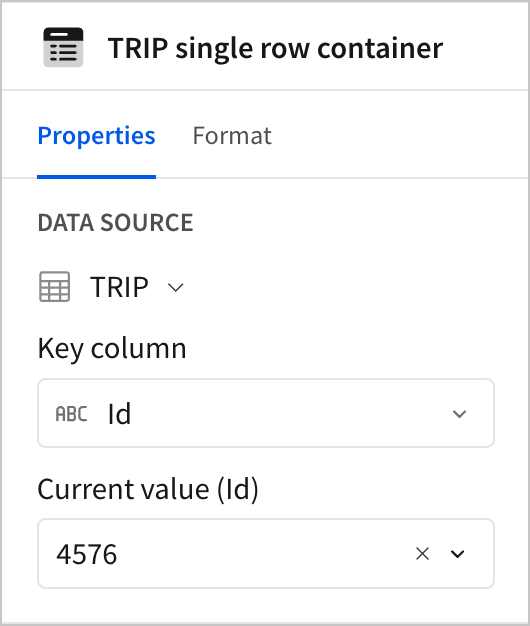
You can configure a Key column and Current value to set the selected row in a single row container:
- Select the single row container element.
- In the editor panel, select the Properties tab.
- In the Key column dropdown, select the column from the data source to use as the unique identifier for the single row container.
- In the Current value field, select or enter the value of the unique identifier for the row you want to display.
The single row container and any connected elements display the details of the selected row.
The Current value can be updated by the Set single row container action, enabling workflows where user interaction updates which row is displayed in the single row container.
Add a unique identifier column
When creating a single row container, you must select a column to use as the unique identifier. This column determines which row to display. If the selected unique identifier column contains non-unique values, the single row container reads Multiple values instead of displaying the contents of any particular row. Because of this, using a column with unique values is recommended to prevent the single row container from displaying ambiguous results.
If your data source does not have a column with unique values, you can create one:
- If your data source is an input table, you can add a Row ID column.
- If your data source is a table, consider adding a unique identifier column in your connected data platform.
Sigma attempts to automatically select a unique identifier column from your data source when creating a single row container, such as an ID column. If no unique identifier column is available, you can manually select another column.
Change the data source of a single row container
To change the data source of a single row container:
- Select the single row container.
- In the editor panel, select the Properties tab.
- Under Data source, select
 > Change source….
 - In the Change source modal, select a new data source.
The single row container updates to use the new data source. Any connected elements that reference columns from the previous data source update to display the value for the column with the same name from the new data source.
When you change the data source of a single row container, connected elements that reference columns from the previous data source display an error if there is no column with the same name in the new data source. For example, if a value list displays information from a column in one data source, and you change the data source of the single row container to a data source that does not have a column of that name, the value list displays an error.
Customize a single row container
To add connected elements and customize the layout of a single row container, see the following sections:
- Add connected elements to a single row container
- Change the key column of a single row container
- Select a row to display in a single row container
- Style a single row container
Add connected elements to a single row container
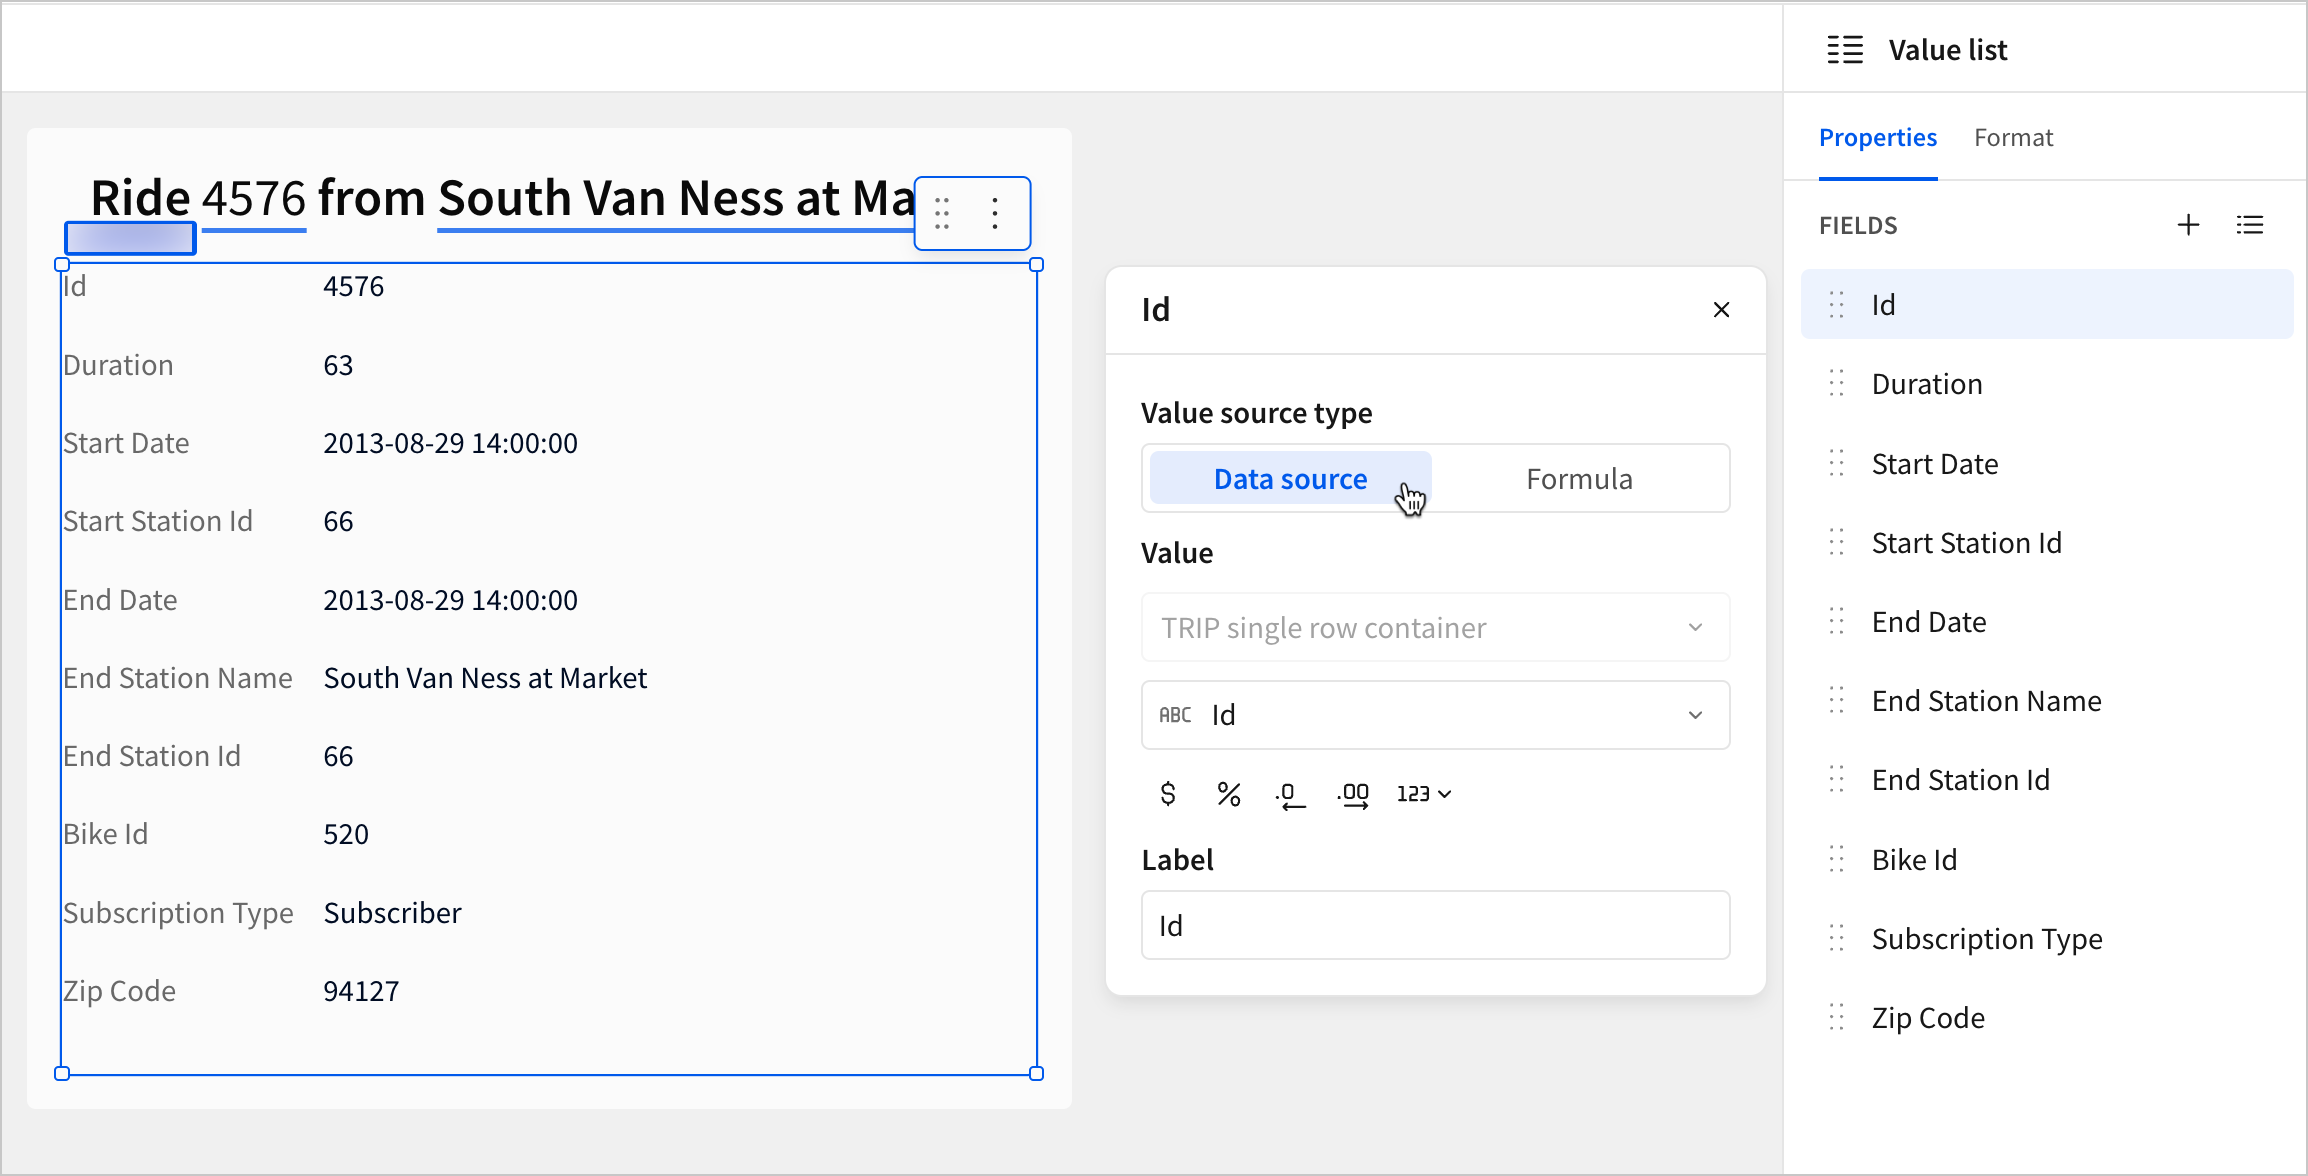
Single row containers can share context from their data source with additional connected elements. For example, you can add an image element to a single row container to display an image based on a URL column from your data source.
To add more connected elements to a single row container:
-
Using the Add element bar, create a new element on the workbook page.
-
Move the new element into the single row container container or modal.
-
Select the single row container.
In the editor panel, under Properties, in the Connected elements section, the new element is listed.
For image, text, embed, and value list elements, you can configure the element to display dynamic content based on the data source of the single row container. When configuring these elements, set the Input type or Value source type to Source column and select the column from the data source to display. The element displays the value of that column for the selected row in the single row container. When the single row container updates, all connected elements update to display the value of that column for the new selected row.
Change the key column of a single row container
You can change the key column used to select the row displayed in a single row container:
- Select the single row container.
- In the editor panel, select the Properties tab.
- In the Key column dropdown, select a new column to use as the key column.
The single row container updates to use the new key column.
Sigma recommends selecting a column with unique values as the key column. If the selected column contains non-unique values, the single row container displays Multiple values instead of displaying the contents of any particular row. For more information, see Add a unique identifier column.
Select a row to display in a single row container
You can configure the Current value from the Key column to set the selected row in a single row container:
- Select the single row container.
- In the editor panel, select the Properties tab.
- In the Current value field, select or enter the value from the Key column for the row you want to display.
The single row container and any connected elements display the details of the row with the matching value in the key column.
The Current value can be updated by the Set single row container action, enabling workflows where user interaction updates which row is displayed in the single row container. For more information, see Create actions that control single row containers.
Style a single row container
Single row containers can be created as a container or as a modal, and inherit the style options available to those elements.
For single row containers made as a container, see Customize a container
For single row containers made as a modal, see Customize a modal
Access the selected value of a single row container in a formula
You can access the selected value of a single row container in a formula using the following syntax:
[<Data source name>-single-row-control]
Selecting this control value in a formula returns the value of the unique identifier column for the selected row. For example, if you’ve created a single row container connected to a data source named “TRIP” with a unique identifier column Id, you can use the following formula to return the selected Id:
[TRIP-single-row-control]
In a calculated column in a table, this returns the selected Id in each row.
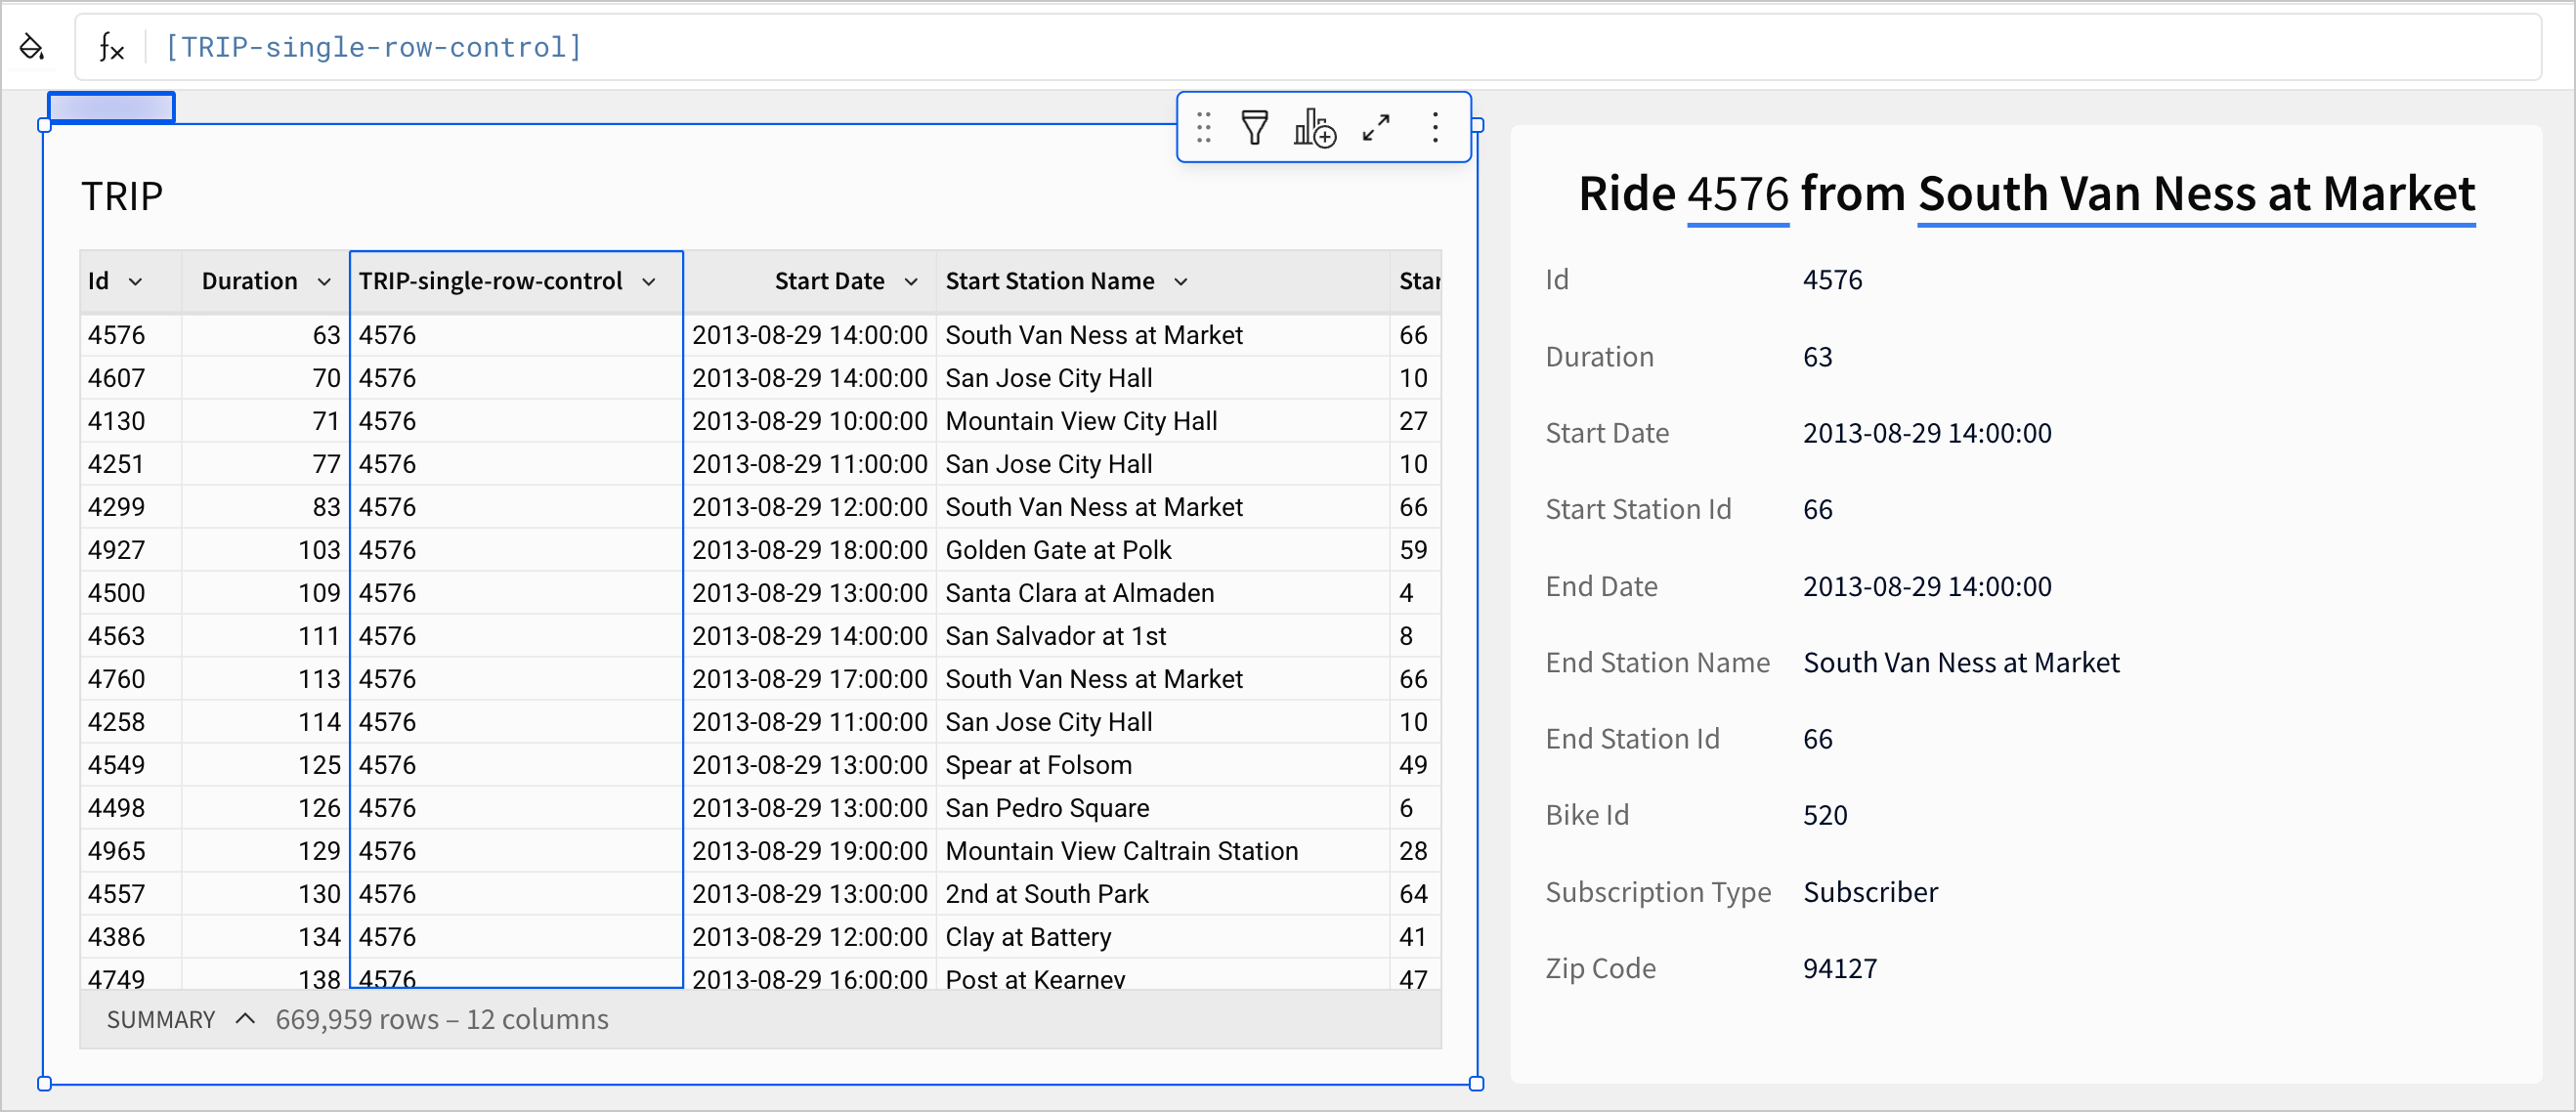
When the single row container updates with a new selected row, the formula updates to return the unique identifier for the new selected row.
If you want access a column other than the unique identifier from the data source, you can perform a lookup. For example, the following formula returns the Bike Id for the current selected trip in the single row container:
Lookup([TRIP/Bike Id], [TRIP-single-row-control], [TRIP/Id])