Value lists
To create an organized view of details from one or more data sources, add a value list element. You can customize the value list to show custom formula results, values from controls, static values, and more. When paired with a single row container, you can create a dynamic list that shows individual rows from a data source based on user input. To see an example of a value list paired with a single row container, see Example: Create an interactive employee directory.
This document explains how to create and customize a value list element.
User requirements
To add and edit value list elements:
- You must have Can edit or Can explore access to the individual workbook.
- You must be in Edit or Explore mode for the workbook. See workbook modes overview.
Create a value list element
To add a value list element to a workbook:
- Open a draft, custom view, or saved view of a workbook.
- In the Add element bar, select UI > Value list. The new value list element appears on the page.
Customize fields in a value list
To control what information is displayed in the value list, you can add and customize fields:
- Configure a field in a value list
- Add a field to a value list
- Remove a field from a value list
- Organize fields in a value list
Configure a field in a value list
-
Select the value list element on the workbook page.
-
In the editor panel, under Properties, in the Fields section, select the field you want to configure.
-
If the value list is connected to a single row container or repeated container, choose whether to display a value from a Source column or a Formula. Otherwise, you can only configure fields using a formula.
-
If the value list is connected to a single row container, choose whether to display a value from a Source column or a Formula. If it is not connected to a single row container or repeated container, you can only configure fields using a formula.
- For Formula, use the formula bar in the Value section to configure the value of the field. Optionally, enter a Label for the field.
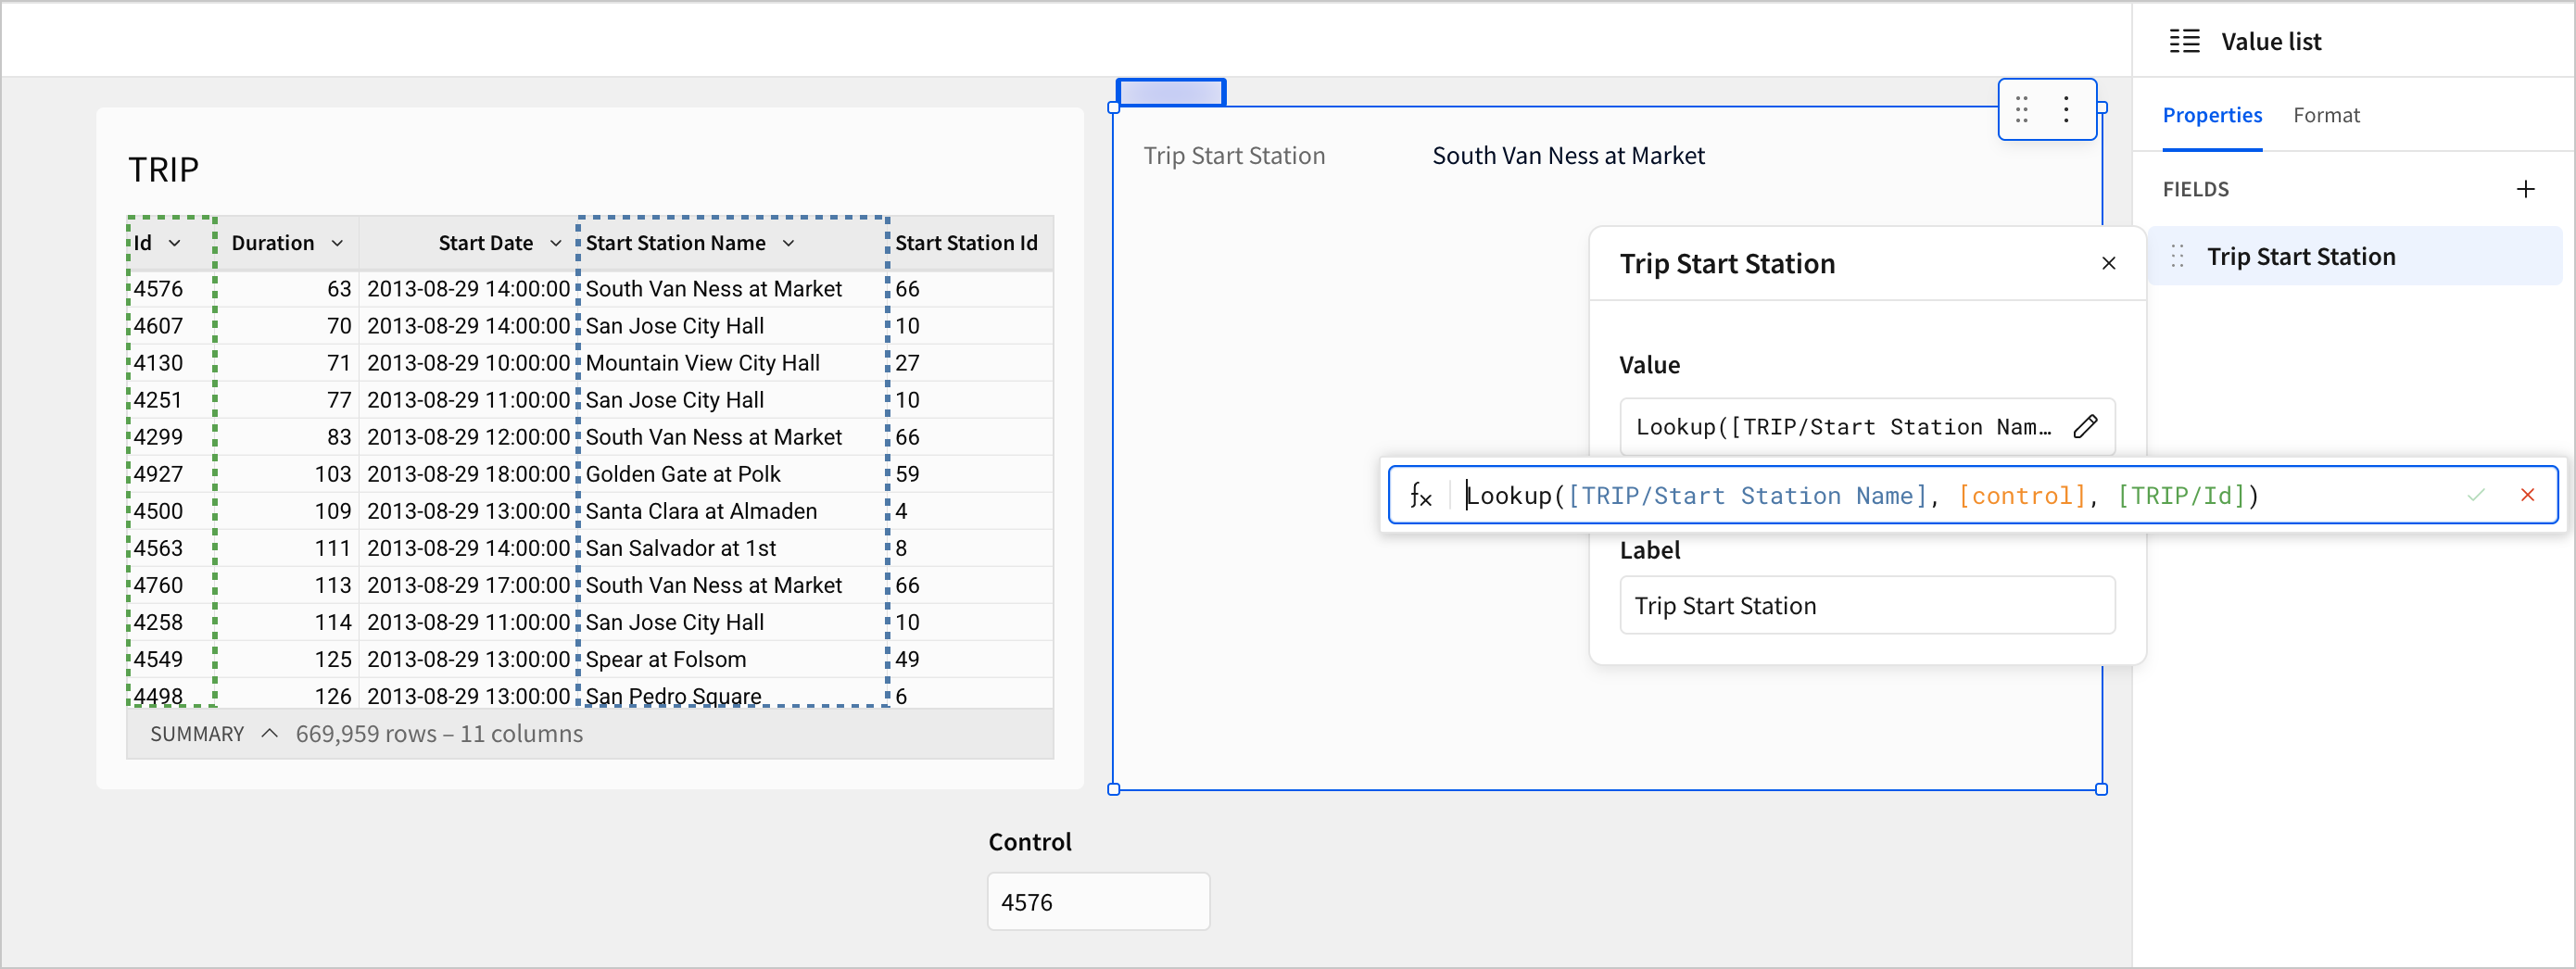
- For Source column, select a column from the connected data source in the Value section. Optionally, enter a Label for the field.
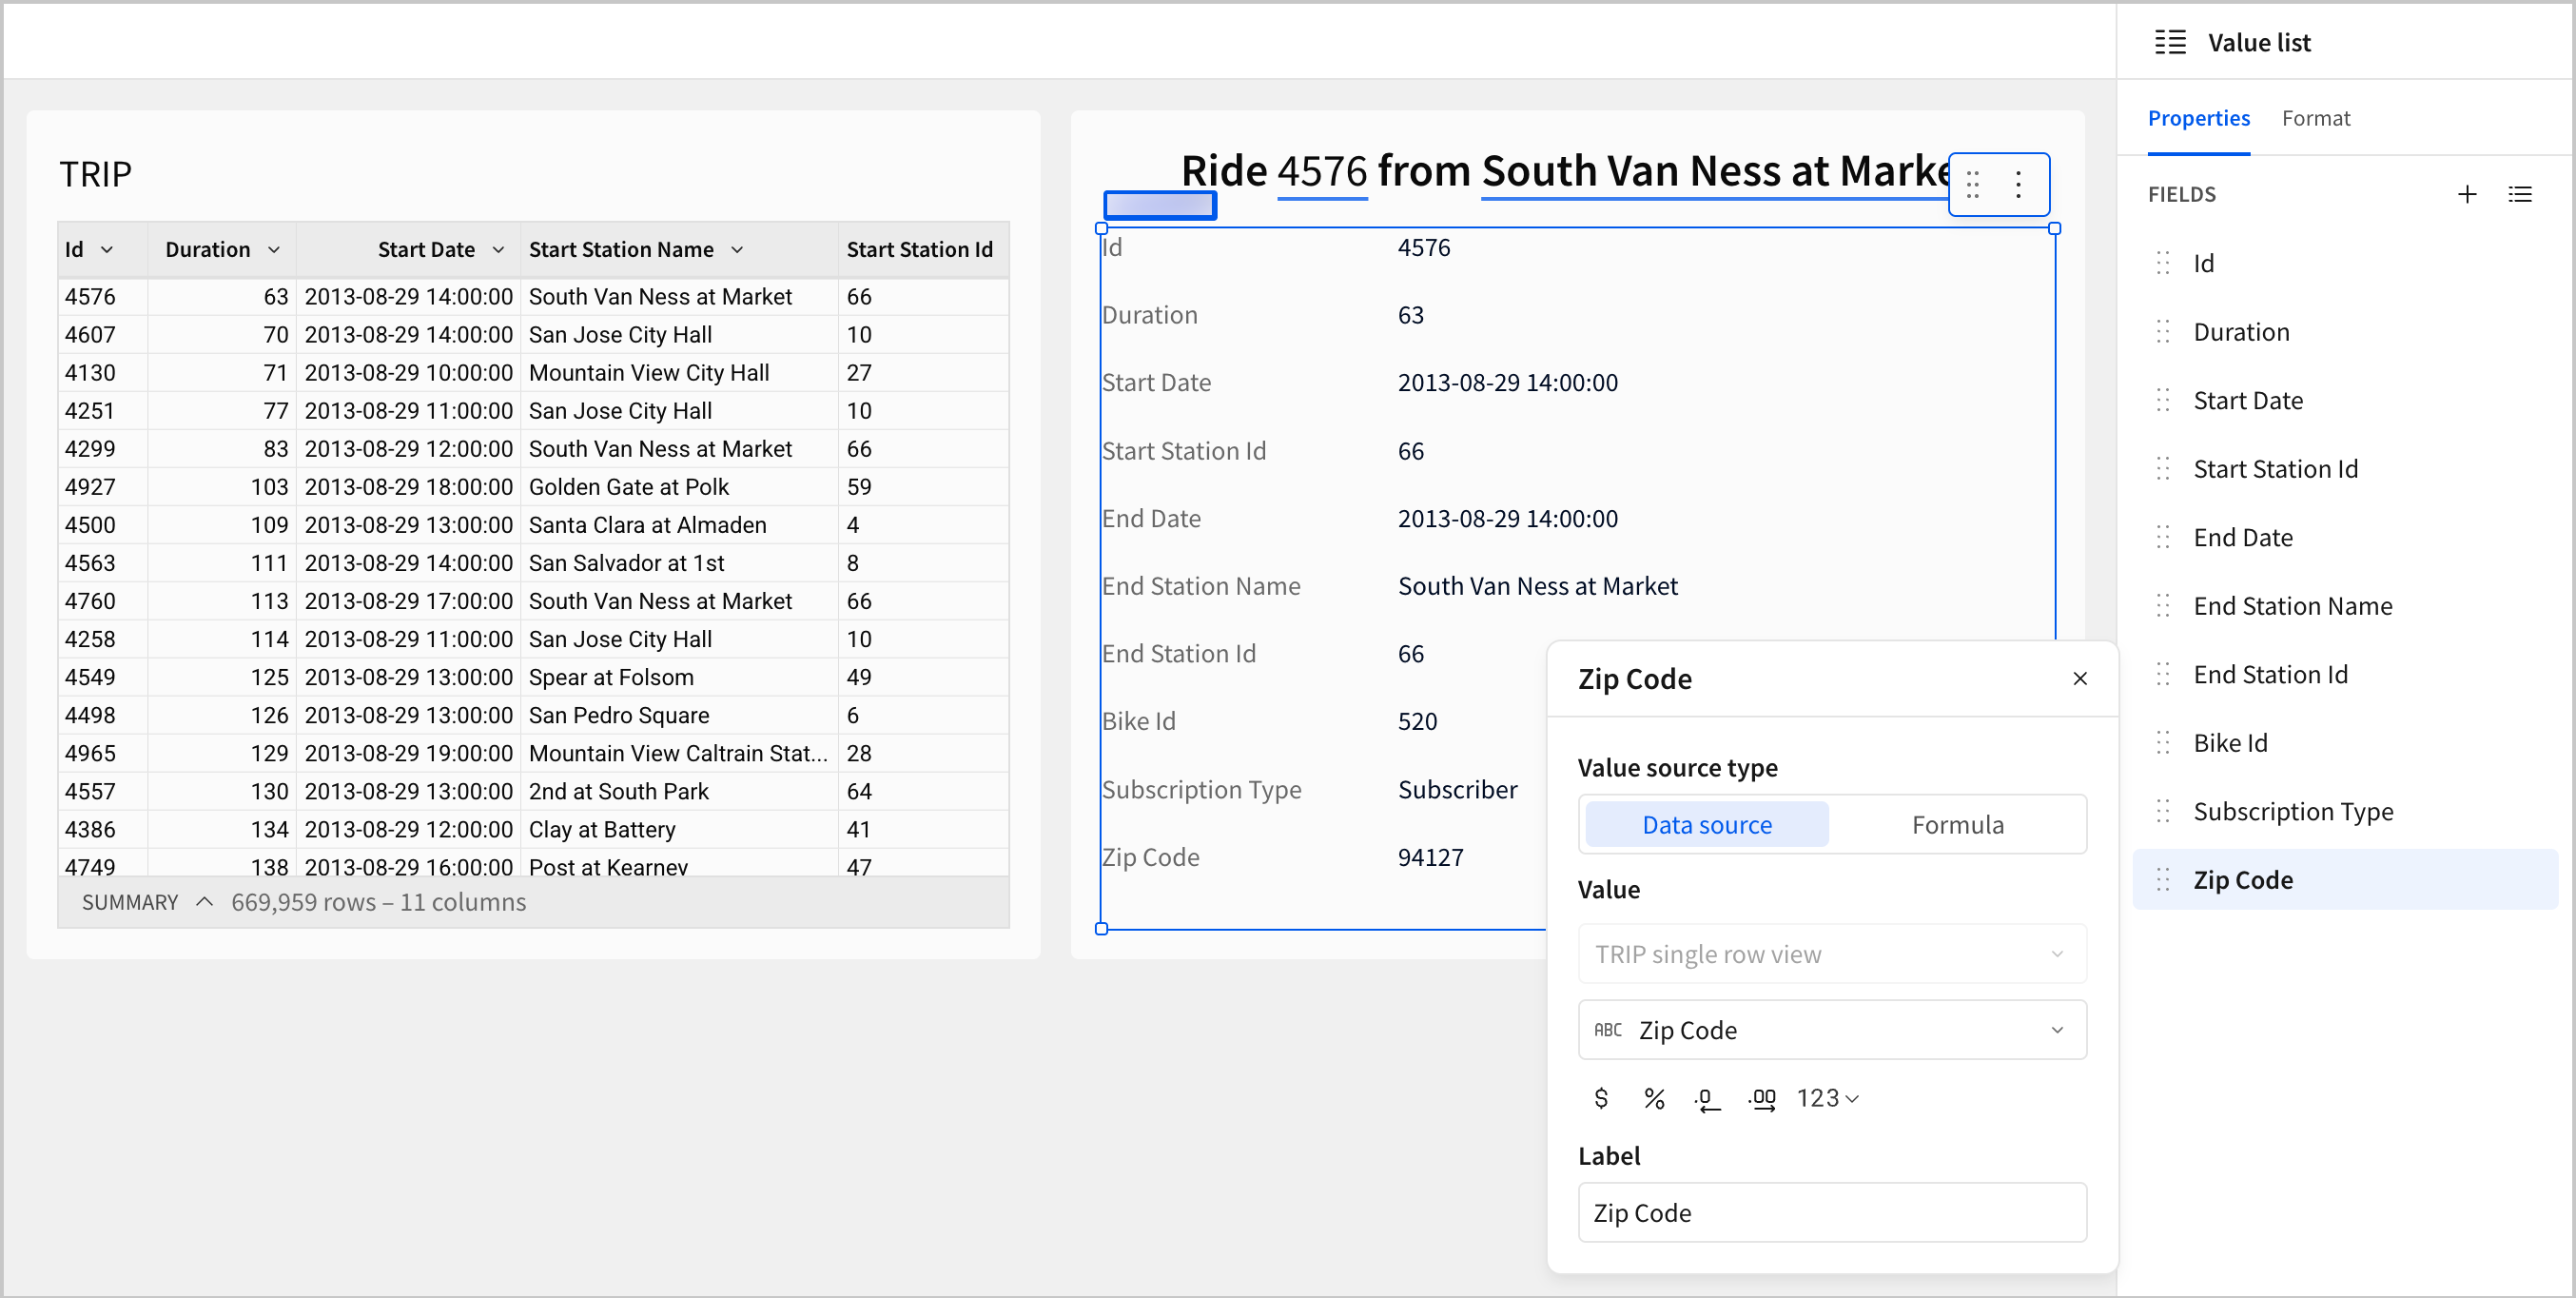
Fields in a value list can only display one value. If your selected data source or formula returns multiple values, the field reads Multiple values. Consider changing the data source or applying an Aggregate function.
Add a field to a value list
- Select the value list element on the workbook page.
- In the editor panel, under Properties, in the Fields section, click
 Add field. A new field appears at the bottom of the section.
 - Select the new field to configure its contents.
Remove a field from a value list
- Select the value list element on the workbook page.
- In the editor panel, under Properties, in the Fields section, click
 More options for the field you want to remove.
 - Click Delete.
Organize fields in a value list
- Select the value list element on the workbook page.
- In the editor panel, under Properties, in the Fields section, drag and drop fields to organize them in the desired order.
Customize value list
You can customize the appearance of the value list and its fields.
-
In the editor panel, select the Format tab.
-
In the Element style section, customize the following:
- Padding: On by default. Turn off the toggle to remove padding between elements.
- Background color: Change the background color of the value list using a hex code, color palette, or color picker.
- Border: Add a border around the value list.
- Corner: Select whether to have square, round, or pill-shaped corners for the value list.
-
In the Field style section, customize the following:
- Label format: Change the font size, weight, and color of the field label.
- Value format: Change the font size, weight, and color of the field value.
- Layout: Choose whether to organize fields and labels in a grid, compact, separated, or stacked layout.