

Create a local Sigma table (Beta)
This documentation describes one or more public beta features that are in development. Beta features are subject to quick, iterative changes; therefore the current user experience in the Sigma service can differ from the information provided in this page.
This page should not be considered official published documentation until Sigma removes this notice and the beta flag on the corresponding feature(s) in the Sigma service. For the full beta feature disclaimer, see Beta features.
Create a new Sigma table that’s independent of existing data in Sigma or your data platform. You can create an empty table or pre-populate it with data from a CSV upload.
The resulting table is a local Sigma table, available only in the workbook you create it in. Use it to prototype a new data source, store and edit new data, or support an app workflow in that workbook.
This page explains how to create a local Sigma table. To create an organization-wide Sigma table, you can promote a local Sigma table, or you can start from an existing input table or connection table.
Sigma tables are currently supported by Snowflake, Databricks, and PostgreSQL connections.
Requirements
To create a local Sigma table in a workbook:
- You must be assigned an account type with the Can create, edit, and publish workbooks permission enabled.
- To create a local Sigma table from a CSV upload, your account type must also have the Upload CSV permission enabled.
- You must be the workbook owner or have Can edit workbook access.
- You must have access to a write-back schema on a connection with write access enabled.
About local Sigma tables
When you create a local Sigma table, Sigma creates a new database table in the selected connection and write-back schema. As the creator, you automatically own the Sigma table (Can own table access), so you can add and remove rows, add columns, edit cell data, set the primary key, and manage table grants.
Because a Sigma table is local to the workbook, it doesn’t appear in the data catalog or search results, and users cannot select it as a data source in other Sigma documents. To make a local table available across your organization, you can promote it, which also allows you to customize the table name, choose the destination schema, and decide which columns to include.
Limitations and considerations
- Sigma tables support text, number, date, and boolean column types. Other column types, such as single-select, multi-select, and file columns, are not supported.
- You can create local Sigma tables in workbooks only. You cannot create them in data models or reports, but you can promote a local Sigma table to use it as a data source in any document type.
- Every local Sigma table includes an
Idtext column used as the primary key. Sigma populates the column with system-generated key values that uniquely identify each row. You cannot choose the primary key when you create the table, but you can change it afterward. For more information, see Change a Sigma table primary key.
Create an empty local Sigma table
Create a local Sigma table without pre-populated data.
-
Open a workbook draft.
-
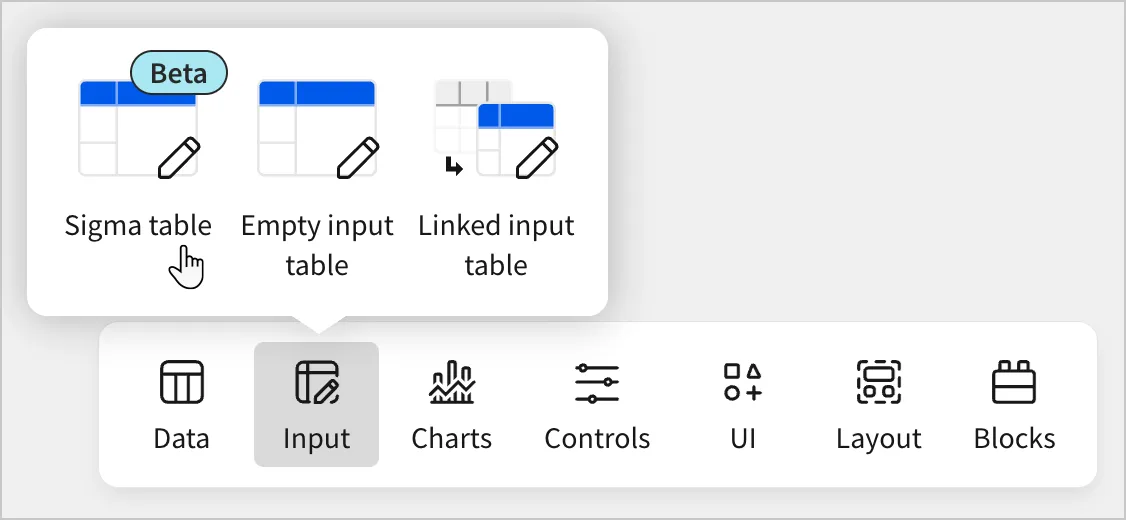
In the Add element bar, select Input > Sigma table.
-
In the Create Sigma table popover, complete the following:
-
Select Empty table.
-
In the dropdown, select the connection Sigma must use to write the data to your data platform. If you select an OAuth connection, you must also choose a write-back schema in the Destination dropdown.
If there are no Destination options available, you don’t have access to any write-back schemas and cannot create a Sigma table on the selected connection. To request access, contact an administrator.
-
Click Create table.
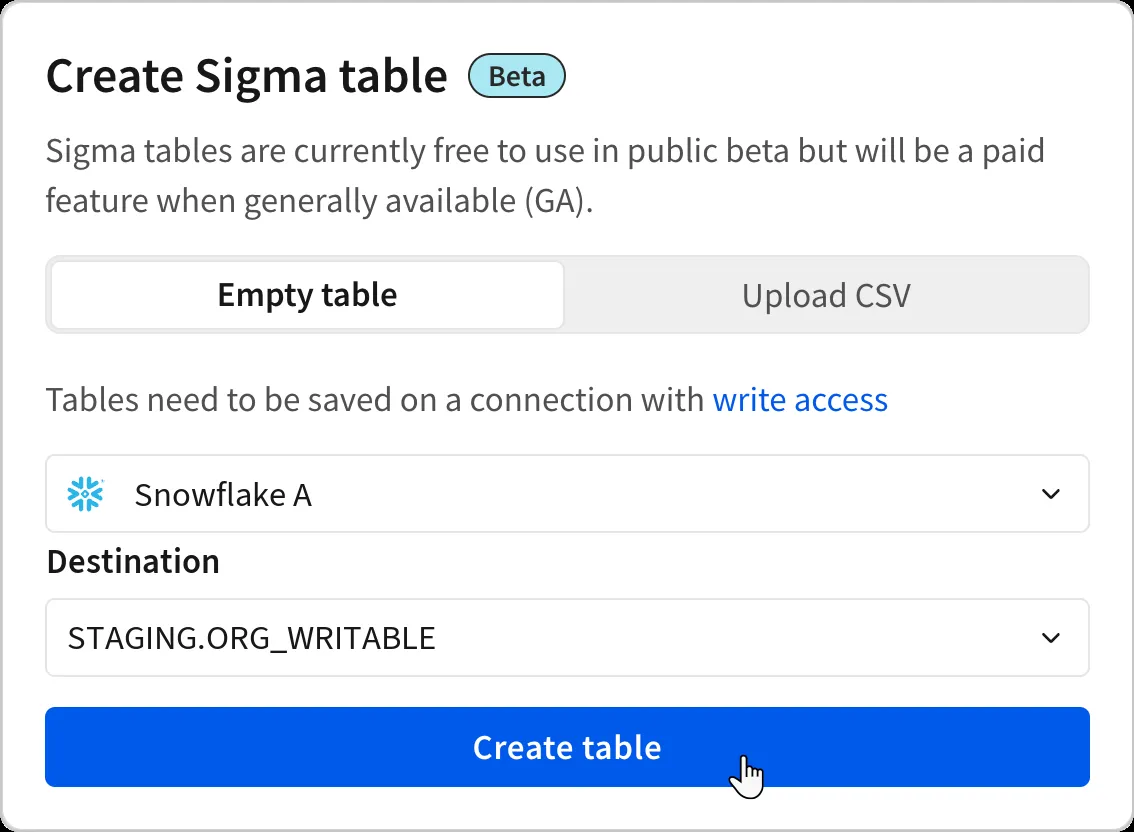
Sigma adds an empty Sigma table element to the workbook and creates an underlying database table in your data platform.
-
Create a local Sigma table from a CSV upload
Create a local Sigma table that’s pre-populated with data from a CSV upload.
By default, Sigma limits CSV uploads to 200MB and requires UTF-8 encoding. If your organization regularly works with larger files, an admin can increase the file size limit to 1GB.
-
Open a workbook draft.
-
In the Add element bar, select Input > Sigma table.
-
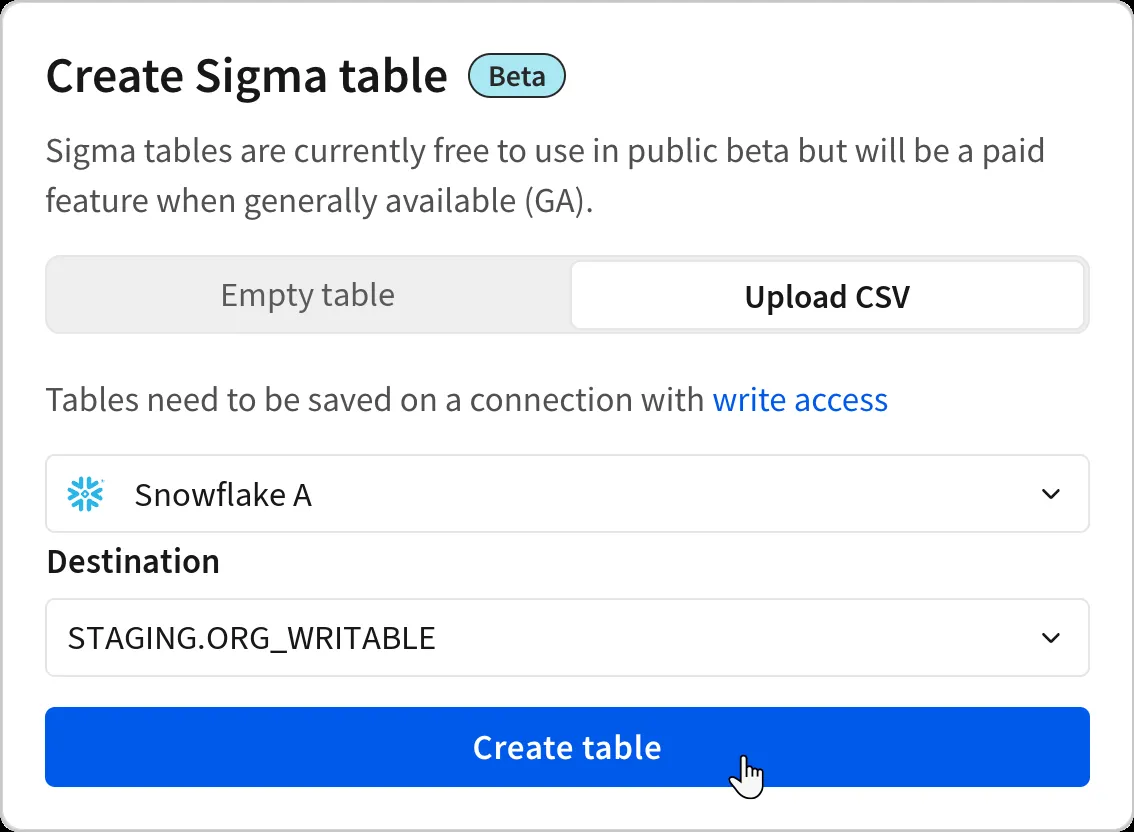
In the Create Sigma table popover, complete the following:
-
Select Upload CSV.
-
In the dropdown, select the connection Sigma must use to write the data to your data platform. If you select an OAuth connection, you must also choose a write-back schema in the Destination field.
If there are no destinations available, you don’t have access to any write-back schemas and cannot create a Sigma table on the selected connection. To request access, contact an administrator.
-
Click Upload CSV.
-
-
In the Upload CSV modal, complete the following:
- Drag and drop a file, or click Browse and choose one from the file picker.
- Review the parsed data and any warnings, then update the parsing options and column types if needed. See Parse numbers with separators.
- Click Save.
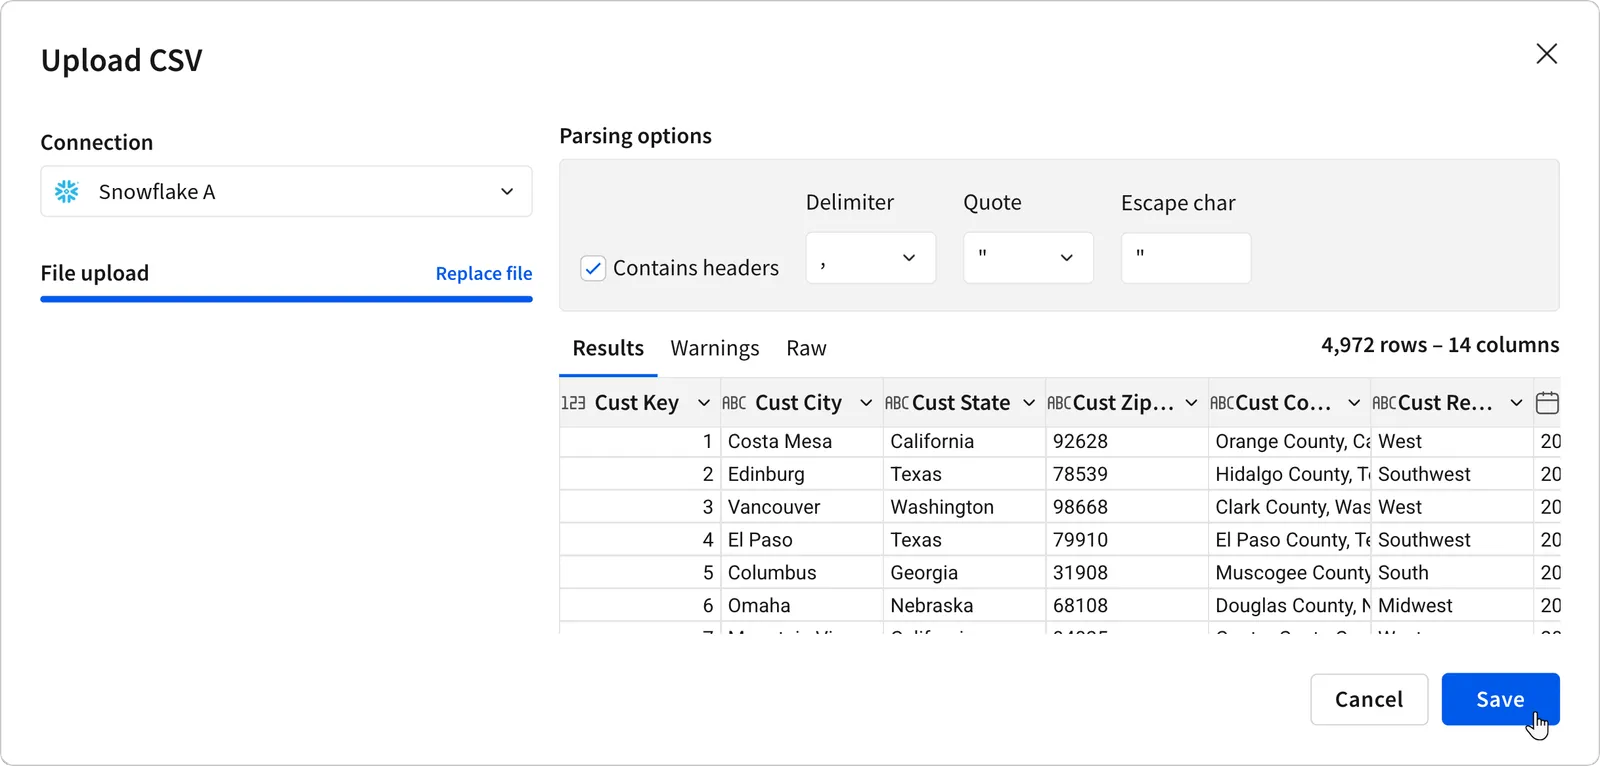
Sigma adds a Sigma table element populated with the CSV data and creates an underlying database table in your data platform.