Create a table from an array (Beta)
Create a table from an array (Beta)
This documentation describes one or more public beta features that are in development. Beta features are subject to quick, iterative changes; therefore the current user experience in the Sigma service can differ from the information provided in this page.
This page should not be considered official published documentation until Sigma removes this notice and the beta flag on the corresponding feature(s) in the Sigma service. For the full beta feature disclaimer, see Beta features.
You can create a table based on the items in an array or a column of arrays using the Unnest operation.
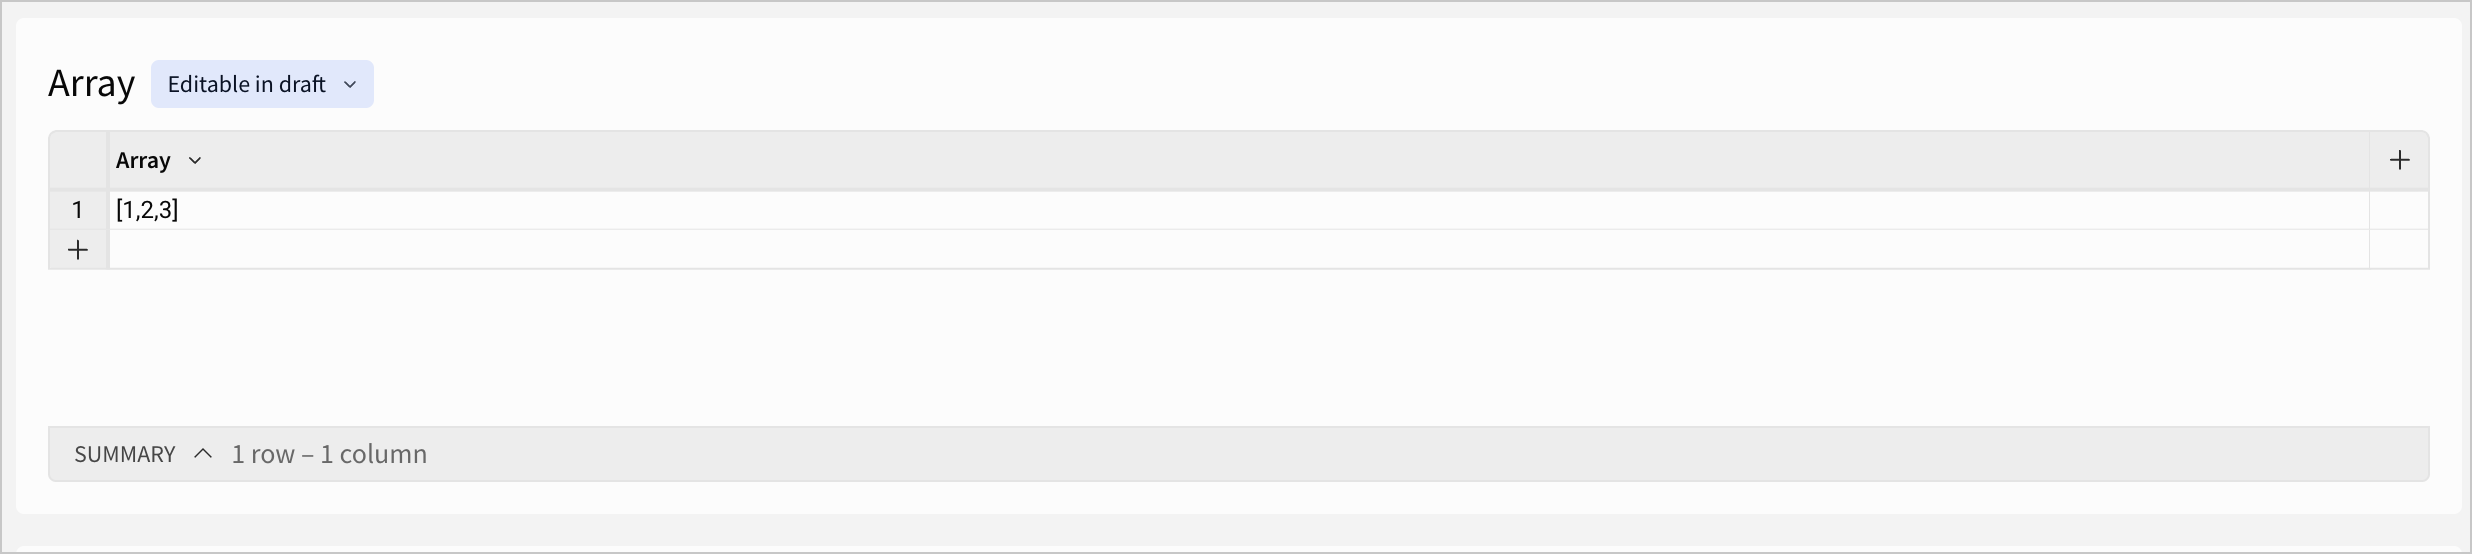
For example, the table below shows a single row with an Array column containing an array with three items.
To shape the data such that each array item appears in its own row, you can unnest the Array column. The result is a table with three rows, where each array item has been separated onto its own row.
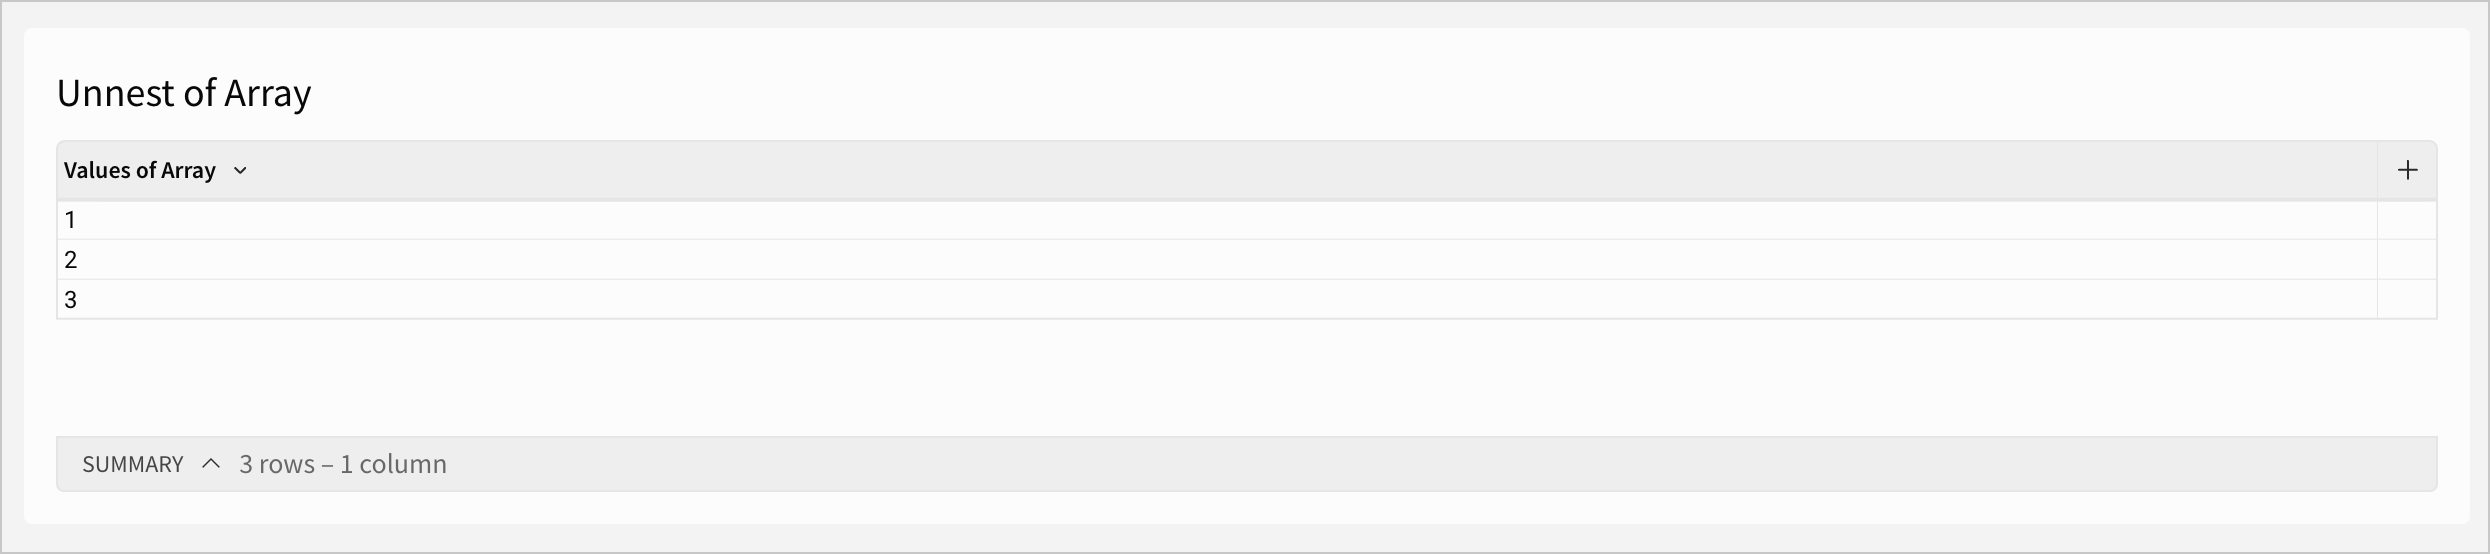
Optionally, you can add an index column to show the position of each item in the original array, or include the original array itself in a column next to each array item.
Unnesting is especially useful when working with deeply nested data, or when data is stored as an array in your data platform. If you want each value in an array to behave as an individual data point that you can group, aggregate, or filter on, unnest the arrays to get individual rows.
This document explains how to unnest an array column into a table.
User requirements
- You must be the workbook owner or be granted Can explore or Can edit access to the document.
Notes
- Your selected data source must have a column with the Variant data type to unnest.
- You can only unnest arrays from the top level of a variant column. For example, you cannot unnest an array defined within a property of a JSON object.
Unnest an array column
You can unnest an array column to unpack each item in the array into its own row. All other columns in the table repeat their source value for each new row in the expanded table.
To unnest an array column:
- From the Add element bar, select Table > Data > Unnest.
- In the Select source modal, select the data source or element with an array column to unnest.
- Click Select.
- In the Unnest table modal, select an Array column to unnest. Only columns with the Variant data type are available to select.
- Enter a Values column label to set the column name for the column of unnested array values.
- (Optional) Check the checkbox next to Include index column to add a column that lists the zero-indexed position for each item in the original array.
- (Optional) If you checked the checkbox next to Include index column, enter an Index column label to set a custom name for the column of index values.
- Select the checkboxes next to your desired Output columns to determine which columns appear in the final output table. Review the columns in the Output preview to see the resulting contents.
- Select Submit.
A new table with the unnested array contents appears on the workbook canvas.
Example: Expand a product tags array into multiple rows
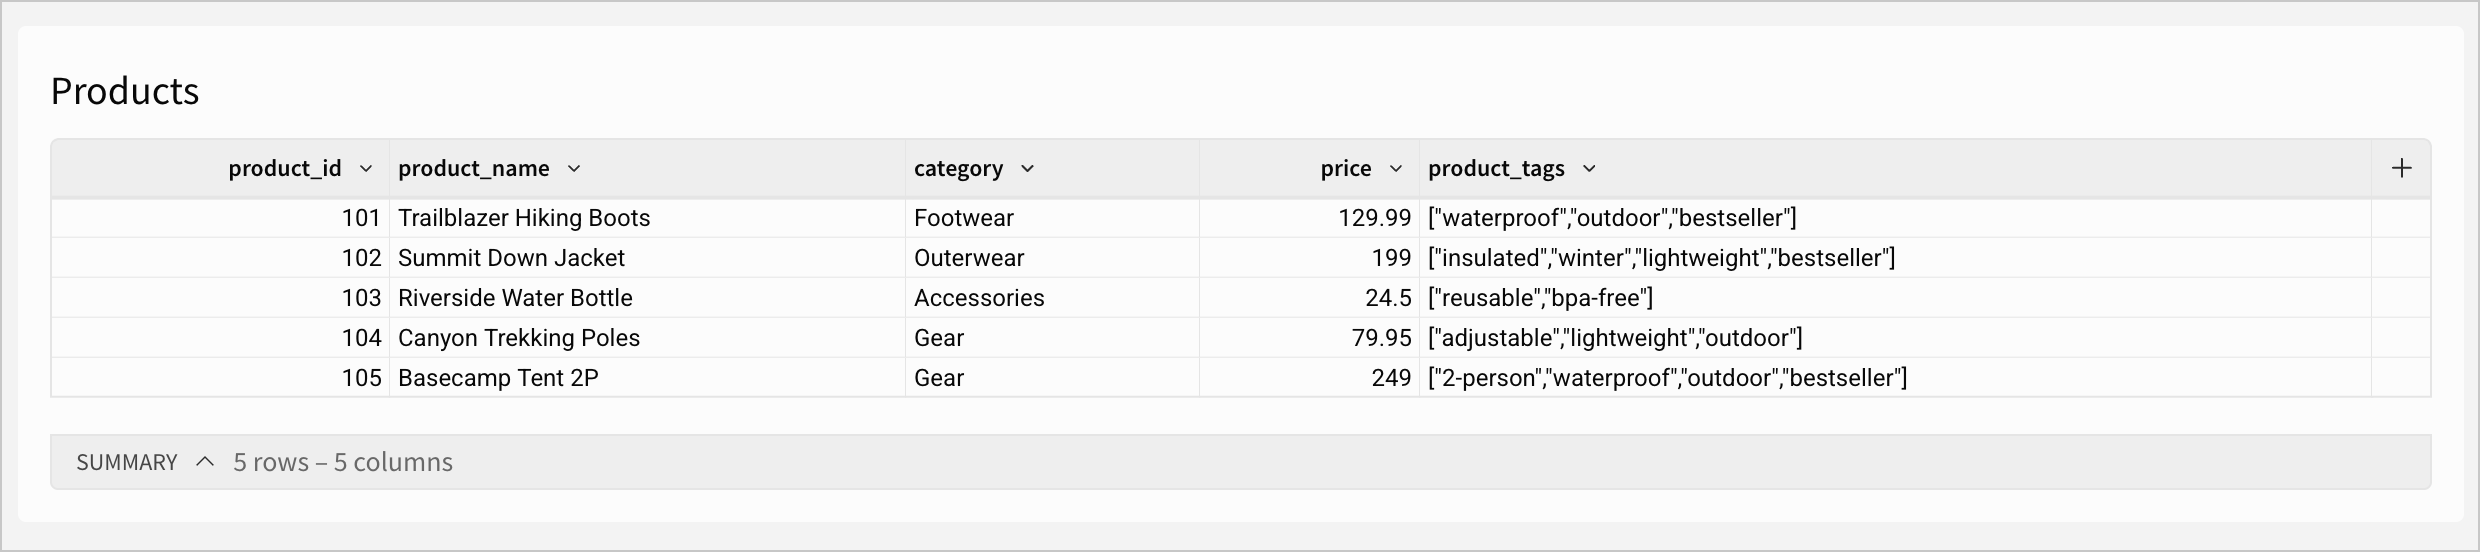
In an example scenario, imagine a table called Products where one row represents a product that a customer can order. In the Products table, there is a column, product_tags that contains an array of all the metadata tags that apply to that product.
If you want to analyze the performance of particular product tags, you can unnest the product tags array, so that each tag can be filtered or grouped independently:
-
From the Add element bar, select Table > Data > Unnest.
-
In the Select source modal, select the Products table element.
-
Click Select.
-
In the Unnest table modal, configure the following fields:
-
Select Submit.
The Unnest of Products table appears on the workbook canvas, with each value from the original product_tags array on its own row.
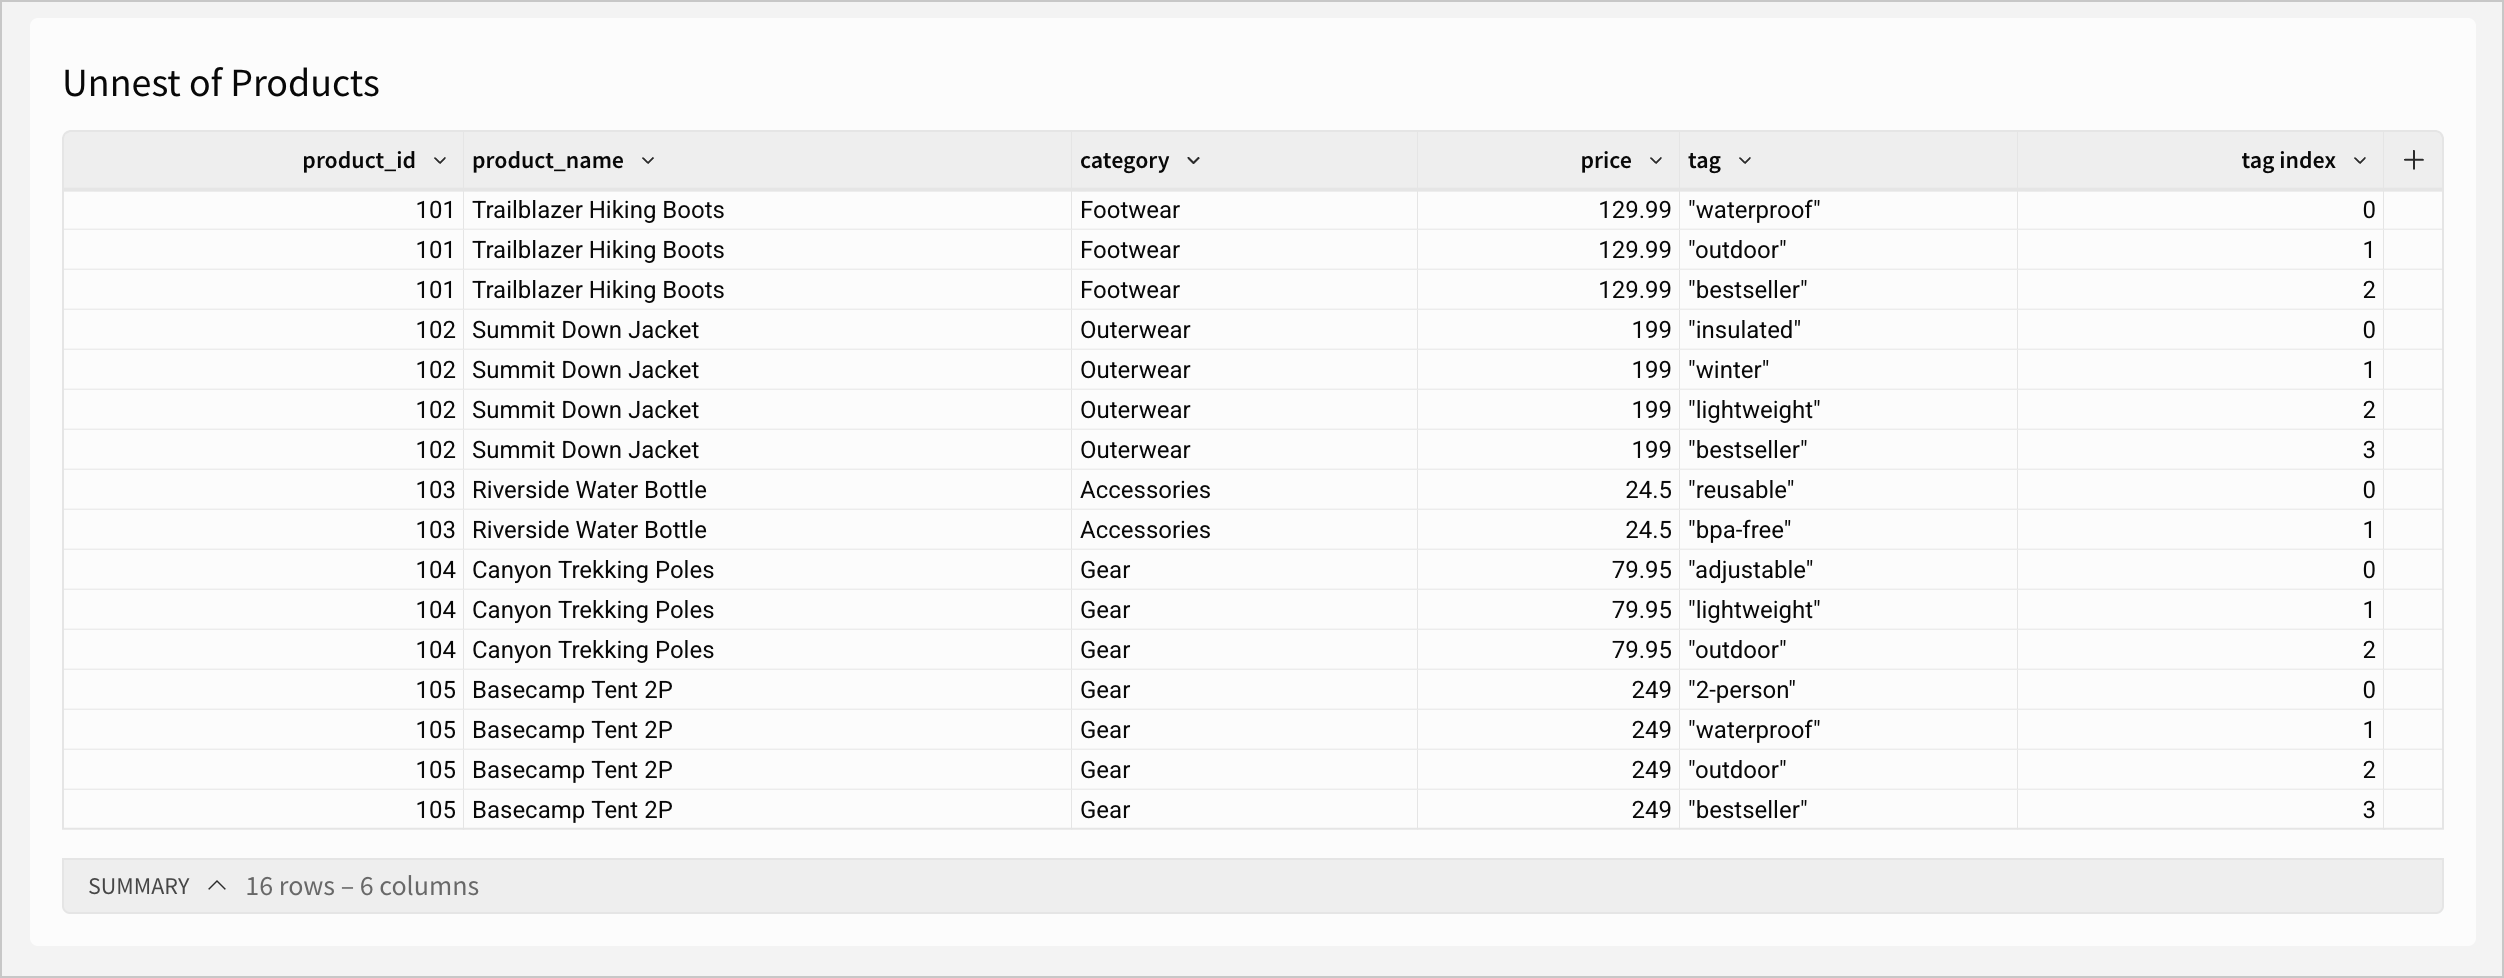
When performing aggregate calculations on unnested data, such as in table summaries or grouping calculations, avoid counting a row value from the original table multiple times in the calculation logic.
For example, each row in the Unnest of Products table represents one tag on one product. Because of this, there are multiple rows for each product from the original table. Because some products are now represented on more rows than others, calculating the average of all values in the price column would give a different result than the actual average price of those products.