
Manage users and teams with SCIM
Configuring SCIM for your Sigma organization will allow you to centralize management of users and teams through an Identity Provider (IdP).
The following guide introduces you to SCIM and walks you through how to configure it for your Sigma organization. The configuration instructions in this document are not IdP-specific, but they can be applied across multiple IdPs (e.g. Okta, Azure, etc).
If you are using Okta, follow the Okta specific instructions. If you are using Azure, follow the Azure specific instructions.
For more information on setting up SCIM for specific IdPs, see the Sigma Community post on Guidelines For Configuring OAuth and SAML Authentication.
Requirements
-
You must be assigned the Admin account type to initiate provisioning.
-
Your Sigma organization must already be authenticated with your IdP using SAML.
This feature doesn't work with the following authentication types: Password, SAML or password.
Understanding SCIM
What is SCIM?
The “System for Cross-domain Identity Management”, better known by its acronym SCIM, is a standard for the automation of user and group provisioning between a service provider, in this case Sigma, and an identity provider (IdP).
SCIM with Sigma and your IdP
Configuring SCIM for your organization will allow you to create and manage users and groups in your IdP and automatically push them to your Sigma organization as users and teams.
Once SCIM provisioning is enabled for both services, all management of users and teams must be done through your IdP. While not directly editable in Sigma, both will be displayed in your Sigma Admin Portal.
SCIM with SAML
Before you can configure SCIM for your organization, you will need to disable any password-based authentication methods.
SAML allows Single Sign On (SSO) and management of users. However, syncing new users and updates between your IdP and Sigma is not automatic; the user must log into Sigma for the update to carry over. When you add SCIM to your SAML configuration, you will gain the ability to manage Sigma teams from your IdP, and both user and group/team data in your IdP will automatically be pushed to your Sigma organization, regardless of user login.
What to expect when transitioning to SCIM
Are you considering transitioning to SCIM after already creating users and teams in Sigma? This section will discuss what to expect when you transition.
Will I be able to edit users and teams in Sigma?
All management of users and teams must be done through your IdP. While not directly editable in Sigma, both will be displayed in your Sigma Admin Portal.
Guest user accounts are not supported when using SCIM.
What will happen to my existing users and teams?
Existing users and teams will remain in Sigma. However, they will no longer be editable through the Sigma Admin Portal.
Users: Your IdP may allow you to link to an existing user with the same email address in Sigma. No work will be lost, and Admin management of that user can then be maintained through your IdP. Alternatively, you may be able to import users from Sigma into your IdP.
User account types: If you switch management of a user originally created in Sigma over to your IdP, Sigma will automatically respect the account type defined in the IdP, regardless of what was originally set in Sigma.
Guest users: If you previously allowed guest users to your organization, transitioning to SCIM will disable their accounts and they will no longer be able to log in.
Teams: Your IdP may allow you to link a group in your IdP to an existing team in Sigma. No work will be lost, and Admin management of that group/team can then be maintained through IdP.
Configuration instructions
[Prerequisite] Set up authentication
If you have not already, connect your IdP to Sigma using SAML for authentication; see Manage authentication.
[Step 1] Enable Provisioning in Sigma
-
Log in to Sigma. You must be assigned the Admin account type.
-
Open your Sigma Admin Portal.
-
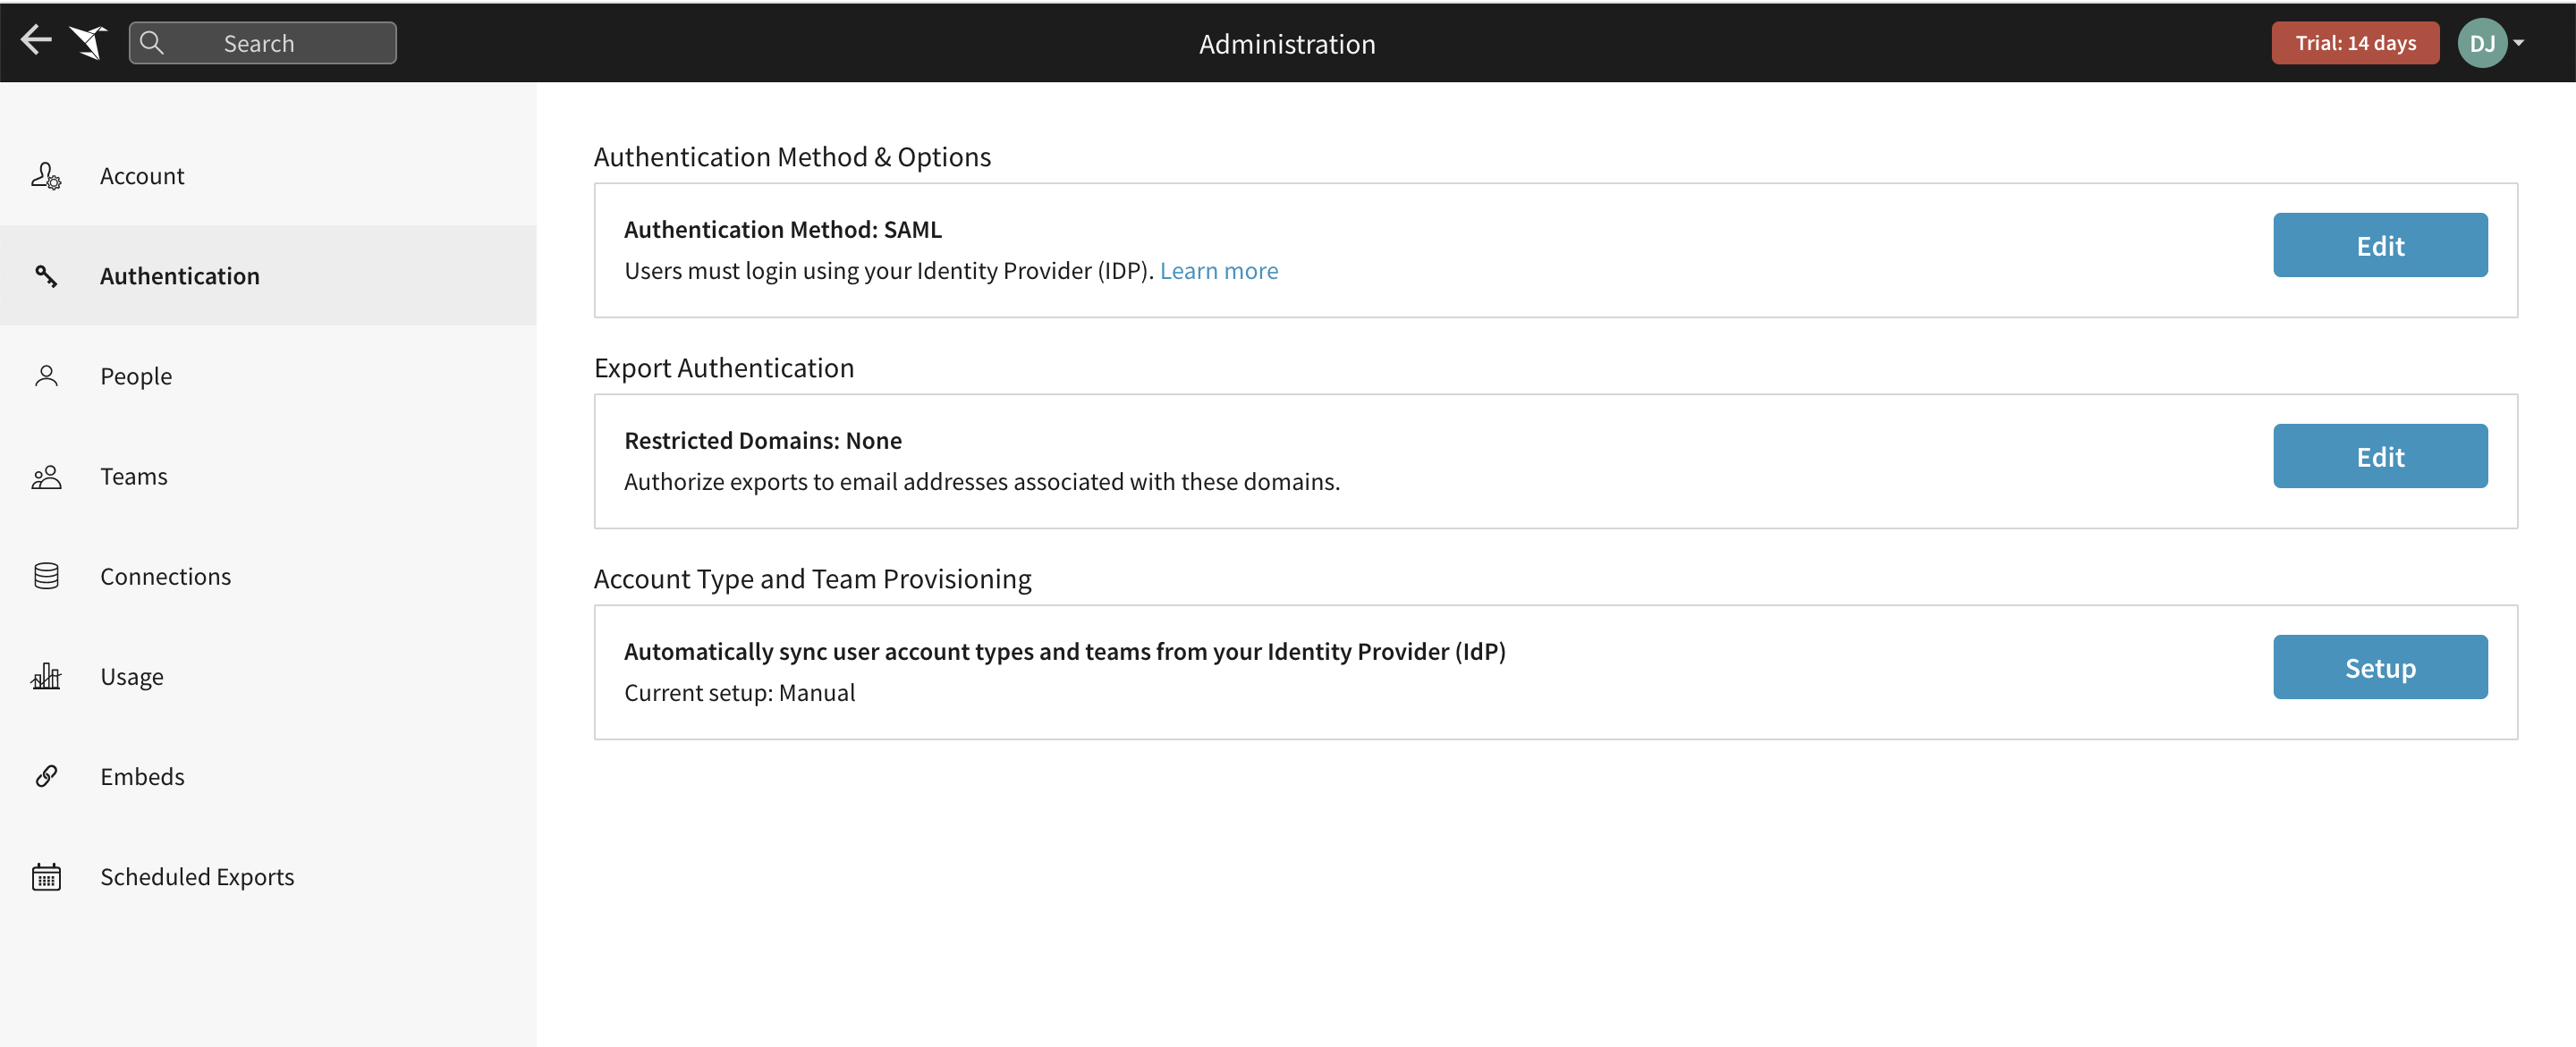
In the left panel, click Authentication to open your organization’s Authentication page. Note: If you have not yet configured SAML, please do so now using the "SAML or password" authentication method; see Single Sign-On with SAML.
-
If your authentication method is set to "SAML or password", please change it to SAML only.
-
Click the Set up button under Role and Team Provisioning to open the Provisioning modal. Note: This section will only be visible if your Authentication method is SAML (not "SAML or password").
 Note: If Account Type and Team Provisioning are disabled, changes in your IdP will no longer propagate to Sigma.
 -
Read through the notes provided on the getting started section of the Provisioning modal. Check the confirmation box, and click Next to continue.
-
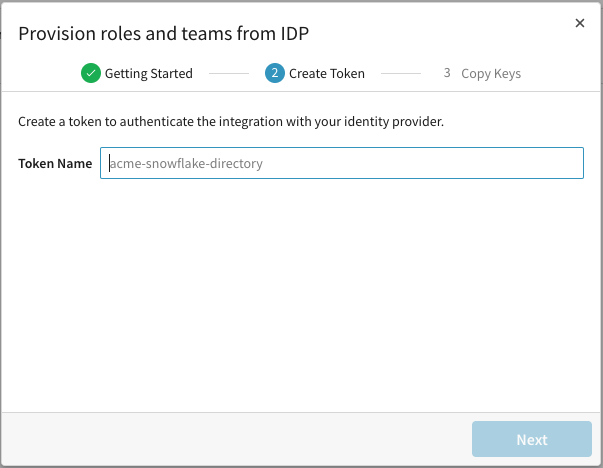
You will now be asked to create a token to authenticate your integration with your IdP. Enter a token name. Then click Next.
-
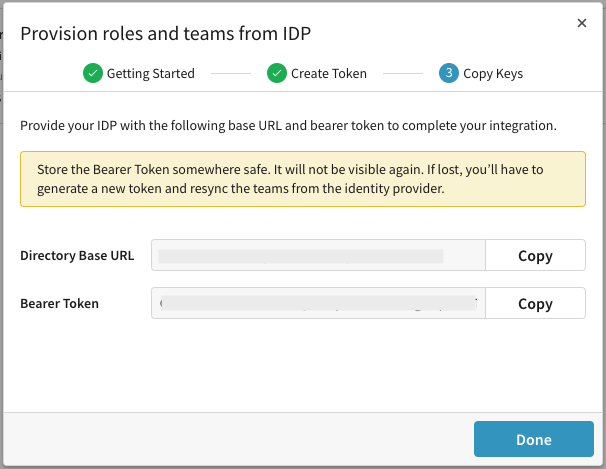
Sigma will provide you with a Bearer Token and Directory Base URL. Copy and store these values in a secure location. You will use them when completing the integration with your IdP.
-
Click Done.
[Step 2] Enable provisioning in your IdP
Next, you will need to configure provisioning in your IdP. This process may vary depending on your IdP of choice. If you’re using Okta, follow Sigma’s Okta specific configuration instructions. If your company uses a different IdP, follow that IdPs instructions for setting up a SCIM provisioning.
Regardless of your IdP, you will need the Bearer Token that was generated when you enabled provisioning in Sigma. If you are using an IdP other than Okta, you will also need to provide your Sigma-generated Directory Base URL.
Do not use SCIM provisioning for the same user across multiple IdPs. Users should be provisioned by a maximum of one IdP to avoid conflicts in information between IdPs.
For all IdPs that you plan to provision from, use the same SCIM secret.
[Step 3] Add users and push groups/teams
After provisioning is enabled, you can start managing users and groups/teams from your IdP and pushing these updates to Sigma. Management of users and teams from the Sigma Admin Portal is longer available.
Refer to your IdP's instructions for guidance, or if you use Okta, visit the guides to add users and push groups/teams.
Troubleshooting
Please reach out to Sigma Support with any questions during your configuration process.
(1) I added a new user to my Sigma application, but their account has not shown up in Sigma. What should I do?
Provisioning users and groups may take a few moments. If provisioning is taking longer than expected, we recommend checking your IdPs provisioning status page, if available. If the user was assigned before provisioning was configured, you may need to remove and re-assign users.
(2) A users that used to be assigned to a team in Sigma before I enabled SCIM remained in that team even when aren't in the application group in my IdP that is supposed to now sync to the team now that SCIM is enabled.
It's recommended that you use the API to update the teams. You can also turn off SCIM in Sigma, make the changes to your teams, then turn it back on.
(3) The Admin who originally set up our provisioning has left or taken on a new role (account deactivated, unassigned, or account type changed). Now we’re hitting errors when attempting to push data from our IdP to Sigma. What happened?
Provisioning is associated with the Sigma Admin who originally set up provisioning in Sigma. If you wish to remove or update this user’s account type, you will also need to remove and re-enable provisioning in Sigma with a new Admin user. This will generate a new bearer token. Provide your IdP with the updated bearer token, and rerun any provisioning tasks that might have failed.
(4) Can I change a user’s username?
This action is not recommended. Changing a user’s username will result in the creation of a new account in Sigma. It will not update the existing user’s username.
(5) How can I deactivate user accounts that were already in Sigma prior to configuring SCIM?
User accounts that predate the configuration of SCIM cannot be managed via IdP or the Sigma UI. In order to deactivate such user accounts, an admin in Sigma can update the member by making a PATCH request to the PATCH /v2/members/{memberId} endpoint and set the isArchived field to true for the user.
Limitations
- Importing groups to an IdP from Sigma teams is not currently supported.
- Sigma cannot guarantee that SCIM provisioning works with any IdP. If you have questions about using a specific IdP with Sigma, please contact Sigma Support.
Updated 4 months ago