
Create a secure embed
Secure embedding allows you to securely integrate Sigma content into another application without requiring users to authenticate through Sigma. You can embed an entire workbook, data model, or report, or a specific page, or individual chart or table element in the document. The secure embed inherits the host application's user security configurations at runtime to implement the appropriate level of control over access to Sigma content.
This is a premium feature. To enable it for your Sigma organization, contact your Sigma Account Executive.
This document provides an overview of the workflows required to create a secure embed.
Requirements
You must be assigned the Admin account type or have been granted embedding credentials by an admin. See Generate embed client credentials for more information.
Depending on your access to the host application, you might require assistance from your engineering team when completing the server-side requirements.
About secure embedding
This document provides an overview of the workflow required to create secure embed URLs signed with JSON Web Tokens (JWTs):
- JWTs are compact, URL-safe tokens that can be digitally signed, ensuring that the data they contain is tamper-proof.
- JWT URLs can authenticate internal Sigma users to access embedded content with the same email address they use for their Sigma account.
- JWT URLs enable you to disable automatic embed user account provisioning for non-Sigma users, effectively restricting your embed content to the users you have explicitly provisioned in Sigma or your IdP. Allow you to choose how to manage your users and team access.
Authentication flow
This diagram displays how access is secured between the end user browser, the client front end, client back end, and Sigma.
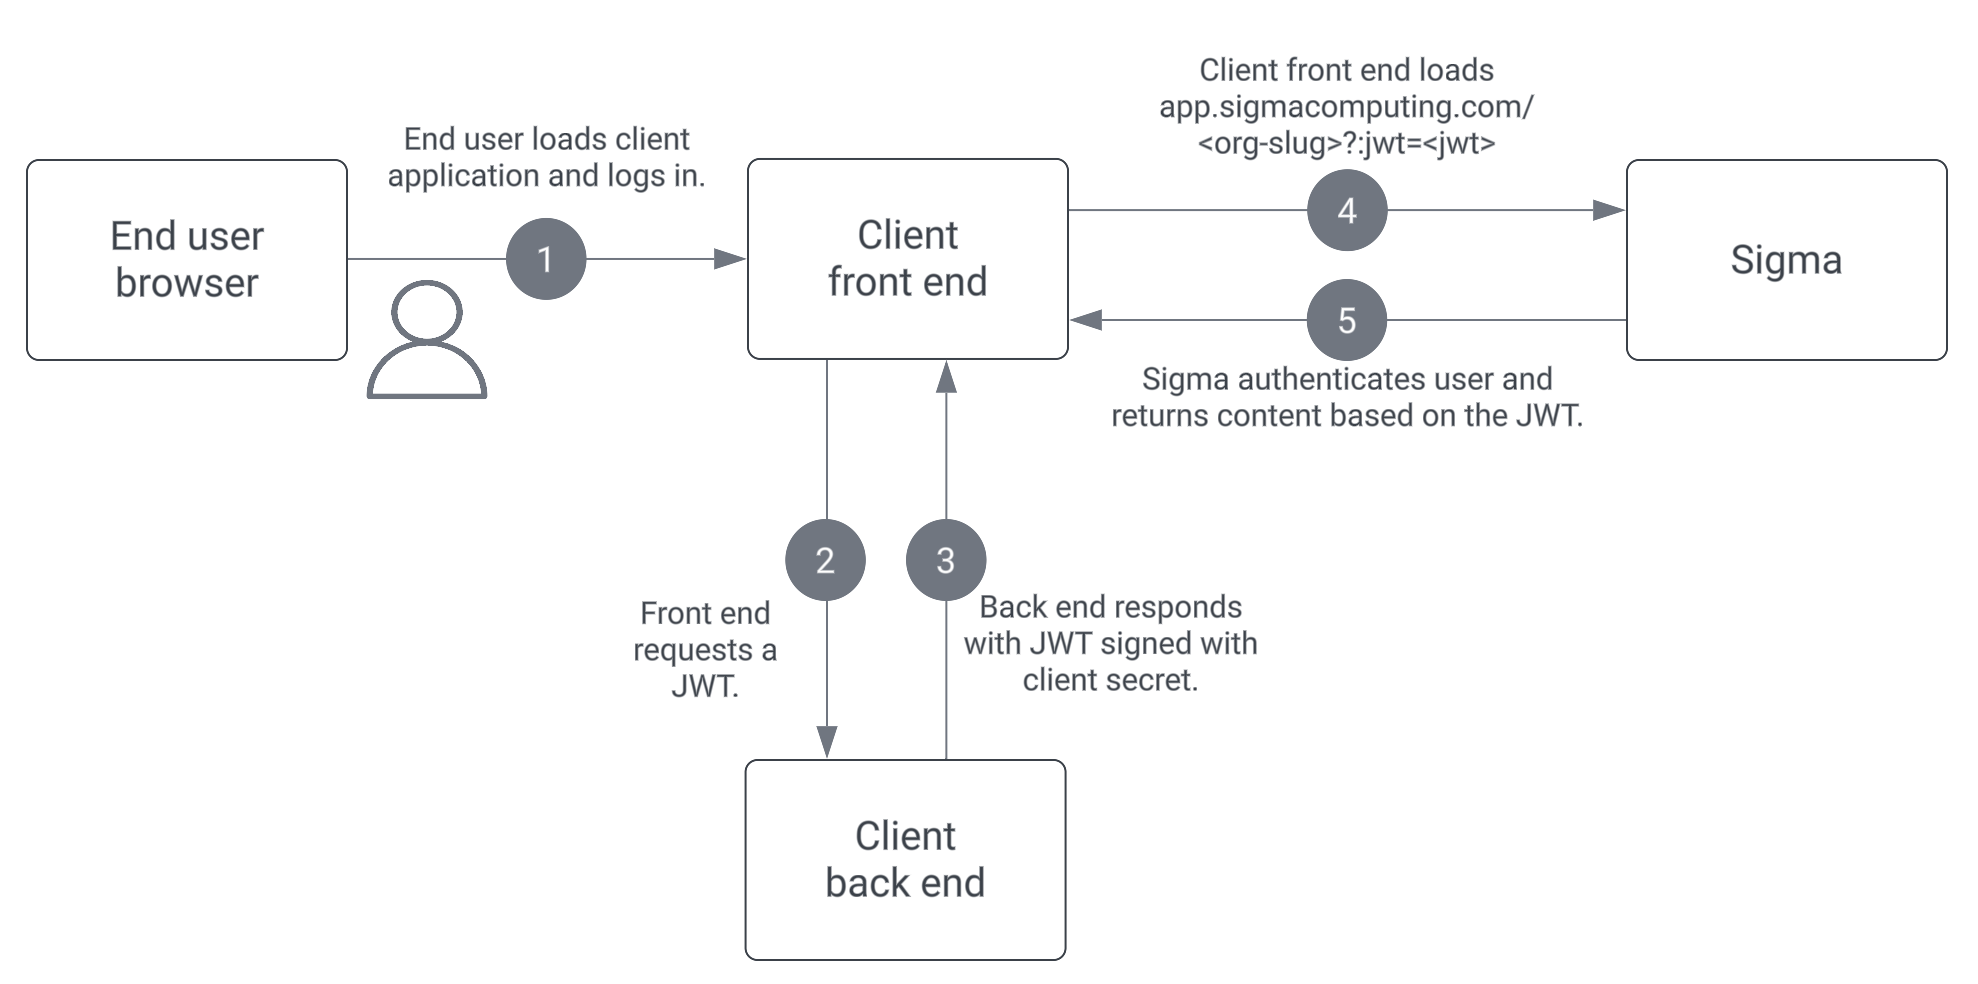
When a JWT is issued, thejticlaim, a unique identifier for the token, is stored server-side. When the JWT is used to access an embedded Sigma workbook, the server checks whether the value passed for thejtihas already been seen. If it has, the token is rejected as a replay attempt, ensuring it can't be reused.
Workflow to create a secure embed
Follow these steps to access the documentation for each step:
-
Generate embed client credentials. The client credentials (a unique client ID and client secret) are required to sign the JWT for the embedded Sigma content in the host application.
-
Manage access to your embedded content. Determine how to manage user access to your embed using teams and more.
-
Build a URL by copying the published link that points to the Sigma content you want to embed.
-
Test the embed in Sigma’s embed sandbox. Configure and test optional interface, security, and user attribute claims.
-
Create an embed API to interact with Sigma's services. This API manages requests and responses between the host application and Sigma. See Example embed API via JWT secure method for more details.
-
Implement your API to render the Sigma content in the host application interface.
For details about creating a secure embed URL signed by embed credentials, which is now deprecated, see Secure embedding with signed URLs.