
Upload CSV data
Upload a CSV file to write CSV data to a connected data platform. Upload the data directly to an existing workbook as a table, pivot table, input table element, or chart element, or upload it to a data model to reuse the data across multiple workbooks. You can also upload a CSV file and perform ad hoc analysis in an exploration.
This document explains how to upload a CSV file, customize parsing options, and view parsing errors.
System and user requirements
The ability to upload a CSV file requires the following:
- When selecting a write destination for the uploaded data, you must choose a connection with Write access enabled.
- The CSV upload feature must be enabled for your organization.
- You must be assigned an account type with the Upload CSV permission enabled.
- To upload a CSV file to a workbook or data model, you must be the document owner or have Can edit access.
Limitations
The default maximum file size for CSV uploads is 200MB. Depending on your organization's settings, the file size limit can be 1GB. This can be configured by an organization admin (see Choose the default or increased CSV upload limit).
Where uploaded CSV data is stored
When a user uploads a CSV file to Sigma, the data is written to your data platform as a new table in the schema used for write-back. If your organization uses multiple connections with write access enabled, users with access to more than one connection are required to choose one to write the CSV data to.
Before any data is written to your data platform, however, the data flow can follow one of two possible paths, depending on your organization settings. These paths differ in where the raw and processed CSV files are staged before the data is written to your data platform.
- Sigma-owned cloud storage (default): Staging files are temporarily stored in a Sigma-owned storage bucket in Sigma's infrastructure.
- Customer-owned cloud storage: Staging files are temporarily stored in a customer-owned storage bucket in your organization's cloud platform. See Choose Sigma-owned or customer-owned cloud storage for staging CSV files.
If a user uploads a CSV file to a workbook, the data is only accessible from the specific workbook using the CSV file. When browsing the connection's data catalog, users cannot see the table created from the CSV upload, and if a user deletes the workbook, the data from the CSV file is no longer accessible.
To make CSV data available for reuse across multiple workbooks, upload the CSV file to a data model. You can also create a new data model from an existing workbook table or input table that was populated by a CSV upload.
Upload a CSV file to a workbook or data model
Upload CSV data to a workbook or data model by creating a table, pivot table, input table, or chart and selecting CSV data as its source.
-
Create a new workbook or data model, or open an existing one and select Edit in the document header to open the draft.
-
Go to the Add element bar and add a table, pivot table, input table, or chart element:
-
To add a table element, select Data > Table, then select CSV in the Select source modal.
-
To add a pivot table element, select Data > Pivot table, then select CSV in the Select source modal.
-
To add an input table element, select Input > CSV.
-
To add a chart element, select Chart and choose a specific chart type, then select CSV in the Select source modal.
-
-
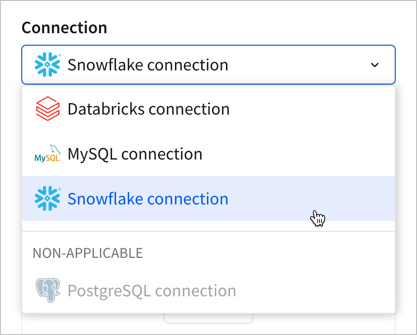
In the Upload CSV page, select the Connection dropdown and choose an available write destination. You can only choose a connection with write access enabled. If a connection is listed as non-applicable, write access is likely not enabled.
-
Drag and drop a file, or click Browse and choose one from the file picker.
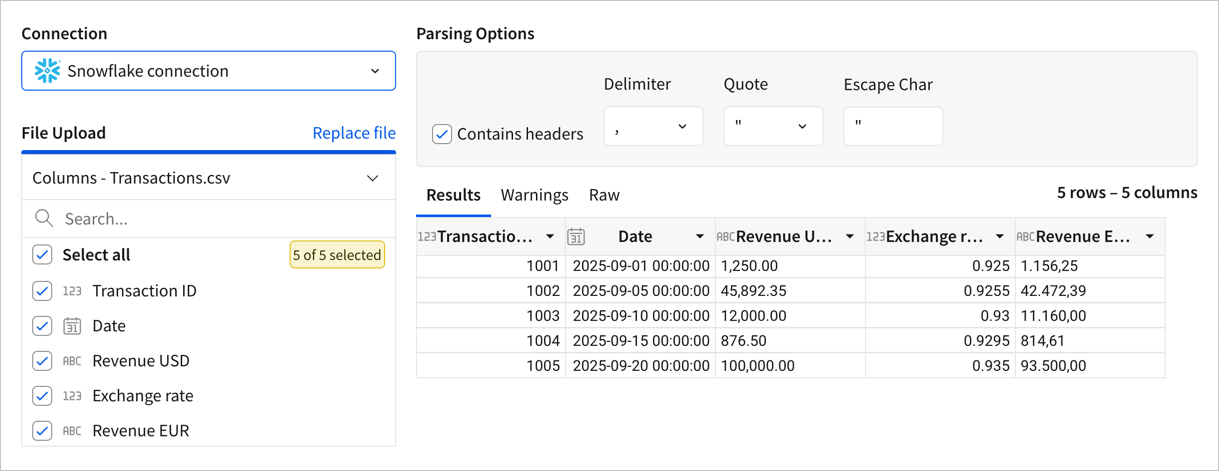
Sigma displays a preview of the data, allowing you to customize parsing options and view errors before completing the upload.
-
(optional) In the Parsing options section, customize the parsing parameters (headers, delimiter, quote, and escape character).
-
(optional) If the upload contains numbers with separators, determine how the values are parsed. See Parse numbers with separators in this document.
-
(optional) In the left panel, clear the checkbox for any column that you want to exclude from the upload.
-
Review the uploaded data and address errors as needed.
-
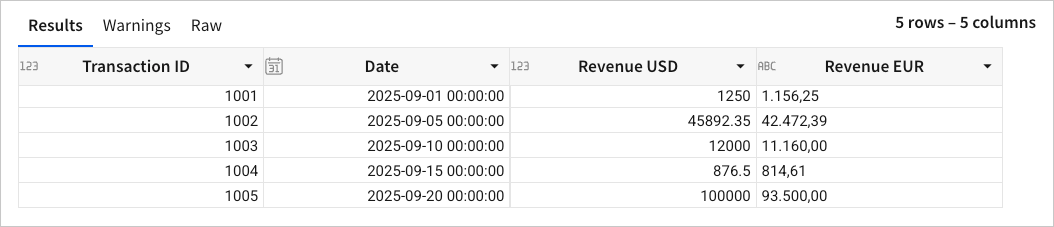
Results tab: Displays a tabular preview of the data to be uploaded.
-
Warnings tab: Lists parsing errors.
-
Raw tab: Displays the raw CSV data.
-
-
In the header, click Save to finish creating the element sourced from CSV data.
Upload a CSV file for ad hoc exploration
Upload CSV data to perform ad hoc analysis in an exploration.
-
From your Home page, click Create new and select Upload CSV from the dropdown.
-
In the Upload CSV page, select the Connection dropdown and choose an available write destination. You can only choose a connection with write access enabled. If a connection is listed as non-applicable, write access is likely not enabled.
-
Drag and drop a file, or click Browse and choose one from the file picker.
Sigma displays a preview of the data, allowing you to customize parsing options and view errors before completing the upload.
-
(optional) In the Parsing options section, customize the parsing parameters (headers, delimiter, quote, and escape character).
-
(optional) If the upload contains numbers with separators, determine how the values are parsed. See Parse numbers with separators in this document.
-
(optional) In the left panel, clear the checkbox for any column that you want to exclude from the upload.
-
Review the uploaded data and address errors as needed.
-
Results tab: Displays a tabular preview of the data to be uploaded.
-
Warnings tab: Lists parsing errors.
-
Raw tab: Displays the raw CSV data.
-
-
In the header, click Explore to view the CSV data in an exploration.
Parse numbers with separators
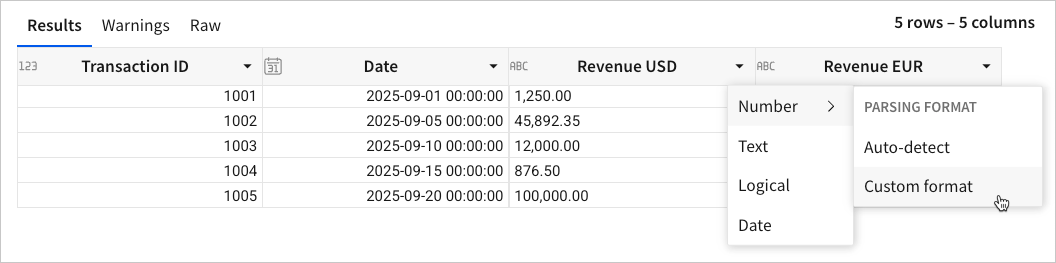
When a column in an uploaded CSV file contains numbers with separators (commas, periods, spaces, etc.), Sigma parses the data as text by default. To parse the data as numbers, you can choose to have Sigma automatically detect the number format pattern, or you can specify a format.
-
While previewing uploaded CSV data, identify a column of text values that must be parsed as numbers.
-
In the column header, click the down arrow (
 ) to open the column menu, then hover over Number and choose one of the following parsing options:
- Auto-detect: Sigma automatically detects the format pattern and parses the data as numbers accordingly. Sigma can currently detect US standard number format1 and European number format2.
- Custom format: Specify the number format pattern for Sigma to parse.
-
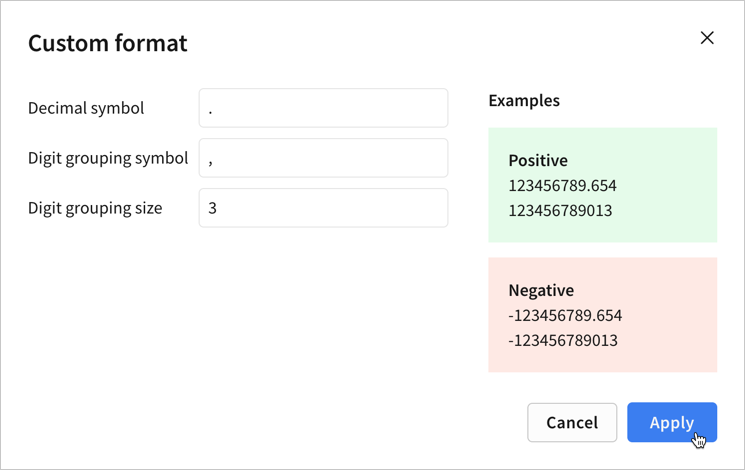
If you chose Custom format in the previous step, complete the fields in the modal, then click Apply:
- Decimal symbol: Enter the symbol used to separate the integer and fractional parts of the number.
- Digit grouping symbol: Enter the symbol used to separate groups of digits.
- Digit grouping size: Enter the number of digits in each group.
-
Review the data preview and confirm that the number data is parsed correctly.
-
Repeat steps 1 through 4 for all columns containing text values that must be parsed as numbers, then complete the CSV upload as explained in Upload a CSV file to a workbook or data model or Upload a CSV file for ad hoc exploration.
Footnotes
Updated 12 days ago