
Configure Warehouse Data Editing (Deprecated)
As of February 2022, this feature is deprecated and available to a limited group of organizations with legacy access.
Sigma's warehouse data editing feature allows you and your team to update your warehouse data directly from Sigma’s spreadsheet interface. As an Admin, you can choose which connections and individual Tables support data editing. Sigma level access permissions also allow you to control which organization members and/or teams can edit your data.
Requirements
- You must be a Sigma Admin to configure this feature. Learn about user account types.
- You may need to make configuration updates in your warehouse (see Step 1: Configure Data Editing on your Connection). If so, you will need the appropriate warehouse privileges.
Configure Data Warehouse Editing
Step 1: Configure Data Editing on your Connection
The following steps outline how you can enable Data Editing for your warehouse connection. Depending on your current connection configuration, you may need to make updates in Sigma and/or in your warehouse.
-
Confirm that the User/Role associated with the connection has permission to UPDATE the intended Tables in the warehouse. Warehouse permission should be granted at the Table level.
For guidance, please reference your warehouse’s documentation:
- Snowflake (If you use a Snowflake with OAuth connection, permissions are granted to individuals on your OAuth provider.)
- Redshift
- BigQuery
-
If your warehouse supports table primary keys, and if you do not already have one selected, set one now.
If a primary key is not defined in your warehouse, you are prompted to select one directly in Sigma. Sigma recommends that you define this key in your warehouse if possible.
-
[optional] To track who updated a row and when it was updated, add empty date and string columns to your warehouse table. From within Sigma, you’ll configure these columns to be automatically updated when changes are made.
For more information, see the Track UPDATED_AT and UPDATED_BY section.
Step 2: Set up Data Editing on a Table
-
Open the Table you would like to make editable from Sigma.
This can be done from the Connection section of Sigma’s left navigation panel.
-
Click the Edit button in the Table header to enter Edit mode.
-
Open the Table page’s Columns tab.
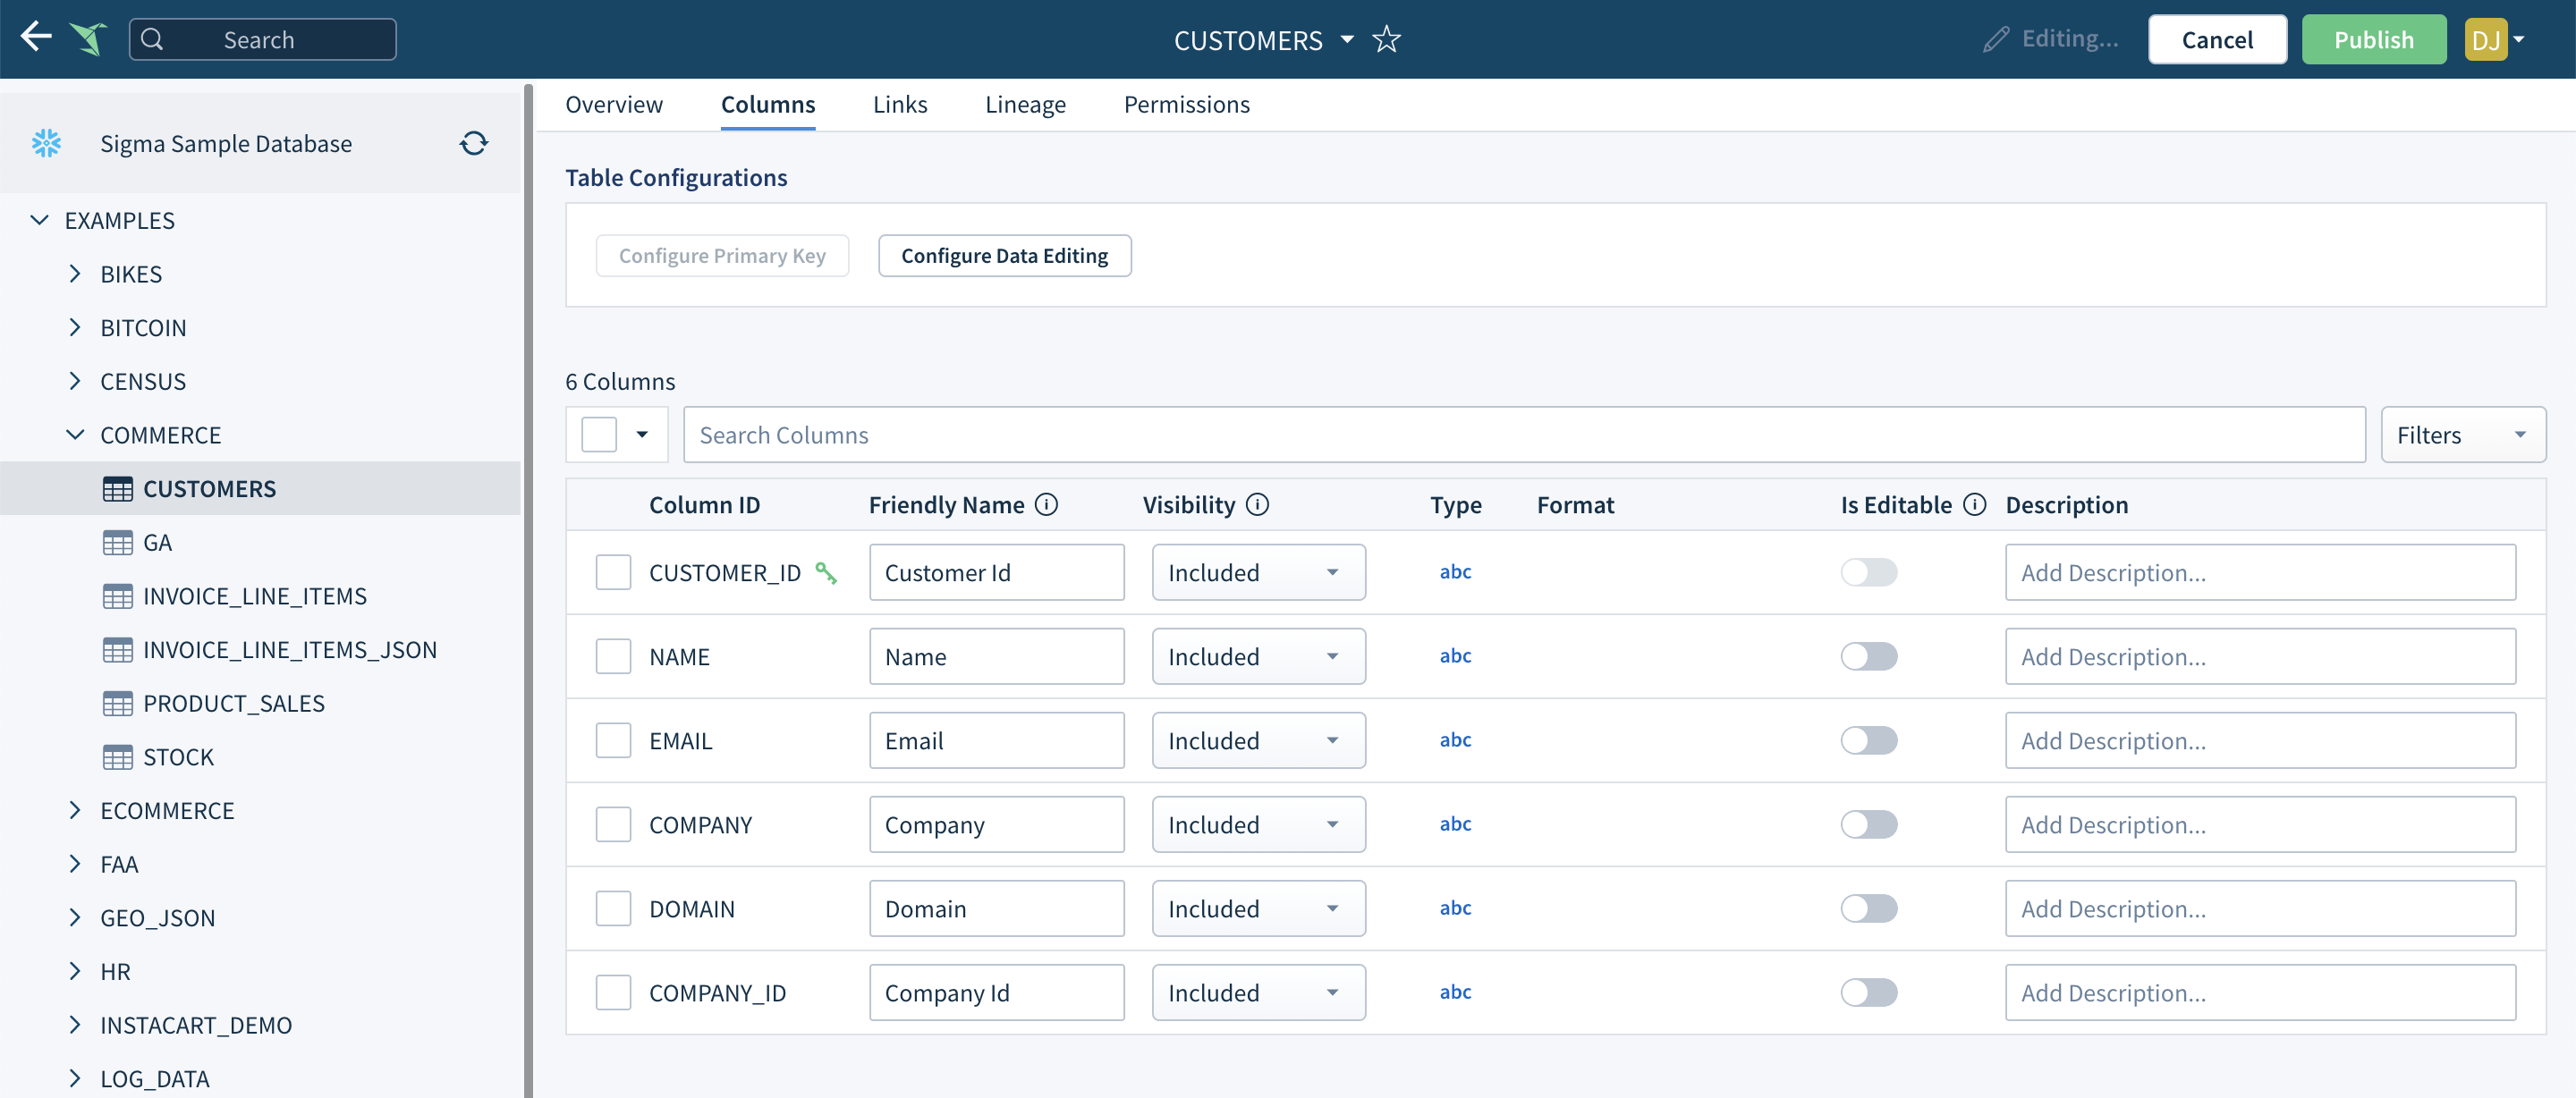
-
If a table primary key is not yet set in your warehouse, or if your warehouse does not support primary keys, click the Configure Primary Key button under Table Configurations. Then select a key from the available columns and save.
Note: We highly recommend setting a primary key in your warehouse if supported. -
In the column list, switch on Is Editable for any columns you would like to permit edits on.
-
[optional] Define a list of optional input values for individual editable columns by clicking the gear icon and populating the Column Configuration value list. Learn more.
-
[optional] Click the Configure Data Editing button under Table Configurations, to define columns for tracking who updated a row (
UPDATED_AT) and when it was updated (UDPATED_BY). -
Click the Publish button in the top right corner of your table’s header.
-
To confirm that editing has been enabled for your table, open the Table’s Overview tab, and look for the Edit Cell Values button on the right hand side of the page. Clicking this button will bring you and other editors to the table’s Warehouse Data Editing page.
Select which Column are Editable
Data editors can only edit the Table columns you, as an Admin, declare editable. By default, all Table columns are NOT editable. To select which columns are editable:
-
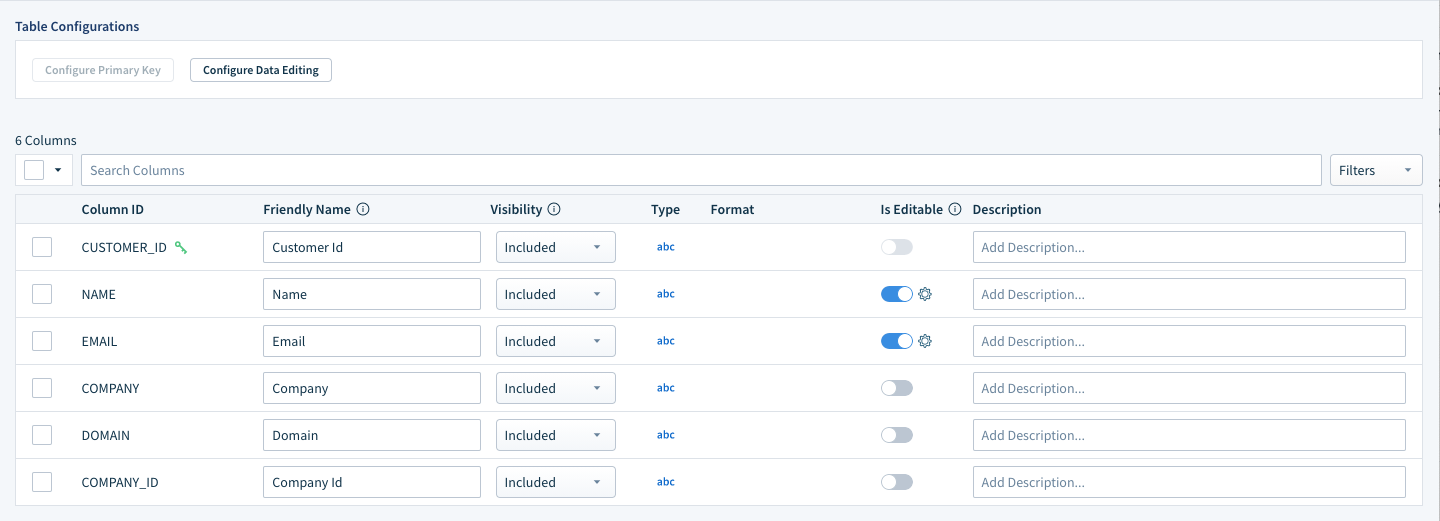
Open the Table page’s Columns tab. And, if you have not already, click the ‘Edit’ button to put the Table in edit mode.
-
In the column list, click the Is Editable toggle next to the column to enable or disable editing.

Define Limited Input Options for Columns
Selectable value lists can be created on a per-column basis. Create a list of possible cell values for the column, and the list will be displayed whenever someone begins editing a cell. Editors will be limited to using only these values when updating the table.
If a value options list is not provided, editors will be permitted to enter any value matching the column’s type.
-
Open the Table page’s Columns tab. And, if you have not already, click the ‘Edit’ button to put the Table in edit mode.
-
If a column is editable, you will see a gear icon under the column table’s Is Editable column. Click this gear icon to open the Column Configuration model.
-
Add one or more value options to the list.
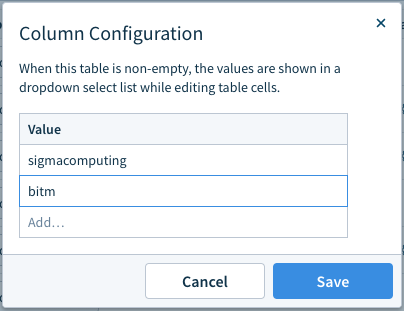
-
Click Save.
Track UPDATED_AT and UPDATED_BY
You can optionally choose to track UPDATED_AT and UPDATED_BY data by adding these columns to your table from the warehouse
-
Add columns for
UPDATED_ATandUPDATED_BYdata to the table in your warehouse. -
Open the table in Sigma.
-
Click the Edit button in the table header to enter Edit mode.
-
Select the Columns tab.
-
Under Table Configurations, click the Configure Data Editing button to open the associated modal.
-
In the modal, select your target
UPDATED_ATandUPDATED_BYcolumns under the corresponding header.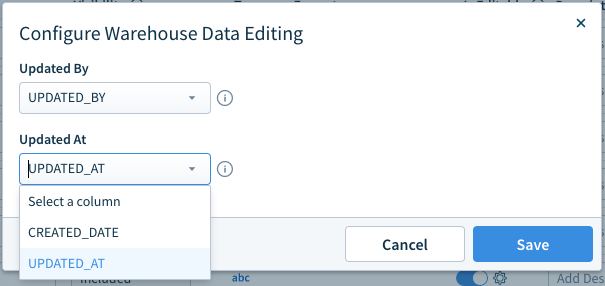
-
Click Save.
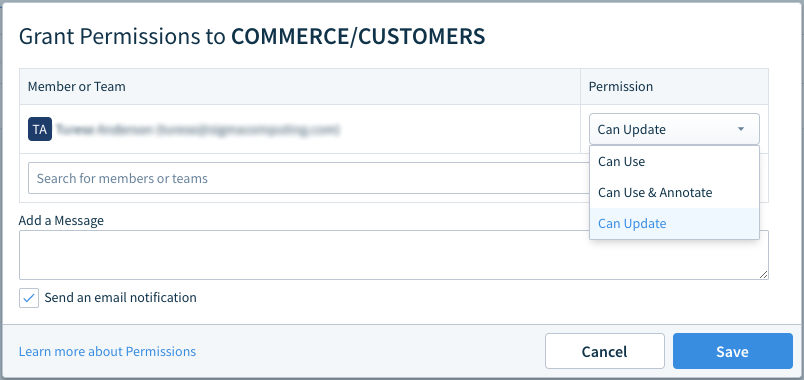
Step 3: Grant Table “Can Update” Permissions to Users in Sigma
Sigma 'Can Update' permission can only be granted at the Table level. Table update permission is also required in the warehouse (see Step 1: Configure Data Editing on your Connection).
-
Open the table in Sigma.
This can be done from the Connection section of Sigma’s left hand navigation panel.
-
Navigate to the table's Permissions tab.

-
Click the Add Permission button to open the permissions modal.
-
Enter the organization member or team.
-
Under Permission, select ‘Can Update’. Learn more about permission options.
-
(Optional) Enter an email message to notify the grant recipient(s) of their new permission. You may also choose to opt out of sending an email.
-
Click Save.
Disable Warehouse Data Editing for your Organization
Warehouse Data Editing is enabled by default for all organizations. This means that users assigned the Admin account type have the option to configure the feature on a per-connection basis. Individual users cannot use this feature without this Admin configuration.
If you do not plan to configure Warehouse Data Editing, you can disable it at the organization level. To do so:
- Open your Admin Portal.
- On the Account page, find the section titled Features.
- Click the toggle switch next to **Warehouse Data Editing.