
Write custom SQL
When you explore your data platform using the SQL editor, you can preview SQL queries and create workbooks, data models, and datasets directly from SQL.
This document describes how to do the following:
- Create a workbook from SQL
- Create a SQL workbook element
- Reference existing Sigma workbook elements
- Use shortcuts, including:
- Toggle within SQL-based workbook data elements to an inline SQL editor with side-by-side display.
- Auto-format your SQL query.
- Use find and replace within your SQL query.
Requirements
- To use this feature, you must be assigned an account type with the Write SQL permission enabled.
- To run custom SQL, you must be granted Can use access for an entire connection. See Manage access to data and connections.
- The SQL editor only appears if you have connection-level access to at least one connection in your organization.
Limitations and considerations
Query limitations
- Sigma incorporates your custom SQL as a subquery inside a larger query with other workbook contents. Because of this, any SQL statement that cannot be performed in a subquery or CTE is not supported in Sigma's custom SQL editor, including:
- Data Manipulation Language (DML) or Data Definition Language (DDL) statements.
- Multiple queries in one custom SQL editor. This limitation applies to statements such as
SETandUSE DATABASErun before another query.- To store and use a variable in custom SQL, consider referencing a workbook control value.
- To change the database or schema, consider using dynamic schema selection or explicitly stating database and schema in your query.
- Sigma does not support the use of ordinal positions to select columns from Sigma elements in custom SQL. For example,
SELECT $1 FROM sigma_element('table')is not supported as syntax for referencing the first column in a table.
Row and column order limitations
- Because Sigma incorporates your SQL query into an optimized query with other workbook contents, sort orders defined in your custom SQL cannot be guaranteed. To guarantee sort order for records in a custom SQL element, apply a sort from the table UI.
- Because users can change column order in both the table UI and the SELECT statement of a SQL query, Sigma stores the column order according to the first query run for each custom SQL element. This has the following consequences:
- Changes to column order made in the table UI after the first run will be respected, but changes to column order made in the SELECT statement after the first run may not be.
- To return columns in the order defined in the SELECT statement of your custom SQL query, create a new custom SQL element, copy your query into it, and run your query. This must be the first query run in that custom SQL element.
Considerations
- Sigma converts all timestamps to your organization’s timezone. This has the following consequences:
- If a column in your data platform has timezone data, Sigma converts the timestamp to your organization’s timezone while preserving the moment in time. For example, a column stating the timestamp
2025-09-10 10:00:00.000for theAmerica/New_Yorktimezone is converted to2025-09-10 07:00:00.000if your Sigma organization has theAmerica/Los_Angelestimezone. - If a column in your data platform has no timezone, Sigma interprets it as if it is in your organization’s timezone, but does not convert the timestamp. For more details on timezone handling, see How Sigma displays date data.
- If a column in your data platform has timezone data, Sigma converts the timestamp to your organization’s timezone while preserving the moment in time. For example, a column stating the timestamp
Create a workbook from SQL
To create a workbook from a SQL query, do the following:
-
Open Sigma Home.
-
In the navigation panel, click
 Create New, then select Write SQL to open the SQL editor.
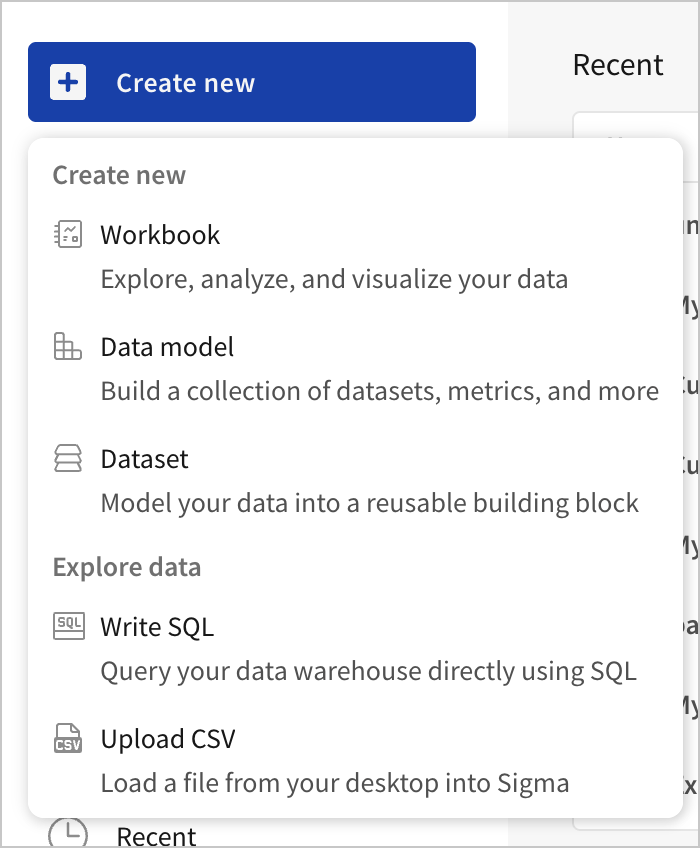
-
In the side panel, click Select a Connection and select the connection you want to query.
-
In the query editor, enter your SQL query. Sigma provides autocomplete suggestions to guide you.
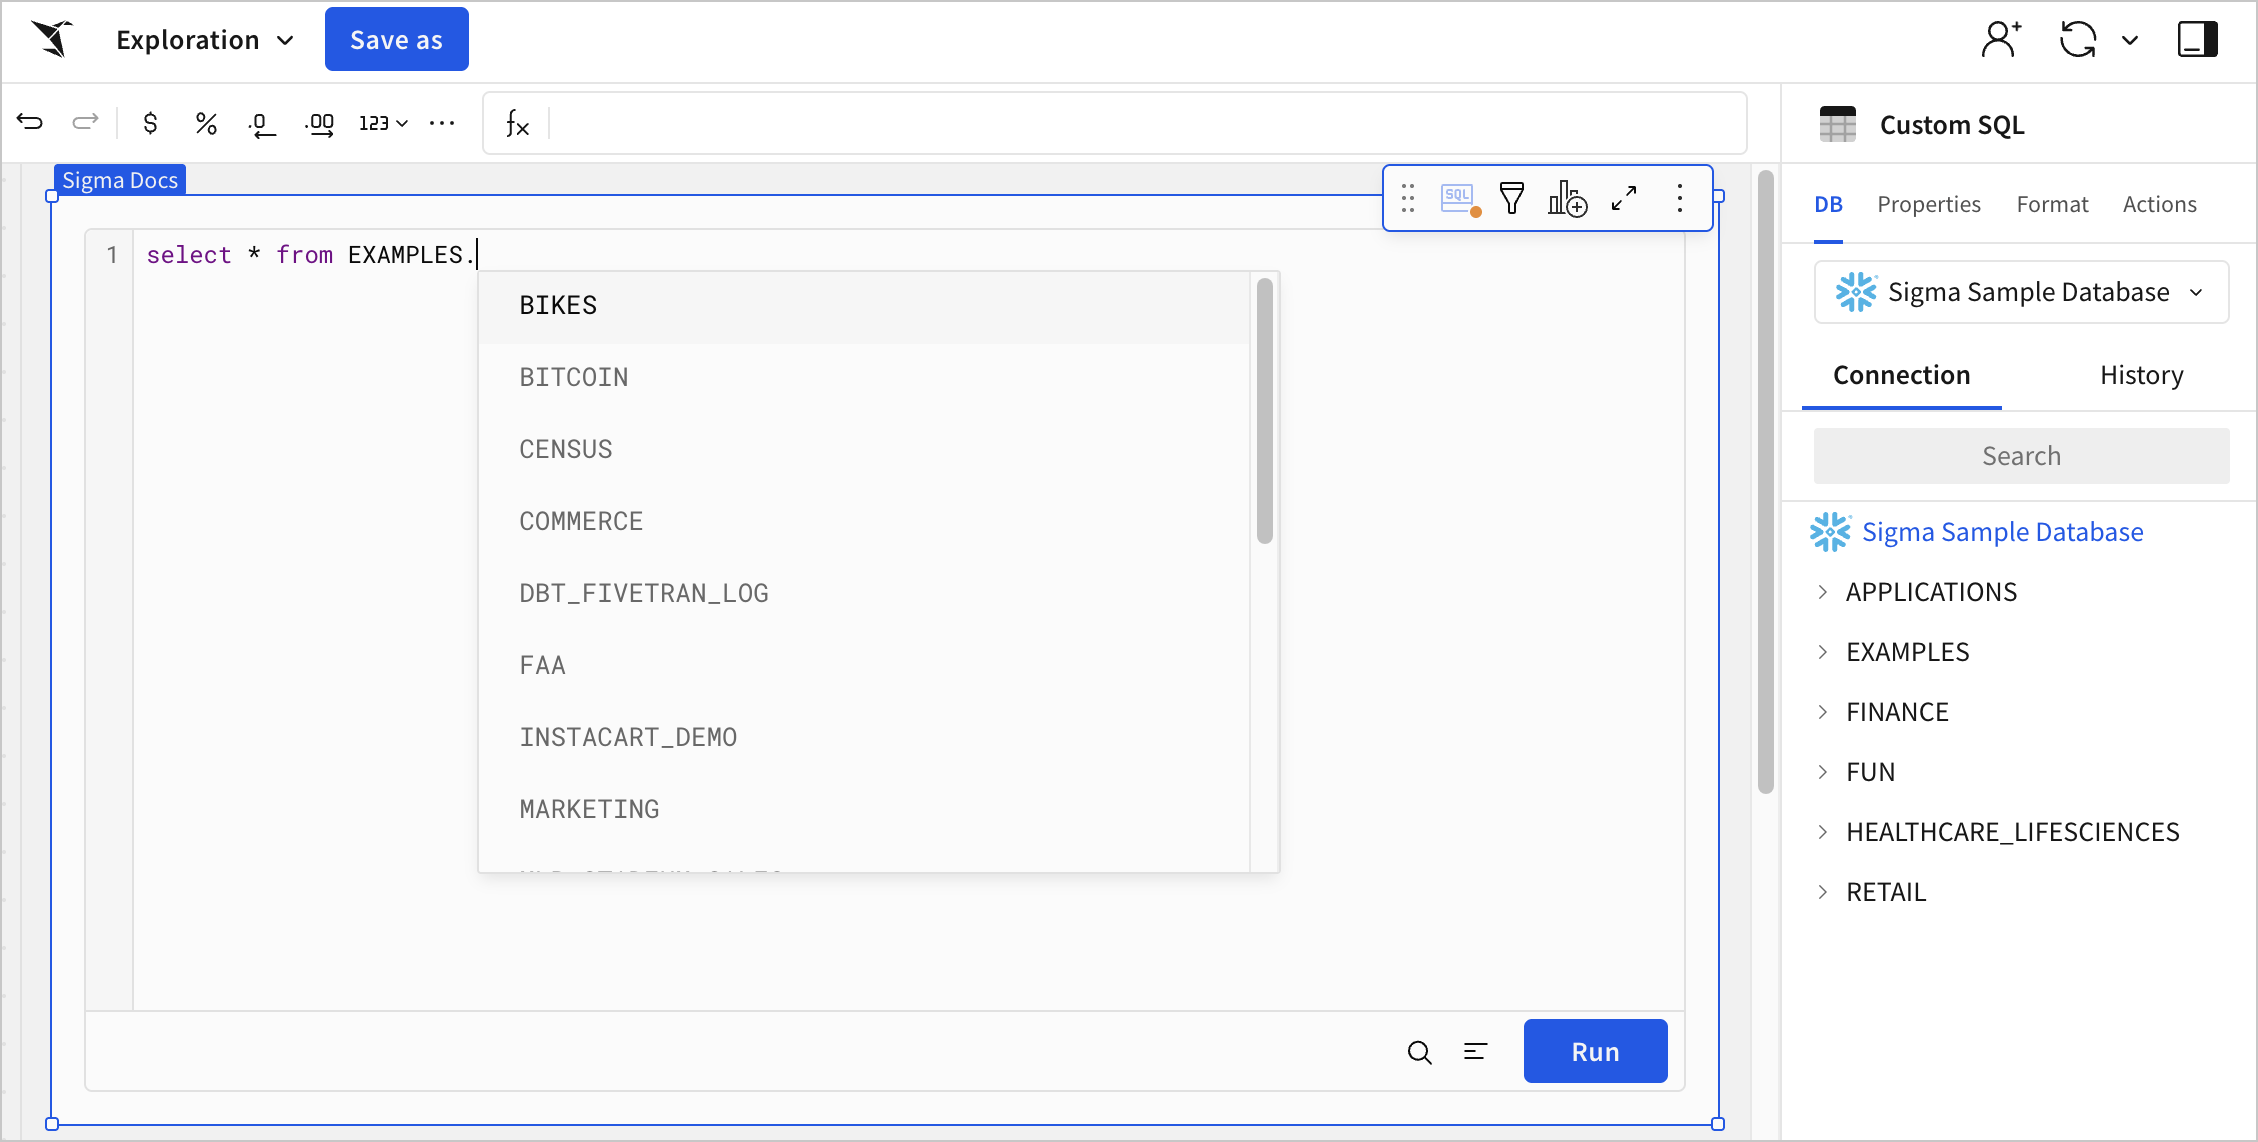
You can reference workbook controls in your SQL by wrapping the control ID in curly brackets. See Reference workbook controls.
-
To run your SQL query, click Run, or use the keyboard shortcuts
⌘+returnon a Mac orctrl+enteron a PC. -
To save your unpublished workbook (exploration) as a workbook, click Save As.
To convert your SQL query to a data model, select
More to open the element menu, then select Advanced options > Create data model.
Create a SQL workbook element
To add a SQL element to an existing workbook and supplement existing analysis, do the following:
-
Open a workbook for editing.
-
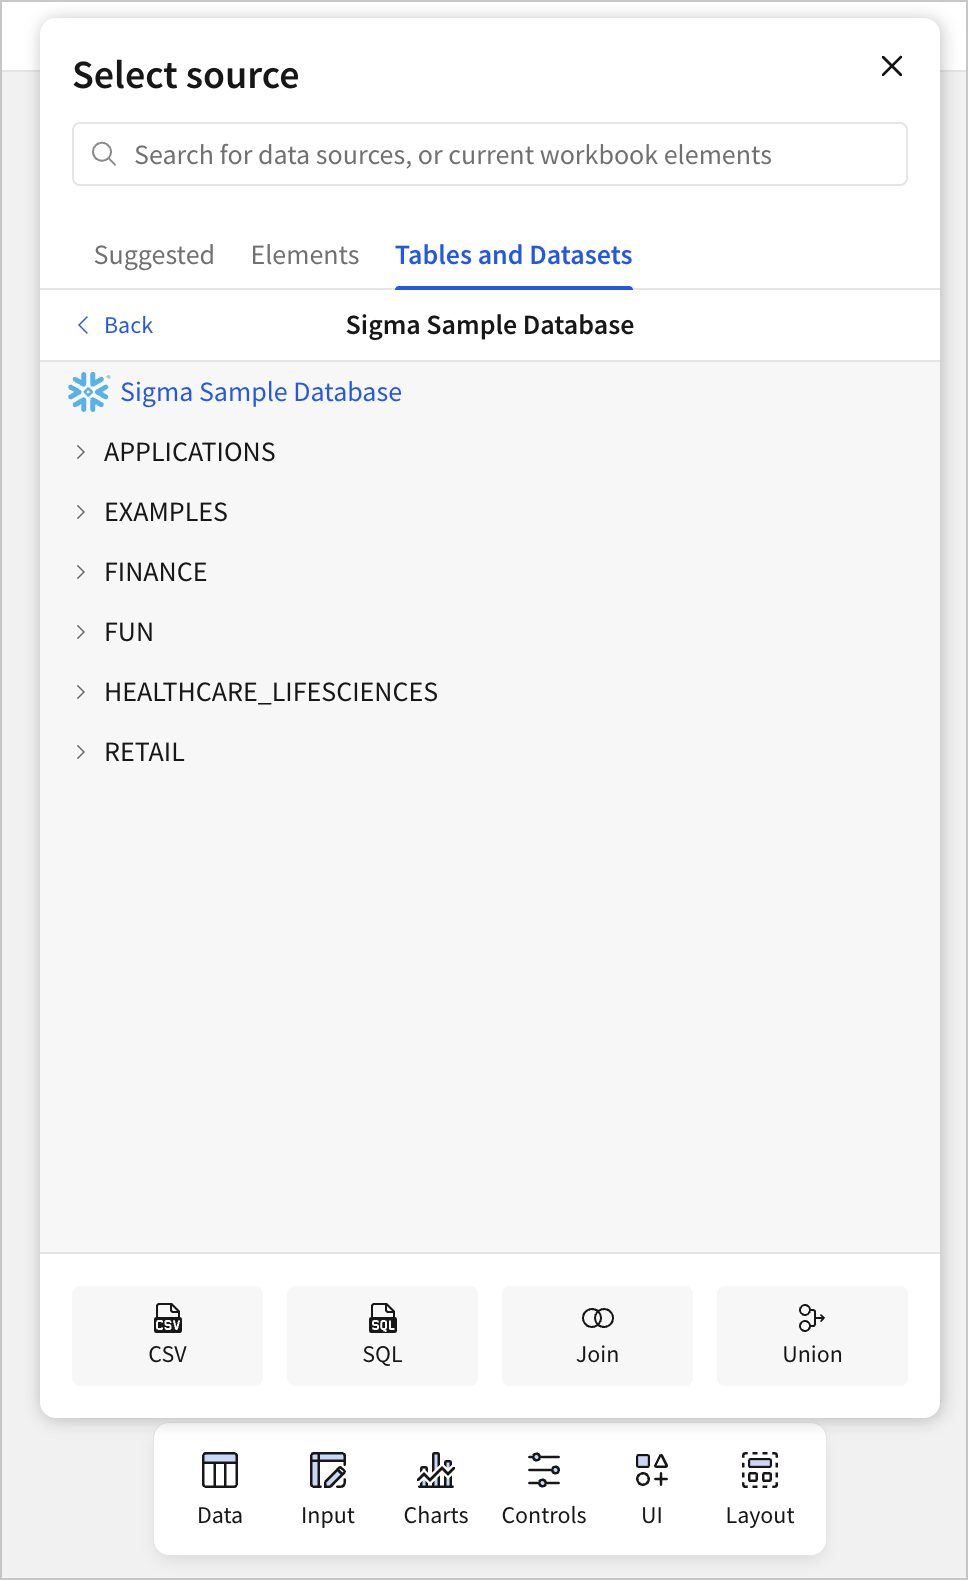
In the add element bar, select the type of element you want to add, then choose a specific element type: Data > Table, Data > Pivot Table or Chart and any supported chart type.
-
In the Select source modal, choose the SQL option at the bottom.
-
Select the connection you want to query.
An element appears in your workbook, prompting you to enter a SELECT statement to query the connection.
-
In the query editor, enter your custom SQL. Sigma provides autocomplete suggestions to guide you.
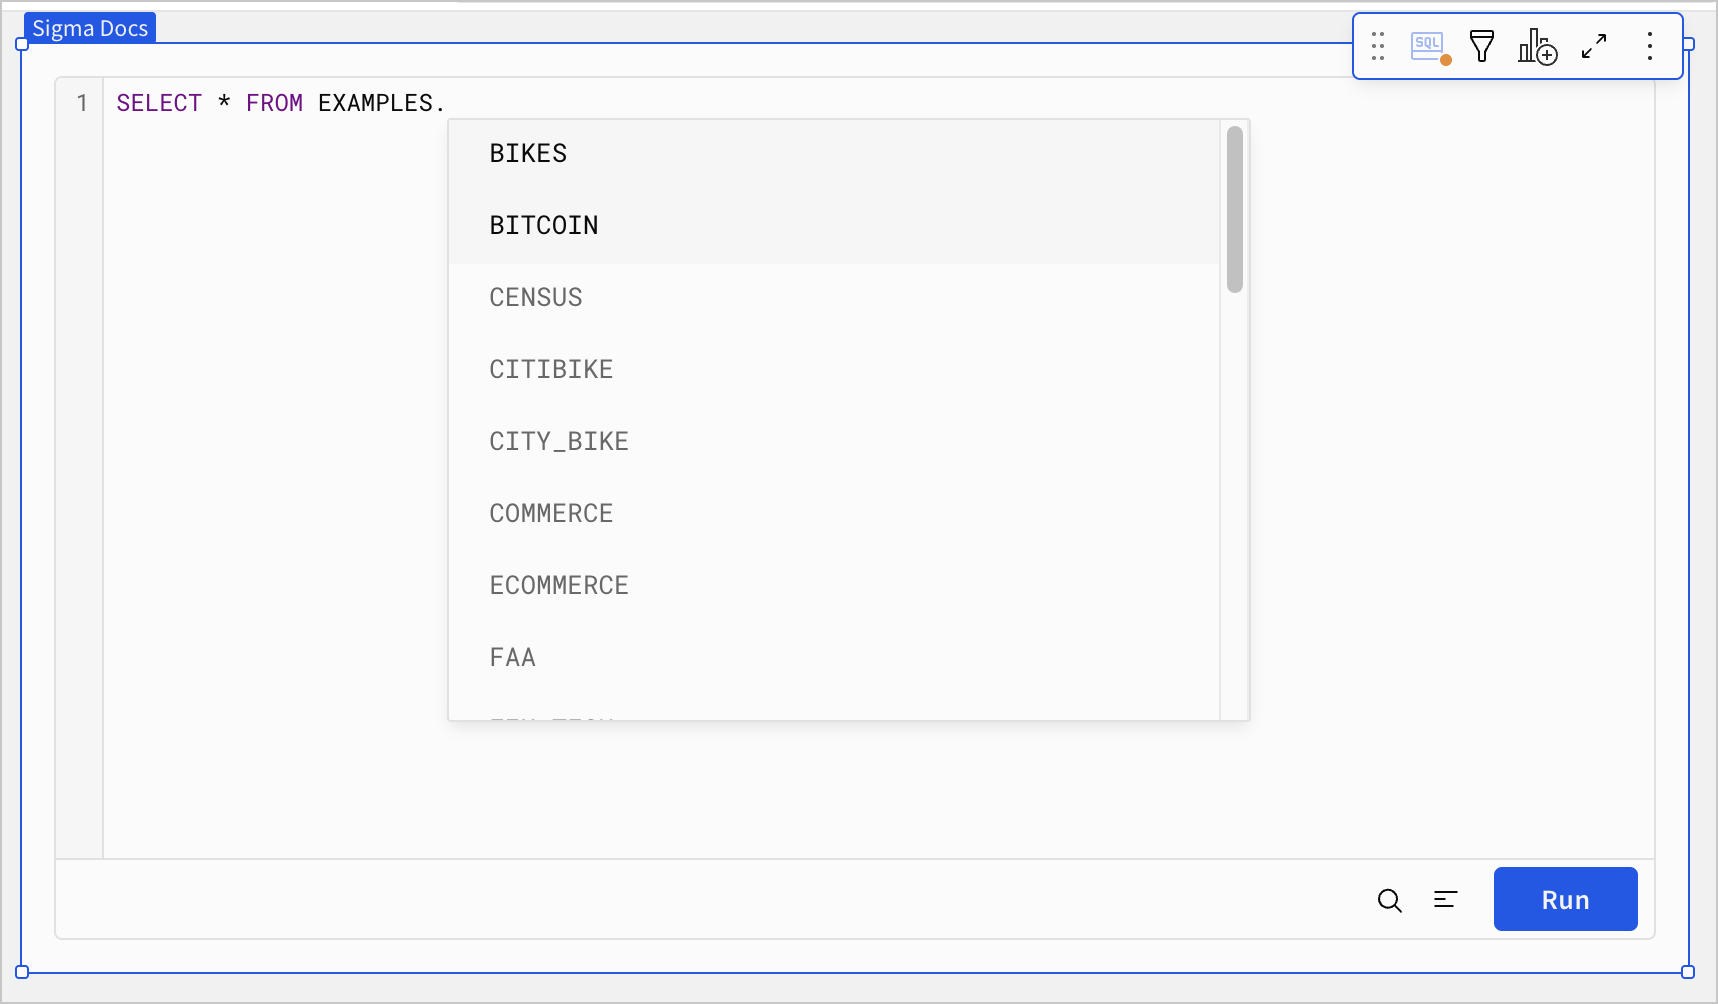
You can reference workbook controls in your SQL by wrapping the control ID in curly brackets. See Reference workbook controls.
Reference column identifiers
The syntax used to reference column identifiers in your SQL query depends on the data you are querying.
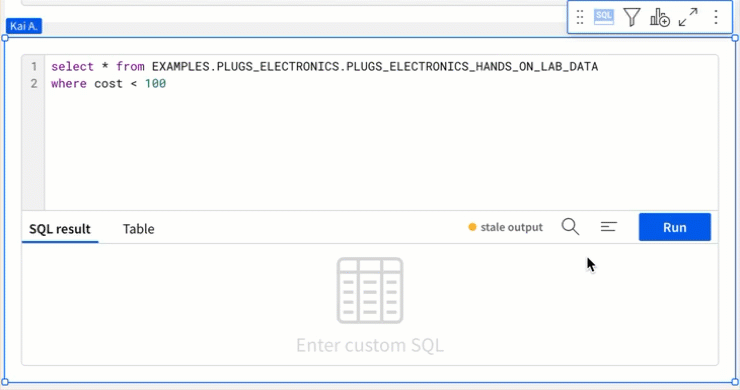
When querying a table in your data platform, you can reference the column name directly if it contains no spaces or special characters. For example:
SELECT QUANTITY FROM EXAMPLES.PLUGS_ELECTRONICS.PLUGS_ELECTRONICS_HANDS_ON_LAB_DATAWhen querying a table in your data platform, use single quotes if the column name contains spaces or special characters. For example:
SELECT 'Customer Name' FROM EXAMPLES.PLUGS_ELECTRONICS.PLUGS_ELECTRONICS_HANDS_ON_LAB_DATAWhen querying a data element in the same workbook, use double quotes to reference column identifiers. For example:
SELECT "Customer Name" FROM sigma_element('PLUGS_ELECTRONICS_HANDS_ON_LAB_DATA')Reference existing Sigma workbook elements
To reference other data elements in your workbook in your SQL query, including other custom SQL elements, use the sigma_element() syntax.
For example, to query a data element in your workbook titled Fiscal Year Forecast and filter based on the values of the Revenue column in the element, write a SQL statement like the following:
SELECT * FROM sigma_element('Fiscal Year Forecast')
   WHERE "Revenue" > 100000
Syntax and usage notes
Use the following syntax to reference a data element in the same workbook:
sigma_element('Element title')When using this syntax, consider the following usage notes:
- You must use the exact element title in your SQL statement.
- The element title that you reference must be a string.
- Column names must be identifiers. See Reference column identifiers
Limitations
- Using this syntax with AzureSQL connections is not yet supported.
- You cannot materialize an element that uses this syntax, including the output of a join with an element that uses this syntax.
- If you reference a grouped table with this syntax, you cannot specify the grouping level that you reference. This syntax returns all source columns, with any grouped calculations performed on the base table instead of for each grouping level.
If you reference a column restricted by a column-level security (CLS) rule in a SQL statement, the CLS is ignored and the column is no longer restricted. For details, see Configure column-level security.
Reference user attributes with system functions
You can use system functions with the #formula directive in custom SQL to return context-sensitive information about the current user or session. For a list of system functions you can use, see System functions.
Syntax and usage notes
{{#formula SystemFunction()}}
When using this syntax, consider the following usage notes:
- System functions in custom SQL are equivalent to system functions referenced in the formula bar (ie.
{{#formula CurrentUserFullName()}}is equivalent toCurrentUserFullName()) - When using the functions CurrentUserAttributeText and CurrentUserInTeam, you must use the exact attribute or team name as it appears in the admin panel. For more details, see Configure user attributes and Configure row-level security by team.
Examples
To return the email address of the current user:
SELECT {{#formula CurrentUserEmail()}}To return the current user's full name:
SELECT {{#formula CurrentUserFullName()}}Shortcuts
Some shortcuts exist to make working with SQL in Sigma easier.
Toggle SQL editor in the element menu
When a workbook is published, the SQL element displays only the results. When you edit or explore the workbook, you can toggle the SQL editor to show the SQL query that generates the results.
Click ![]() Toggle SQL Editor to switch back and forth between the data element and the SQL query editor.
Toggle SQL Editor to switch back and forth between the data element and the SQL query editor.
Maximize the SQL element
To maximize the SQL element in your workbook canvas and make it easier to write a long complex SQL query, press the space bar or click ![]() Maximize element to expand the element to full screen mode.
Maximize element to expand the element to full screen mode.
Format SQL
To quickly format long blocks of SQL text, click ![]() Format SQL.
Format SQL.
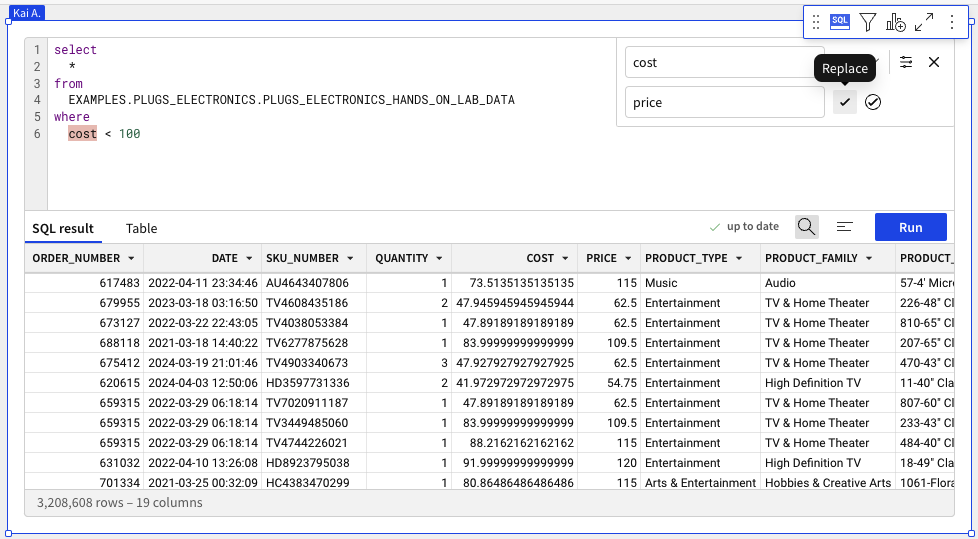
Find and replace
To search within your SQL query, and optionally replace instances of the searched term, click ![]() Search SQL or use the keyboard shortcut
Search SQL or use the keyboard shortcut ⌘ + F.
Access custom SQL from the lineage view
View and edit custom SQL from the lineage view of a workbook or data model. Copy the full query to your clipboard or click Edit SQL to go to the inline SQL editor for the element.
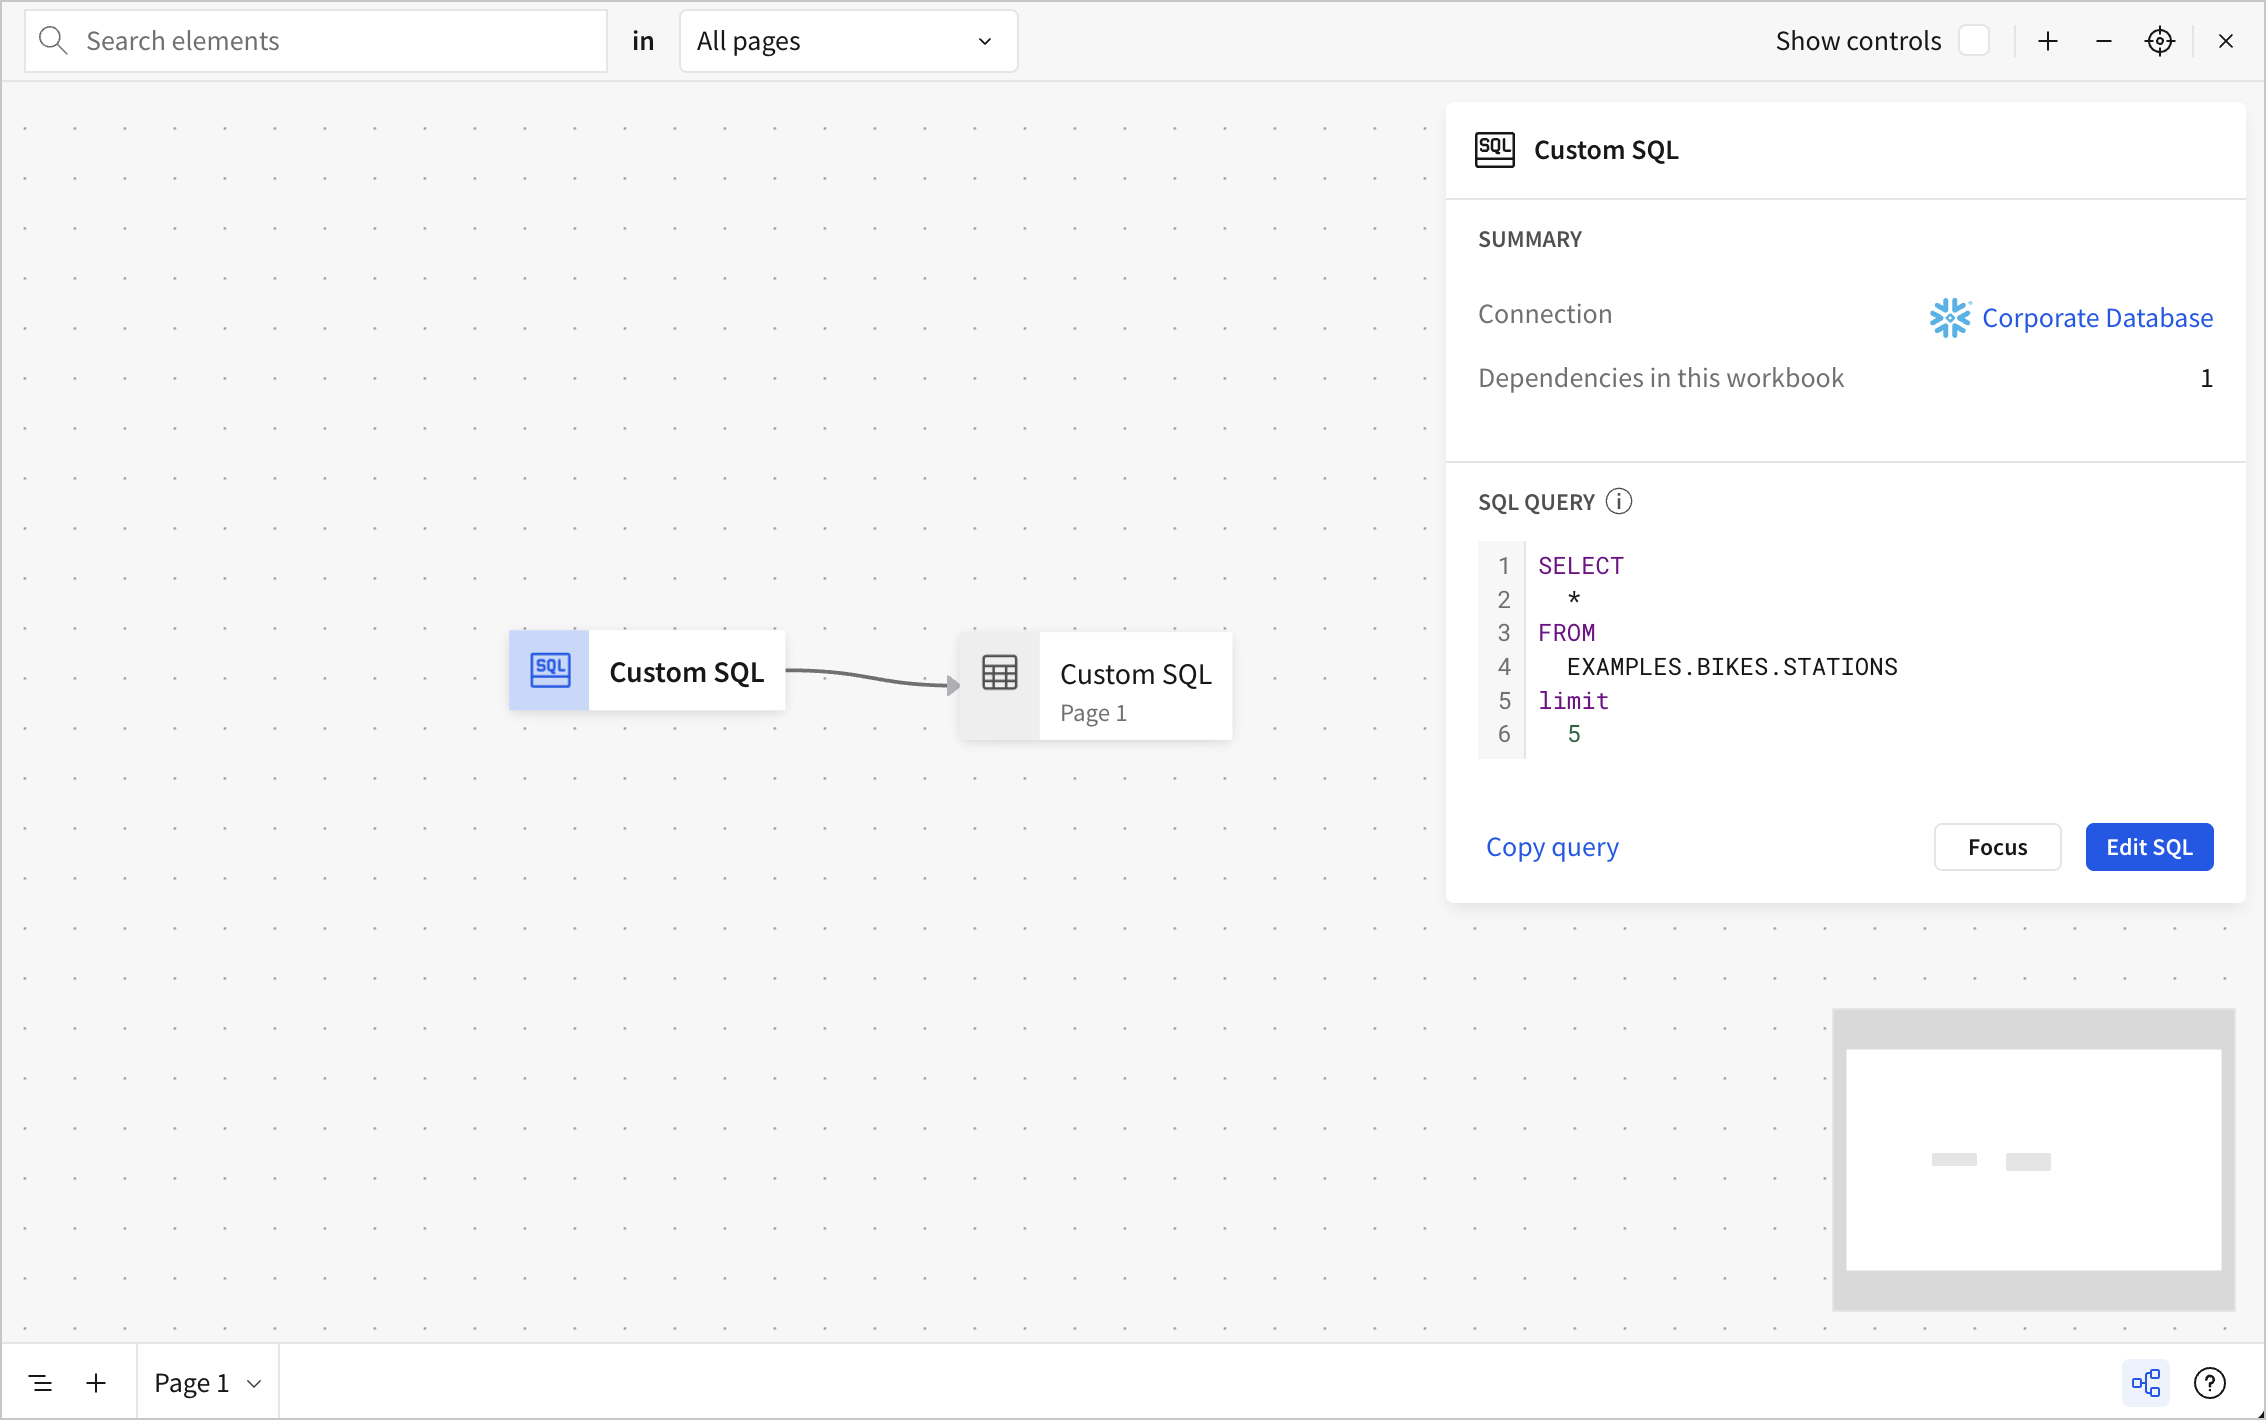
For more details about working with lineage, see View workbook and data model data lineage.
View the query history
When you use the SQL editor, you can access the history of the queries recently run against the current connection.
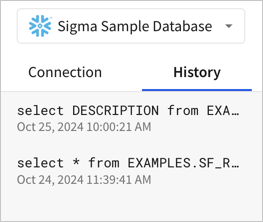
To access this history, click the DB tab in the side panel, then select the History tab.
To see the query history for all elements in a specific workbook or data model, see Examine workbook queries.
View table previews
When writing your query, you can use the side panel to explore tables in your data platform. You can navigate to a specific table and select Preview to open a preview of the columns and rows in the table, helping you decide whether to add that table to your existing SQL query.
For a given table, select ![]() More and choose Place name in SQL or Place select statement in SQL to easily reference a new table in your SQL query.
More and choose Place name in SQL or Place select statement in SQL to easily reference a new table in your SQL query.
Examples
For more advanced custom SQL cases, refer to these examples.
Change output based on a user attribute
If you have user attributes defined in your organization, you can reference an attribute to limit the results returned from a SQL query based on the value of the user attribute for the current user.
For example, for the example Plugs Electronics data, return results only with the store region that the current user can access based on the store_region user attribute assigned to them:
SELECT
  *
FROM
  EXAMPLES.PLUGS_ELECTRONICS.PLUGS_ELECTRONICS_HANDS_ON_LAB_DATA
WHERE
  {{system::CurrentUserAttributeText::store_region}} = STORE_REGION
As another example, return results filtered by the customer_name that the current user has access to view, based on the value of the organization_name user attribute assigned to them:
SELECT
  *
FROM
  test.orders
WHERE
  customer_name = {{system::CurrentUserAttributeText::organization_name}}
For more details about the function syntax, see CurrentUserAttributeText. For more details about user attributes and assignment, see User Attributes.
Return output for a specific date range control
For an example returning rows only when a date column matches the value specified in a date range control, refer to the example SQL in Reference workbook control values in SQL statements.
Return rows depending on the value of a multi-select control
For an example returning rows depending on the value of a multi-select list control, refer to the example SQL in Reference workbook control values in SQL statements.
Update custom SQL
If you need to make changes to a SQL statement, such as to update the referenced data source in a SQL statement, do the following:
-
Open the document for editing.
-
Click Lineage (
 ), then search for SQL.
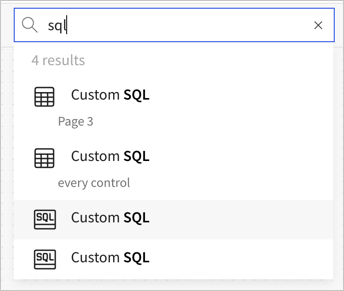
-
For each Custom SQL
 element in your document, select the custom SQL element and review the SQL query.
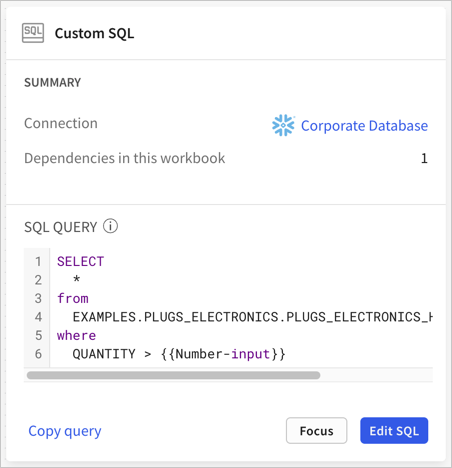
-
If the SQL query contains a data source that needs to be updated, click Edit SQL to open the element for editing in the canvas, then make your desired changes.
If the SQL statement is more than a few lines, copy the SQL from the custom SQL element and paste it into a plain text editor, then make the desired changes in your plain text editor, then copy and paste them into the custom SQL element.
-
Run the SQL and validate that your SQL returns the expected results. For example, confirm that the correct data source is queried.
-
Publish the document.
Updated about 2 months ago