
Edit input table data
Depending on your workbook access and the data entry permission assigned to an individual input table element, you may be able edit input table data in the draft or published version of a workbook. When you have the ability to edit input table data, you can add rows, edit cell values in existing columns, and save your changes to the published version of the workbook.
This document explains how to identify editable input tables, access the editable state, and edit data based on the workbook version you're interacting with.
For more information about how to change the data entry permission on a specific input table, see Change data entry permission on input tables. For general information about input tables, see Intro to input tables.
System and user requirements
The ability to edit input table data requires the following:
-
In a workbook draft:
- You must be assigned an account type with the Create, edit, and publish workbooks and Edit input tables permission enabled.
- You must be the workbook owner or be granted Can edit access to the workbook.
-
In a workbook's published version:
- You must be assigned an account type with the Edit input tables permission enabled.
- If the input table's data entry permission is set to Editable in published version (explore), you must be the workbook owner or be granted Can explore or Can edit access to the workbook.
- If the input table's data entry permission is set to Editable in published version (all users), you must be granted access (any level) to the workbook.
For permissions required to create new input tables and manage table structure, see Create new input tables. For permissions required to configure data governance features, see Configure data governance options for input tables.
Identify editable input tables
Data entry permission is configured at the individual input table level, which can result a workbook containing input tables with different permissions. Refer to the following sections to determine whether a specific input table is editable in the draft or public version of a workbook.
Identify editable input tables in a workbook draft
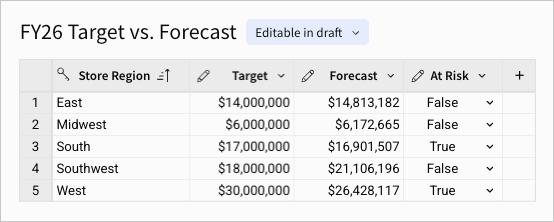
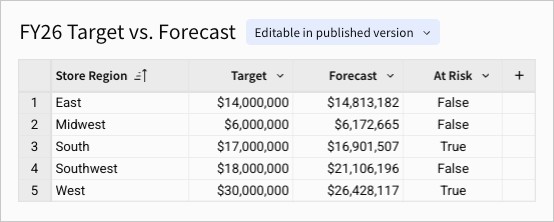
When editing a workbook draft, an input table element displays an Editable in label above the table, which indicates whether data entry is allowed in the draft or published version.
Data entry permission only affects your ability to edit data in existing input table columns. If you have access to the workbook draft, you can still customize the table structure, manage column settings, and configure data governance options, regardless of the data entry permission.
-
If the element displays an Editable in draft label, the input table data is immediately editable. See Edit data in a workbook draft.
Input tables can be restricted from all edits when the connection used to write input table data to your data platform is unavailable or misconfigured. When this occurs, the element displays an "Editing restricted" warning message next to the Editable in draft label, and you cannot edit the input table data. If you encounter this restriction, contact your Sigma admin to resolve the issue. For more information, see Input table error handling.
-
If the element displays an Editable in published version (explore) or Editable in published version (all users) label, the input table data is not immediately editable. To edit data, you can change the data entry permission or switch to the workbook's published version.
Identify editable input tables in a workbook's published version
When interacting with a workbook's published version, an input table element displays an ![]() Edit data button if data entry is allowed in the publish version. Additional factors, described below, can determine whether you can access the editable state to edit data.
Edit data button if data entry is allowed in the publish version. Additional factors, described below, can determine whether you can access the editable state to edit data.
-
If the
 Edit data button is displayed and enabled, you can access the editable state and edit data in existing columns. See Edit data in a workbook's published version.
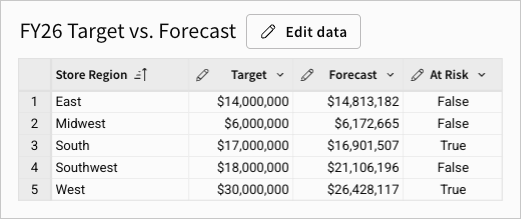
-
If the
Edit data button is displayed but disabled, the input table is editable in the published version, but you cannot access the editable state to edit data. This restriction can be due to insufficient account type permissions or workbook access. If necessary, contact your administrator or the workbook owner to request the required permission or access.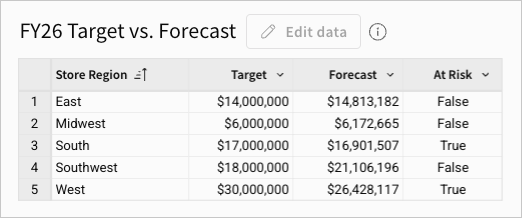
Input table edits can also be restricted when the connection used to write input table data to your data platform is unavailable or misconfigured. When this occurs, the element displays an "Editing restricted" warning message next to the disabled button. If you encounter this restriction, contact your Sigma admin to resolve the issue. For more information, see Input table error handling.
-
If the
Edit data button is not displayed, the input table is not editable in the published version. If you have the applicable workbook access, you can edit input table data in the draft (see Edit data in a workbook draft). Otherwise, you can only view the input table.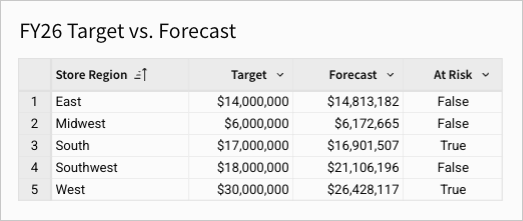
Edit data in existing columns
When adding or editing input table data, the entry point to the editable state and the mechanism for saving your changes depend on the workbook version you're interacting with. Refer to the following workflows to edit input table data in the workbook draft or published version.
Edit data in a workbook draft
When an input table's data entry permission allows edits in the workbook draft, you can immediately edit data directly in the editable columns.
-
Open the draft of a workbook and locate the input table you want to edit.
-
If the input table element displays an Editable in draft label above the table, you can immediately edit data in editable columns using the following methods. If the element displays an Editable in published version (explore) or Editable in published version (all users) label, you must first change the data entry permission or switch to the workbook's published version.
Editable columns display a pencil icon (
) in the column header. Linked columns (in linked input tables), calculations, lookups, and system columns are not editable.-
To enter data through keyboard entry, select a cell and enter a value.
-
To paste copied values, select a cell or range of cells, then right-click the selection and select Paste (or use the ⌘+V or Ctrl+V keyboard shortcut).
You can select and paste values in up to 2,000 rows and 25 columns, including column headers. When you copy multiple rows of data and select a column header or range of cells that include a column header in the input table, the first row of copied data is pasted in the header.
-
To change a cell value in a checkbox column, click the checkbox to toggle between
true(selected) andfalse(cleared). To remove the checkbox and generate a null value, select the cell and press Delete. -
To select a predefined value in a single-select column, a multi-select column, or a column containing data validation, click the down arrow (
 ) in a cell (or double-click the cell), then select an option from the dropdown. For more information about viewing, selecting, and removing values in single-select and multi-select columns, see the interactive demo.
 -
To upload a file to a file column (Beta), hover over the relevant cell and select the plus icon (
 ), then choose a file from the file picker.
 -
To define values in a calculation column, click the column header or any cell in the column, then enter an expression in the formula bar.
If the formula bar is not visible, click
 Show panels in the workbook header to reveal the toolbar (containing the formula bar) and editor panel.
-
-
Sigma automatically saves all edits to the draft. To save your changes to the workbook's published version, click Publish in the workbook header.
Input table edits can be unsuccessful due to configuration or availability issues in the connection or data platform (which must be resolved by the customer). To improve data integrity and prevent unexpected data loss when a connection is misconfigured or unavailable, Sigma blocks edits to relevant input tables and displays an "Editing restricted" message directly on the input table elements. If you're restricted from editing an input table due to a misconfigured or unavailable connection, contact your Sigma admin to resolve the issue. For more information, see Input table error handling.
Edit data in a workbook's published version
When an input table's data entry permission allows edits in the workbook's published version, you can access the input table's editable state to edit data directly in existing editable columns.
-
Open the published version of a workbook and locate the input table you want to edit.
To switch from the draft to the published version, click the down arrow (
) next to the Publish button in the workbook header, then select Go to published version.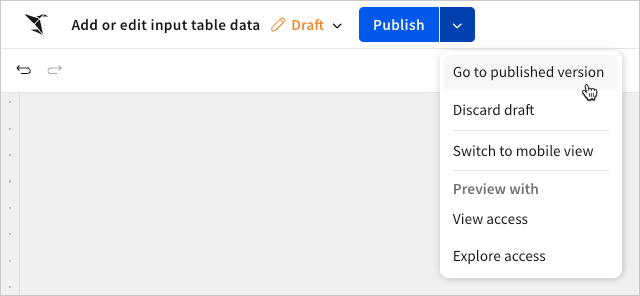
-
In the input table element, click
Edit data to enable editing.If the button is disabled, you cannot access the editable state. See Identify editable input tables in a workbook's published version for more information.
-
Use the following methods to edit data in existing editable columns:
Editable columns display a pencil icon (
) in the column header. Linked columns (in linked input tables), calculations, lookups, and system columns are not editable.-
To enter data through keyboard entry, select a cell and enter a value.
-
To paste copied values, select a cell or range of cells, then right-click the selection and select Paste, or use the ⌘+V or Ctrl+V keyboard shortcut.
-
You can select and paste values in up to 2,000 rows and 25 columns, not including column headers since you cannot edit headers in the published version of a workbook.
-
To change a cell value in a checkbox column, click the checkbox to toggle between
true(selected) andfalse(cleared). To remove the checkbox and generate a null value, select the cell and press Delete. -
To select a predefined value in a single-select column, a multi-select column, or a column containing data validation, click the down arrow (
) in a cell (or double-click the cell), then select an option from the dropdown. For more information about viewing, selecting, and removing values in single-select and multi-select columns, see the interactive demo. -
To upload a file to a file column (Beta), hover over the relevant cell and select the plus icon (
), then choose a file from the file picker. -
To define values in a calculation column, click the column header or any cell in the column, then enter an expression in the formula bar.
If the formula bar is not visible, click
-
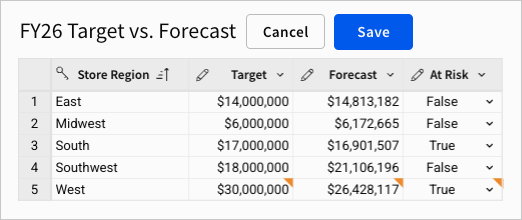
The input table displays yellow cell indicators to mark cells with unsaved data. Click Save to apply your changes to the draft and published version.
Input table edits can be unsuccessful due to configuration or availability issues in the connection or data platform (which must be resolved by the customer). To improve data integrity and prevent unexpected data loss when a connection is misconfigured or unavailable, Sigma blocks edits to relevant input tables and displays an "Editing restricted" message directly on the input table elements. If you're restricted from editing an input table due to a misconfigured or unavailable connection, contact your Sigma admin to resolve the issue. For more information, see Input table error handling.
Updated 16 days ago