
Dataset filters (Deprecated)
Datasets are deprecated:
- Starting June 2, 2026, you will no longer be able to create datasets or edit existing datasets.
- Starting September 15, 2026, you will no longer be able to use datasets as a data source or view datasets in Sigma.
Migrate your datasets to data models and update any documents that use datasets as a data source to use a different source. See Migrate a dataset to a data model.
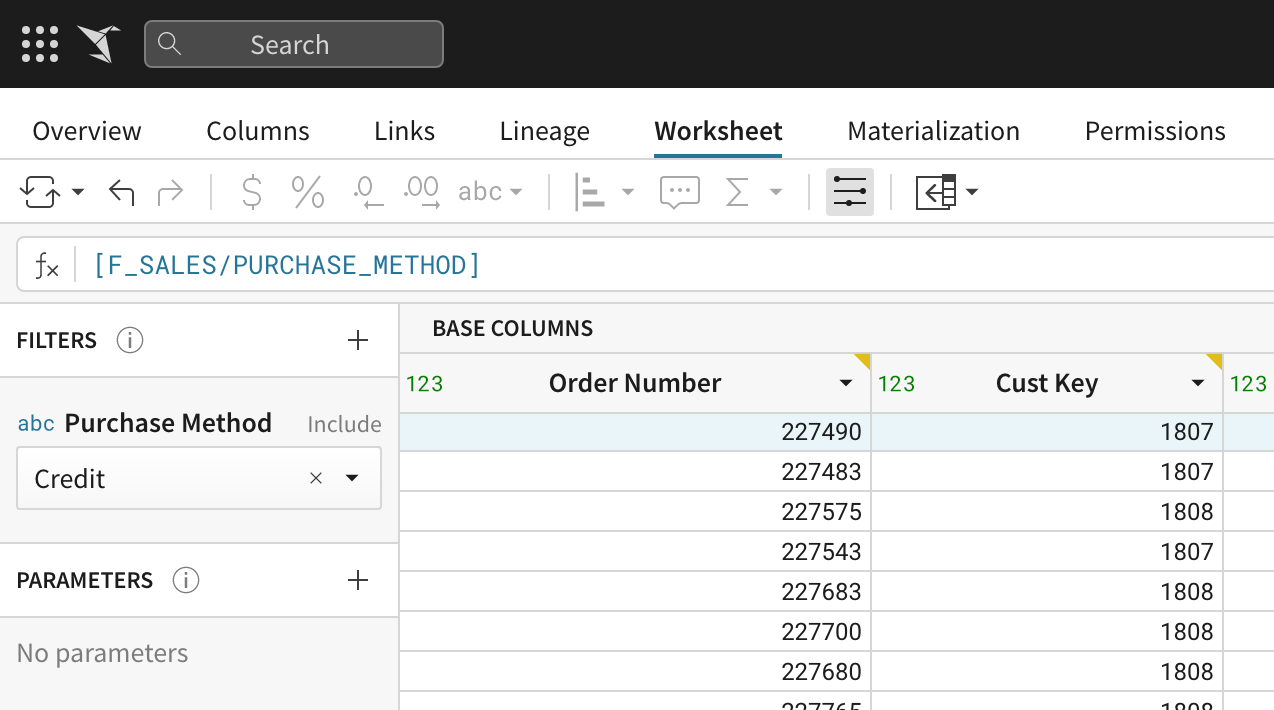
Filters allow you to limit your data to show only rows that meet certain criteria. Sigma worksheet filters live in the dataset worksheet control panel, which is positioned directly to the left panel. This positioning allows you to modify your filter values while simultaneously watching your data respond in real time.
User requirements
To use filters in datasets, you must be assigned an account type with the Create, edit, and publish data models permission enabled.
Anatomy of a filter
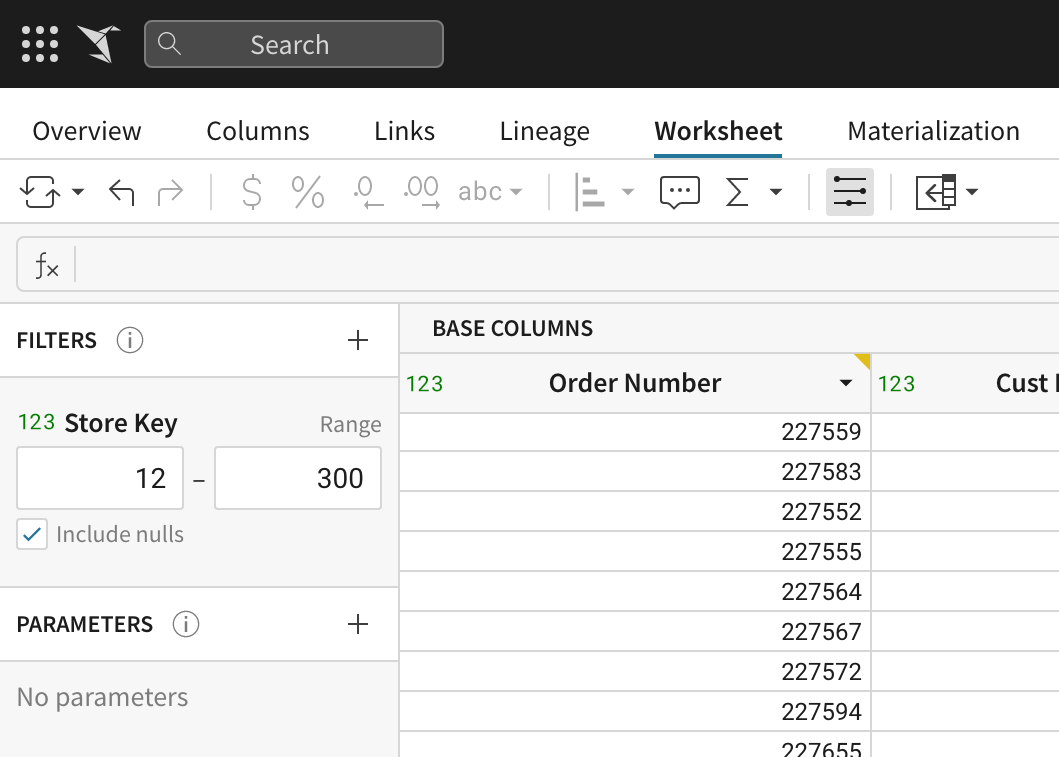
Control panel
Filters live in the worksheet control panel, located on the left side of the dataset worksheet tab. This panel also includes any Worksheet Totals and Parameters.
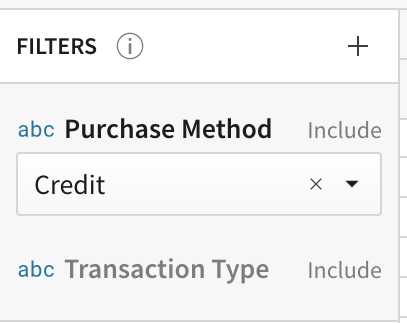
Filter list
All existing filters are available in the control panel under the header FILTERS. Disabled filters are greyed out.
Filter
All filter types have the same basic structure when displayed in the filter list.
The following screenshots show components of an “Include” filter and a "Range" filter.
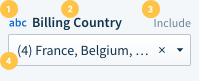
- 1. Column type icon
- This icon shows the type of column being filtered.
- 2. Column name
- This is the name of the column used for the filter. A worksheet may have multiple filters on the same column.
- 3. Filter type
- This label specifies the filter type.
- 4. Filter value input
- This input component will display differently for different filter types. Use it to input the values you would like to filter on. The worksheet data will update to reflect your filter value selection in real time.
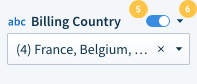
- 5. Disable/Enable filter toggle
- Only visible on hover. Click the toggle to disable or re-enable a filter. It will be grey if the filter is disabled.
- 6. Filter menu
- Only visible on hover. Open this menu to see additional actions including edit and delete.
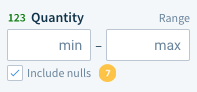
- 7. Include Nulls Checkbox
- This allows you to choose whether you would like to include nulls in your filtered column. The 'Include Nulls' checkbox is not applicable to Include/Exclude filters. Instead, null is listed as a value in the filter value input list. It is not applicable to Text Match filters.
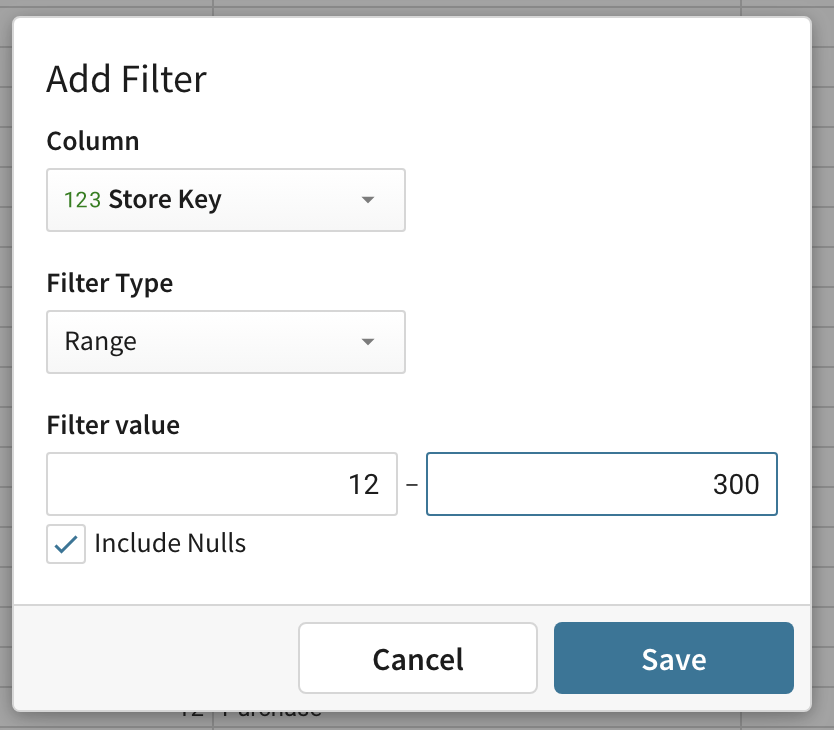
The Filter Modal
The filter modal allows Sigma Creators to create and edit filters. Modal field options vary depending on the column type and filter type you have selected.
Unlike when you select values directly on a filter in the control panel, your value selection in the filter modal will only be applied to your worksheet data after you click Save.
Filter Types
A filter’s filter type dictates what values can be set on your filter and the format in which they can be selected. For example, an “include” filter provides a list of data values for you to choose from, while a “range” filter requests minimum and/or maximum values.
Sigma worksheets support seven filter types. The filter types you can choose from for each given filter are dependent on the type of column that the filter targets. Json columns are the only column type that cannot be filtered on. To filter on json data, you will first need to extract data from the json object.
- Include
Default filter type
Selected values will be included in your data. All other values will be excluded.
Value input type: List of selectable values
Supported column type: Text, Number, Datetime
- Exclude
Selected values will be excluded from your data.
Value input type: List of selectable values
Supported column type: Text, Number, Datetime
- Range
Only values within the specified range will be included in your data.
The range is min/max inclusive.
Value input type: Min/Max numeric input boxes
Supported column type: Number
- Date Range
This filter type supports both fixed and relative date types. Only values within the specified range will be included in your data.
The range is min/max inclusive.
Value input type: A single input box with the option to select fixed and/or relative dates for both min and max values.
Supported column type: Date (Fixed), Date (Relative)
- Limit
Ranks and limits data in the column based on your specifications.
Value input type: A list of rank order/direction (eg “First N”); A numeric input for the number of values to include; rank type (i.e., Rank, RankDense, RowNumber)
Supported column type: Text, Number, Date
- Text Match
The filter will search for full and partial matches between your input text and your data’s values.
Value input type: A list of formulas to match on (i.e., Contains, Starts with, Ends with, Like) as well as their value excluding counterparts (i.e., Does not contain, Does not start with, Does not end with, and Not like); A text input box for text to search for; A checkbox for case sensitivity.
Supported column type: Text
- Boolean
True or False
Filters on true, false, and null
Value input type: A list of values
Supported column type: Logical: True, False
Create a filter
Create a filter from the control panel
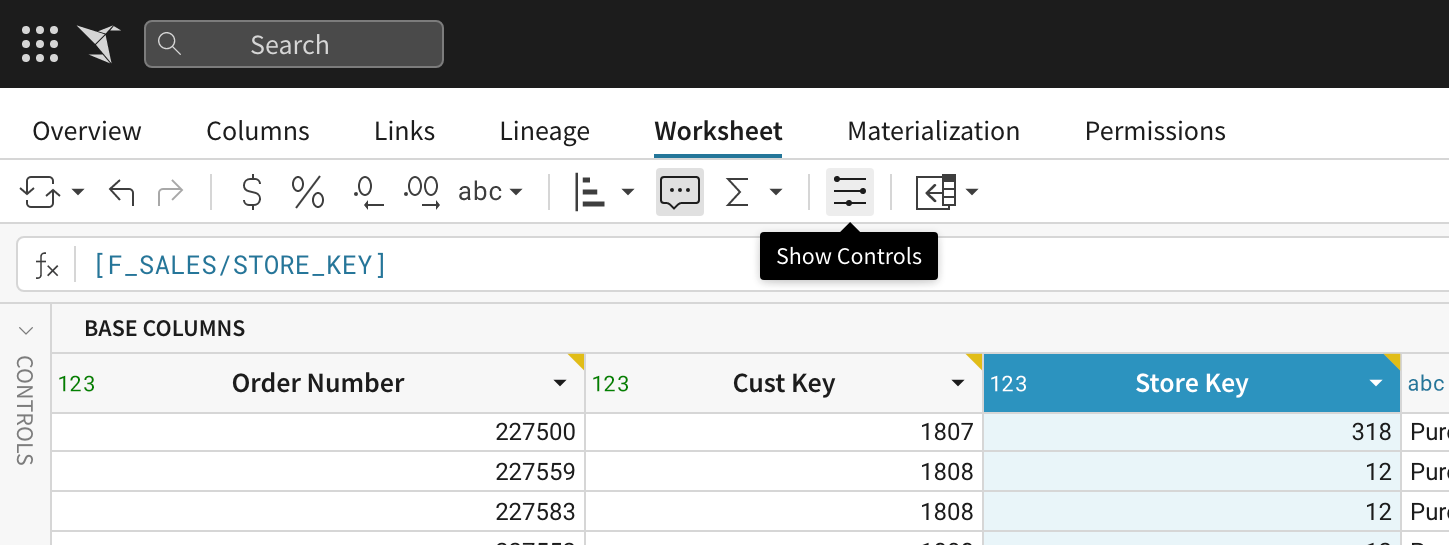
- If the control panel is not already open, open it by clicking either the collapsed CONTROLS bar or the Show Controls button in the worksheet toolbar.
- Click on the + icon on the right side of the panel’s FILTERS section.
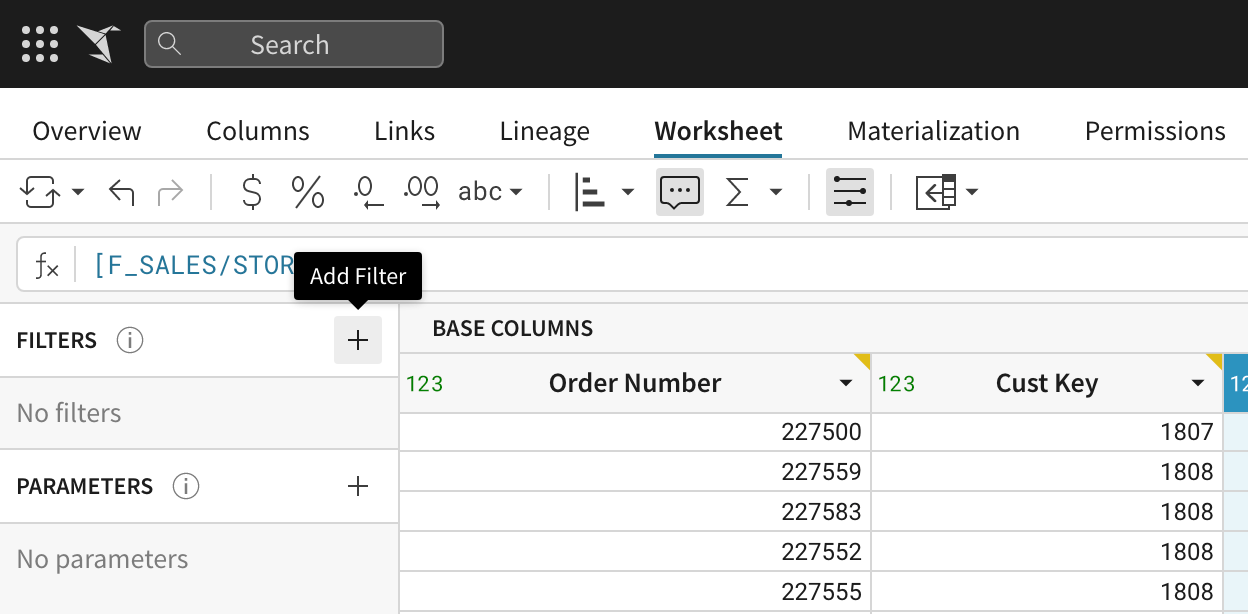
- The Add Filter modal will now appear on your screen, prompting you to select a column to filter from your worksheet.
Select a Column from the drop down list.
Note: The type of column you select will determine the steps that follow. This is because
filter typeandfilter valuesare dependent on column type. For this example, we will select a Text (abc) column.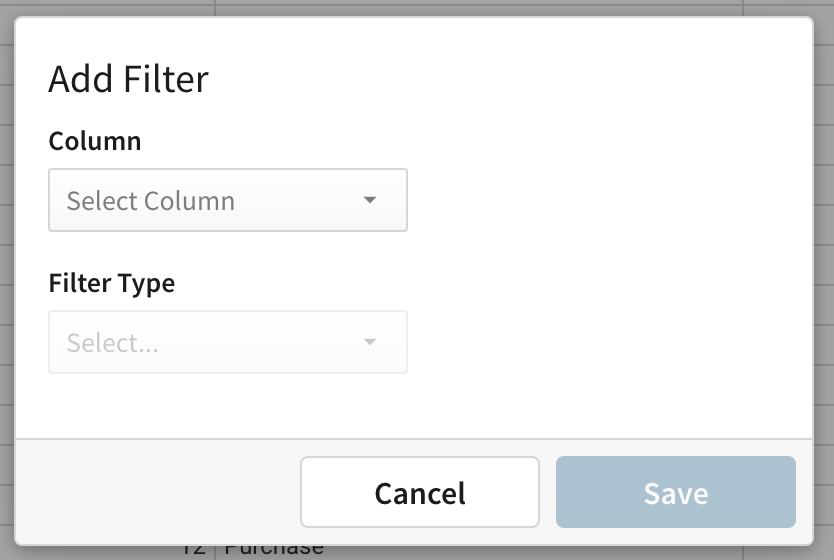
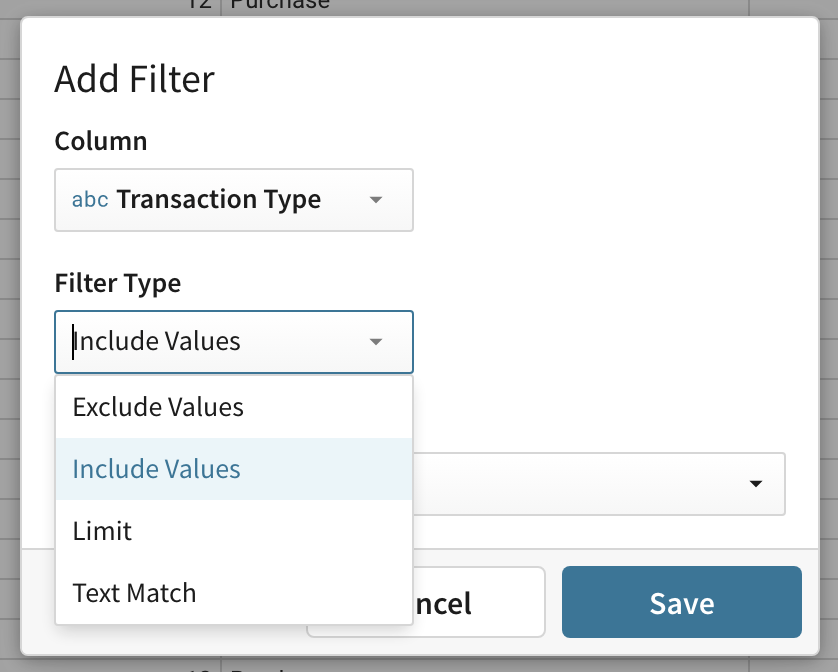
- Next, select a Filter Type from the dropdown menu.
For this example, use the default ‘Include Values’ filter type.
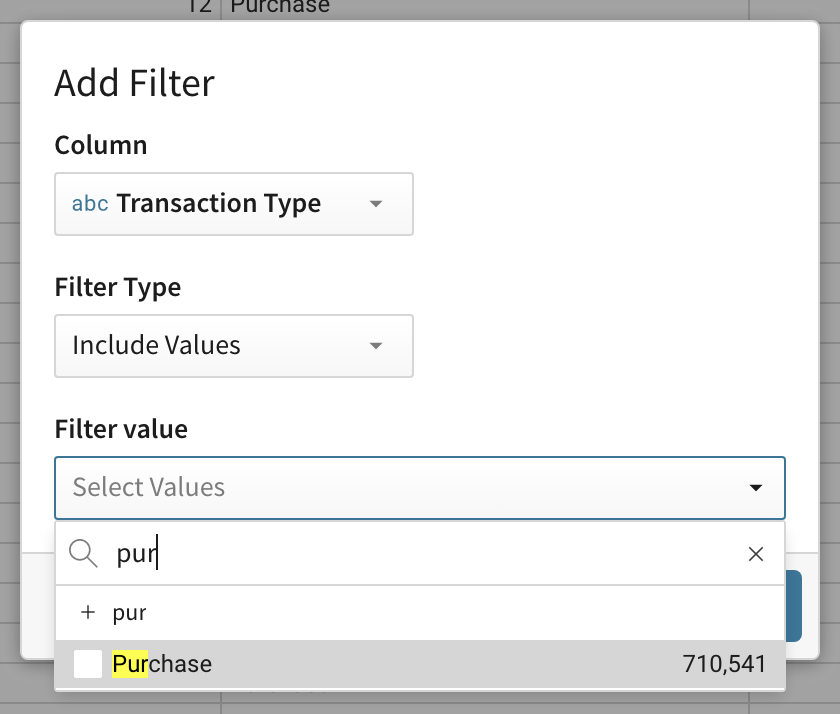
- Under Filter value, select the value(s) you would filter on.
Both Include and Exclude filter types provide a value list ranked by count. Scroll through the ordered list or use search to find and select values.
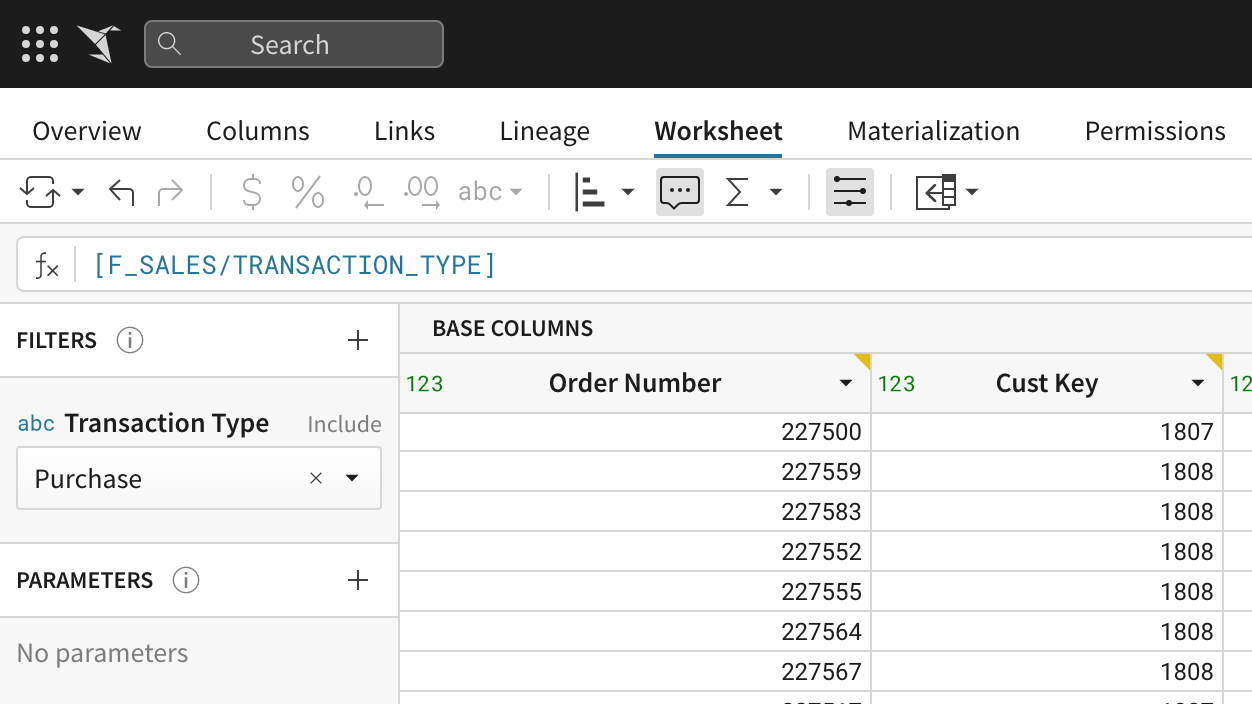
- Click Save to save your new filter.Your new filter will now appear in the worksheet control panel, where you can modify selected values alongside your worksheet’s spreadsheet interface.
Create a filter from a column menu
-
Open the column menu on the column you would like to filter.
-
Select Add Filter... from the menu.
-
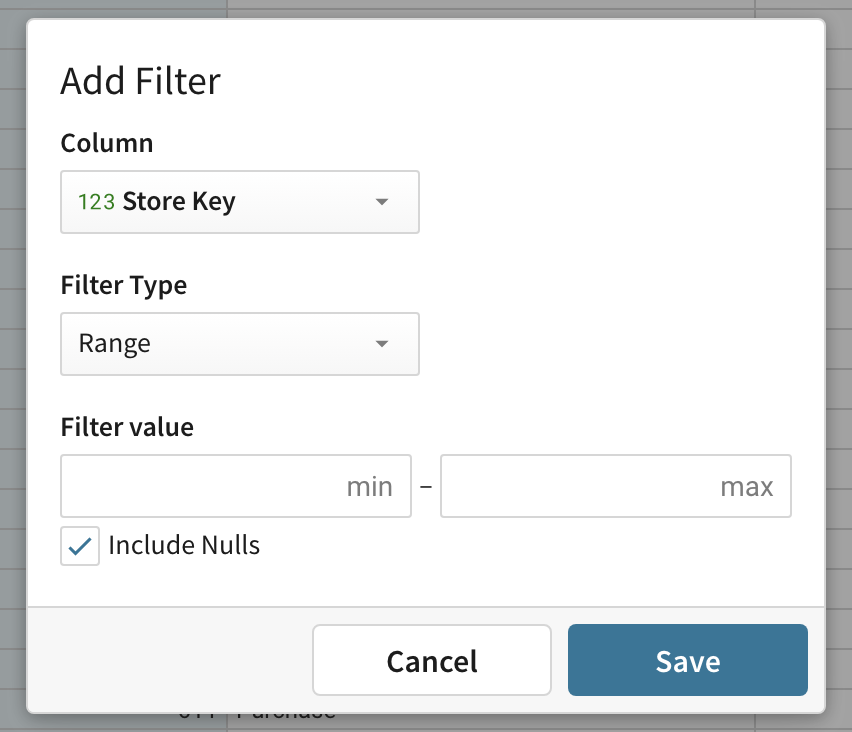
The Add Filter modal will now appear on your screen with the column selected and the default
Filter Typeset. Note: The type of column you selected will determine the steps that follow. This is becausefilter typeandfilter valuesdepend on column type. For this example, we selected a Numeric (123) column.
-
[optional] Change your filter type. For this example, use the default ‘Range’ filter type.
-
Under Filter value, select the range you want to filter on. You can choose to specify both min and max values or leave one end of the range open.
-
After selecting your values, you can choose whether or not to include null values in your filter. Nulls are included by default.
-
Click Save to save your new filter.
Your new filter appears in the worksheet control panel, where you can modify selected values alongside your worksheet’s spreadsheet interface.
Filter from a cell menu
It is possible to create new include/exclude type filters and modify existing ones using the context menu on a table cell. To filter on a select cell value:
- Right click on the cell you want to filter on. The the cell menu opens.
- From the menu, select Include
<cell value>or Exclude<cell value>.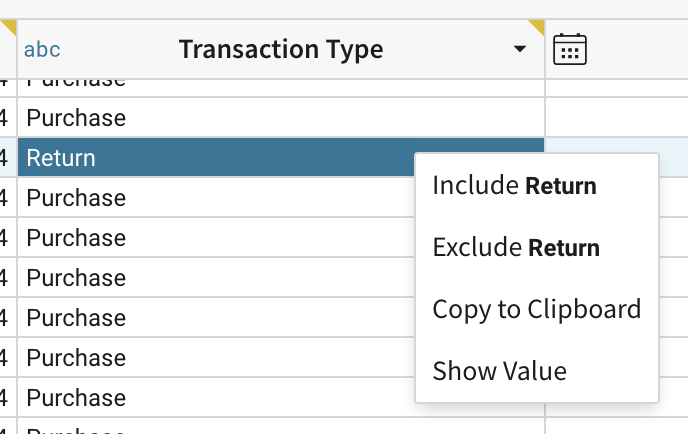 Your selection is applied to the worksheet and reflected in the control panel Filters list.
Modify a filter’s value selection
Changes made to a filter’s value selection from the control panel will automatically be applied to your worksheet’s data. The value selection input field is dependent on the filter type.
Edit a filter
The following instructions will show you how to open the ‘Edit Filter’ modal. From here, you can edit any structural detail of the filter.
Changes will not be made until you hit Save.
Edit a filter from the control panel
-
Open the control panel.
-
In the FILTERS list, hover over the control you would like to edit, and click the caret icon to open the dropdown menu.
-
Click Edit Filter.
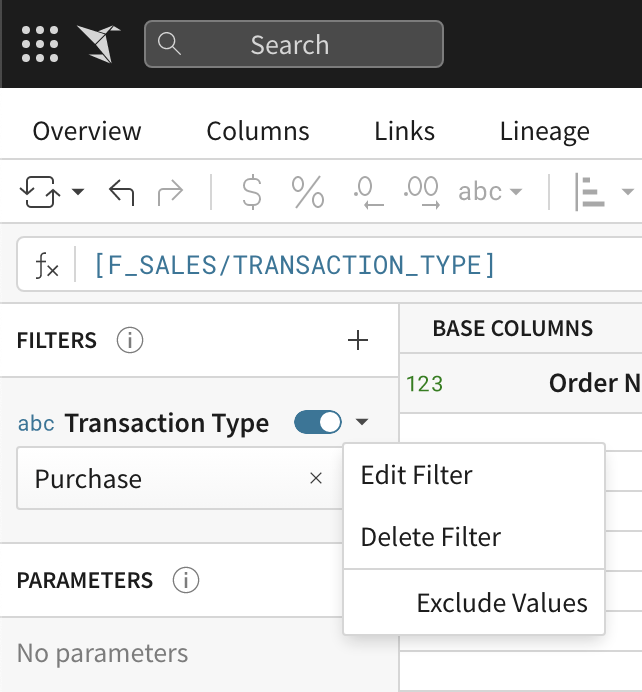
The 'Edit Filter' modal opens. Make your desired changes and click Save.
Delete a filter
The following instructions will permanently delete your filter. Alternatively, you can choose to temporarily disable the filter.
- Open the control panel.
- In the FILTERS list, hover over the filter you would like to delete, and click the caret icon to open the dropdown menu.
- Click Delete Filter.
Temporarily disabling a filter
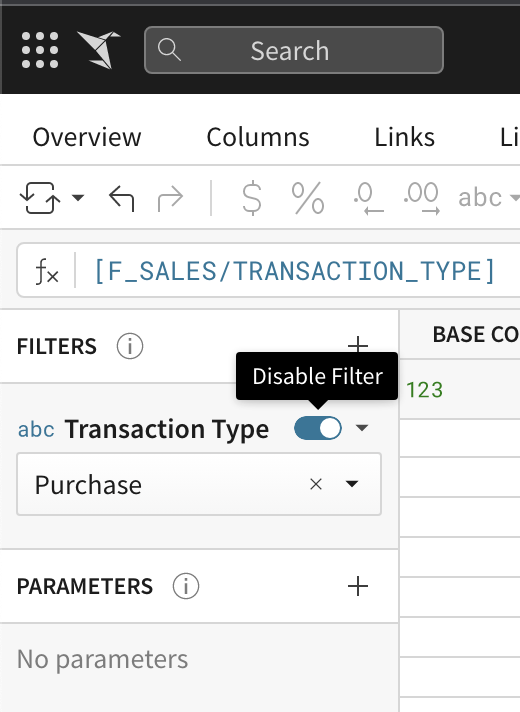
- Open the control panel.
- In the FILTERS list, hover over the control you would like to disable.
- Click the blue toggle switch to disable the filter.
Filter permissions
If you are a Sigma Creator or Admin, you can view, create, edit, and delete filters on the dataset worksheets you have access to. However, as with other worksheet changes, you must have edit permissions on the worksheet to publish your work. If you have view-only access, you may save your worksheet changes as a new worksheet; see Data permissions.