
Filter data in data elements
You can filter data in data elements, such as tables, pivot tables, and visualizations, to focus on a specific subset of the data for analysis or exploration.
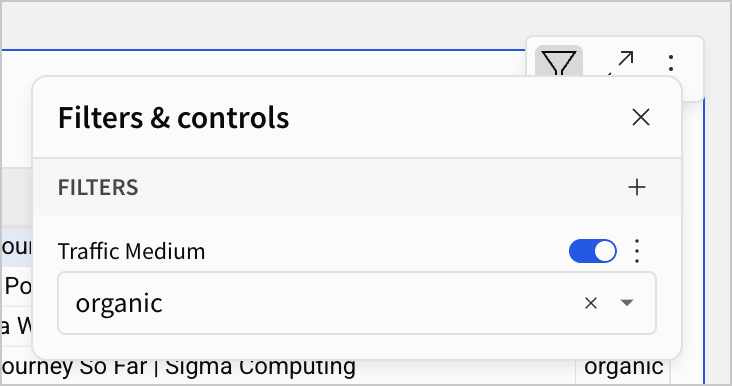
Filters and controls
You can filter a data element in several different ways:
- Filter one data element by adding filters to directly on columns in the data element. After you create a filter on a data element, you can optionally convert it to a control.
- Filter the data sources of a workbook and one or more data elements in a workbook by adding a control element and adding targets to each data element. See Create and manage a control element.
- Filter data directly in the query by adding a control and referencing the control ID in a SQL statement. See Reference workbook control values in SQL statements.
- Filter data elements with the same control settings on multiple pages by adding a control with synced copies. See Synced controls.
When you filter data in a data element, the filtering affects downstream and child elements. If you create a filter on a parent element, the filter cannot be viewed or modified from child elements. To identify which elements might be affected, review the workbook data lineage or review the lineage for a specific element in a data model.
For more best practices, see Best practices for using filters, controls, and parameters.
Order of operations of filters
Filters are applied together.
For example, if you have a data element targeted by a Top N control, showing the top 10 values in a table for the ID column, then you apply a quick filter to exclude 3 of the values from the shown top 10. If there are more than 10 rows in the base table, the top 10 values update to show a new set of 10.
The same is true for filters and aggregates. If you have a grouped table with an aggregate calculating the average price of items sold for a product category, then you filter the price column in the base table to exclude the cheapest items, the average price increases because it is calculated on the filtered data.
Add a filter to a data element
Filter one or more columns in a data element:
- Use the filter (
 ) in the element toolbar.
 - For a specific column, open the column details by clicking the caret (
 ).
). - Right-click a cell to open the context menu and perform a quick filter.
- Target an element with a control. See Create and manage a control element.
You cannot apply more than one data element filter to a column. If you want to filter one column multiple times, you must combine a data element filter with other filters, such as a control that targets that column, or a quick filter.
Add a filter from the element toolbar or column details
-
Select Filters (
) in the element toolbar. -
Select Add filter... to add a new filter.
-
Select + and choose the column to apply the filter to.
You cannot filter a column that already has a filter applied to it.
-
A default filter appears based on the data type of the column:
- For a Number column, the default is a number range filter.
- For a Text or Logical column, the default is a list filter.
- For a Date column, the default is a date range filter.
-
Select
 More to do one or more of the following:
- Change the filter type.
- Configure additional options, depending on the filter type.
Your filter is applied automatically.
Quick filter data in a column or chart
You can use the context menu to perform quick filters. A quick filter lets you quickly include (keep) or exclude selected data values. You can multi-select column or chart values, then perform a quick filter.
-
Locate the value that you want to include or exclude.
-
Right-click to open the context menu.
-
Select either Keep only or Exclude for the selected value(s).
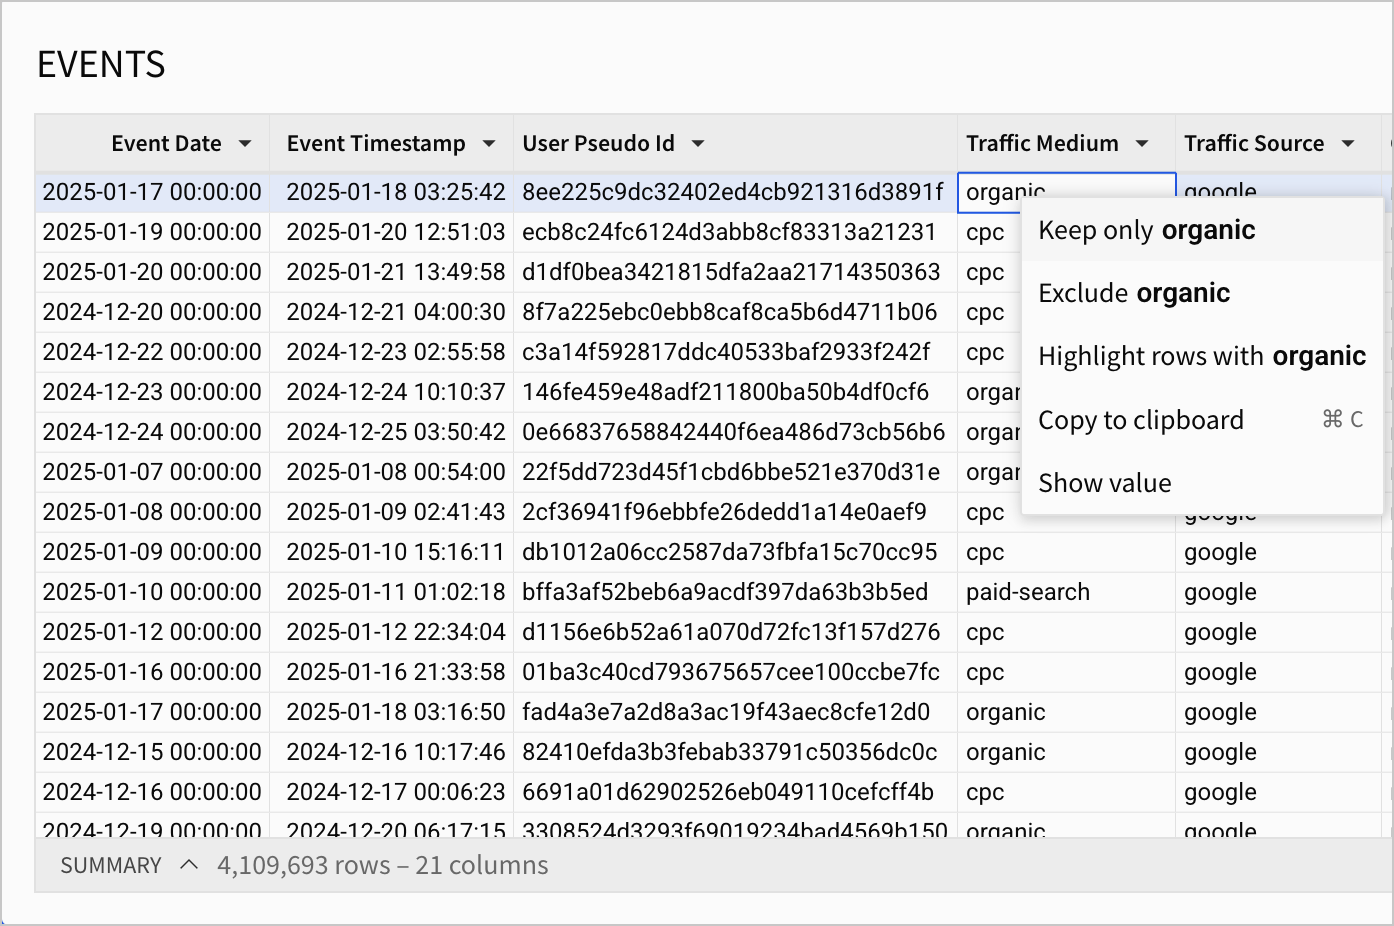
The data element updates and a list filter is created that includes or excludes the selected values. You can modify the filter by opening the filters in the element toolbar.
Types of filters
Depending on the type of column that you want to filter, different filter types are available. Choose the filter type that best suits your use case:
List
Include or exclude selected values in a list. Up to 200 values can be displayed in the list filter.
Supported data types: Text, Number, Date, Logical
Examples:
- Select multiple page paths to exclude from a website analytics table.
- Choose the current and previous quarter from a list to include only those quarters in a chart.
- Select false and null values for a survey column to include only those in a table.
Top N
Rank and limit data in the column according to your selection. You can choose between:
- First N
- Last N
- Top N
- Bottom N
- Top Percentile
- Bottom Percentile
You can also choose the ranking function: Rank, RankDense, or RowNumber.
Supported data types: Text, Number, Date
Examples:
- View the last 20 employees by name, alphabetically.
- View the top 10 most-viewed pages in website analytics data.
- View the first 5 survey responses by date.
For more details about using Top N, see Top N Filter.
Number range
Include only the values within the specified number range, including the upper and lower bounds of the range, in your data. You can choose whether to filter null data.
Supported data types: Number
Examples:
- Exclude survey results with fewer than 5 responses by setting a minimum of 6.
- Include demographic data for ages between 45 and 55, inclusive.
- Exclude user sessions with more than 100 clicks from website analytics data.
Date range
Include only the values within the specified date range in your data, including the upper and lower bounds of the range. You can specify fixed dates (October 24, 2024) or relative dates (Last month).
For relative dates, you can choose whether to include the current day, week, month, quarter, or year. If your data includes future dates, those dates are included. You can also choose whether to filter null data.
Supported data types: Date
Examples:
- View data from the last 30 days to assess a monthlong campaign.
- View telemetry data from the last 15 minutes to troubleshoot a problem.
- View financial data for the current quarter-to-date.
- View data from the first Monday of the month, for example, November 4, 2024.
Text match
Include only full and partial matches for a specified text string in your data, according to the selected operator.
Choose one of the following operators:
- Equal to
- Not equal to
- Contains
- Does not contain
- Starts with
- Does not start with
- Ends with
- Does not end with
- Like
- Not like
- Matches RegExp
- Does not match RegExp
You can also choose whether matches should be case sensitive and whether to filter null values.
Supported data types: Text
Examples:
- View data where the text contains "Total".
- View data for host names that start with "https://www".
- View data where the text does not contain "Not Applicable".
- View data where the text ends with "EOF", case sensitive.
- View data where the text matches "total" or "subtotal" using a regular expression
total|subtotal.
Updated 4 months ago