
Share a workbook
If you own or have Can Edit permissions on a workbook, you can share the workbook with individuals, teams, and everyone in your Sigma organization. When you share a workbook with someone, they are also granted View access to the data in the connection data sources.
If you want to share a workbook but only allow the user to access a specific version of the workbook, see Share tagged versions of a workbook or data model .
Requirements
The ability to share a workbook requires the following:
- You must be assigned an account type with the Share documents permission enabled.
- You must be the workbook owner or be granted Can edit workbook permission.
About sharing with users, teams, and all organization members
When you share a workbook with an individual user, the availability of workbook permissions depends on the user's account type.
| Workbook permission | Minimum required account type permission | Description |
|---|---|---|
| Can view | View workbooks | The user can view and interact with workbook elements in View mode. |
| Can explore | Full explore | In addition to Can view capabilities, the user can modify workbook elements to create custom views of the workbook in Explore mode. |
| Can edit | Create, edit, and publish workbooks | In addition to Can view and Can explore capabilities, the user can manage the workbook (rename, move, or delete), view hidden pages, and save changes to the published version. If the Share documents account type permission is enabled, the user can also share the workbook with other organization members. |
When you share a workbook with all members of your organization or a specific team, individual user access is based on the most restrictive grant (the one with the least privileges) between the workbook permission and account type permission. For example, if you grant Can edit permission to all members of your organization, but a user is assigned an account type with only View workbooks permissions enabled, that specific user is limited to Can view workbook privileges.
For more information about workbook permissions and modes, see Folder and document permissions and Workbook modes overview.
Share a workbook with an organization member or team
You can share a draft or published workbook:
- In the workbook header, click Share (
 ) to open the Share Workbook modal. You can also share a workbook from the workbook menu.
 - In the search bar, enter the team or organization member with whom you want to share the workbook.
- For each team or user, select a Permission from the dropdown. If the workbook has tagged versions, you can also limit the permission to a specific version tag.
- Repeat as needed for additional teams or members.
- (Optional) Add a message to be included in an email message to the users gaining access to the workbook.
- By default, the Sigma service sends an email message. Deselect the checkbox if you don't want to send an email.
- Click Share.
Share a workbook with your organization
You can copy a link to the workbook and share it with users in your organization. Guest users and external users cannot access a workbook shared with your organization.
-
In the workbook header, click Share (
) to open the Share Workbook modal. You can also share a workbook from the workbook menu. -
At the bottom of the modal, in the General access link section, toggle Allow sharing by link.
-
For All members of your organization, choose from the available permissions. The following permissions are available:
- Can view
- Can explore
- Can edit
For more information, see About sharing with users, teams, and all organization members on this page.
After you set the permission, the workbook can be shared.
-
Click Copy Link to copy the link to the workbook to share with others, then close the modal.
Transfer ownership of a workbook
You can transfer ownership of a workbook from one user to another. Before you transfer ownership of a workbook, make sure that the future owner either has access to the folder containing the workbook, or move the workbook.
You must be assigned the Admin account type to transfer ownership.
To transfer ownership of a workbook, share the workbook with the future owner, then assign them as the owner:
- In the workbook header, click Share () to open the Share Workbook modal. You can also share a workbook from the workbook menu.
- In the search bar, enter the user to whom you want to transfer ownership.
- Grant the user any permission level.
- Click Share.
- In the workbook header, click Share () to reopen the Share Workbook modal.
- Locate the user to whom you want to transfer ownership.
- In the permissions dropdown menu for the user, select Owner.
The changes save automatically.
When you deactivate a user, you can transfer ownership of all their documents to another user. See Deactivate a user.
Share an unsaved workbook exploration
You can share a workbook from Explore mode using a link. It works the same way as using links to sharing other workbooks, with the additional checkbox Link to current exploration that is selected by default.

If you make changes to the workbook exploration, you must create a new link to share the changes.
If you have not yet saved your workbook, you can still share the exploration. In the header, click Share (![]() ), then turn on Allow access by link.
), then turn on Allow access by link.

Limit access to workbook contents by hiding pages
You can hide pages in a workbook from users with only Can Explore and Can View permissions on a workbook. To hide a page, see Manage workbook page visibility.
Respond to requests for access to content
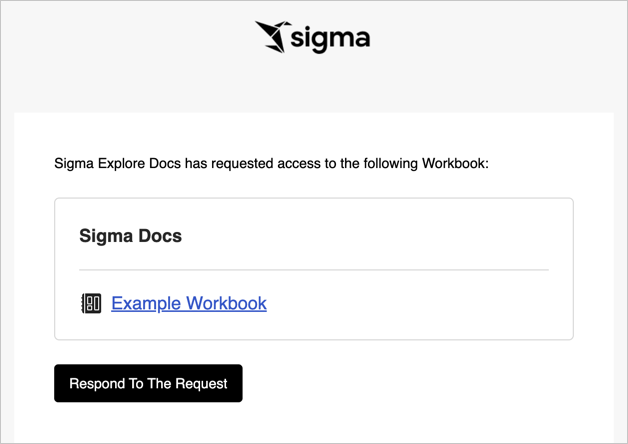
As a workbook owner, if a user attempts to access your content and doesn't have permission to do so, they can request access through the error page blocking their immediate access. Access requests are emailed to the document owner.
To respond to a request to access the document, do the following:
-
Open the email notification, then click Respond to the Request.
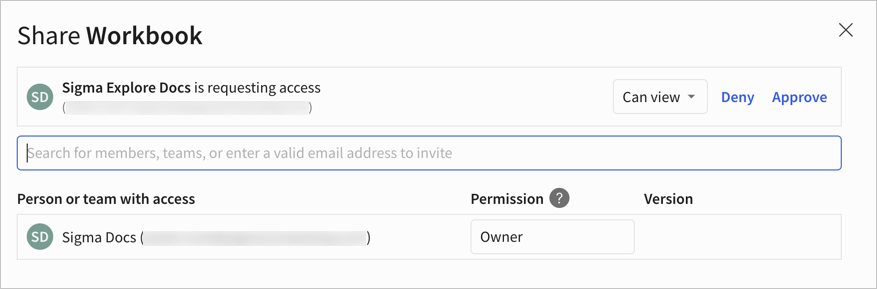
A web browser window opens to the Sigma service. After logging in, the Share Workbook modal opens. You can see and respond to the access request.
-
(Optional) For the requesting user, click the permission dropdown menu to select the appropriate level of access. For a version tagged workbook, you can choose a specific permission and version tag combination to grant the user access to view or explore a specific tagged version of the workbook.
The user can't be granted access higher than what their account type allows.
-
To approve the request, click Approve.
The user is granted access to view the workbook and immediately shows up in the list of people and teams with access.To deny the request, click Deny.
Access to the workbook remains unchanged and the request is removed from the Share Workbook modal. -
Click Save.
Updated about 10 hours ago