
Use Sigma Assistant to build dashboards and apps (Beta)
This documentation describes one or more public beta features that are in development and available only to customers who meet certain conditions. For more information, contact your Account Executive.
Beta features are subject to quick, iterative changes; therefore, the current user experience in the Sigma service can differ from the information provided in this page.
This page should not be considered official published documentation until Sigma removes this notice and the beta flag on the corresponding feature(s) in the Sigma service. For the full beta feature disclaimer, see Beta features.
When editing a workbook, use Sigma Assistant in plan and build modes to help you design and build workbooks using natural language prompts. Assistant in plan or build mode can explore any data source you have permission to access, enabling you to ask questions, provide instructions, give feedback, and iterate as needed to build a complete dashboard or AI app.
In a workbook, use Assistant in plan and build modes to do the following:
- Build dashboards with charts, tables, KPIs, and filters to visualize and explore your data.
- Set up structured data entry with forms, input tables, and actions.
- Accelerate the development of AI-powered apps from idea to working product.
This document describes the workbook capabilities of Assistant in plan and build modes, explains how to access it, and provides example use cases and prompts.
The use of AI features is subject to the following disclaimer.
Requirements
Using Sigma Assistant in plan or build mode requires the following:
-
Your organization must have a supported AI provider configured. See Set up an AI provider.
-
Your account type must have the Use Assistant and Create, edit, and publish workbooks permissions enabled. See License and account type overview.
-
You must be the workbook owner or have Can edit access to the workbook. See Folder and document permissions.
Sigma Assistant inherits your permissions. It can only use data that you're permitted to access, and it can only complete tasks that you're permitted to perform. For example, if you're assigned to an account type with the Create input tables permission disabled, Assistant cannot build workflows that include input tables.
Plan and build mode capabilities
When you access a workbook draft, Sigma Assistant can operate in one of two specialized modes: plan or build. You can switch between these modes to transition from scoping your work to executing it.
Plan mode
Plan mode gathers context, makes decisions, and outlines a structured approach without building or editing anything. Use Sigma Assistant in plan mode when you want to review and refine a proposed strategy before applying changes to the workbook.
Assistant in plan mode can complete tasks like the following:
- Clarify your goals, requirements, and intended outcomes.
- Recommend pages, elements, structure, and layout for your use case.
- Identify the data sources, columns, and logic needed to achieve your goal.
- Review existing workbook content and recommend improvements or next steps.
When Assistant proposes a plan, you can edit it by entering further instructions in the prompt bar, or you can select View plan and modify the scope, structure, and other details directly in the plan editor.
Build mode
Build mode creates and modifies workbook content. Use Sigma Assistant in build mode when you're ready to make changes that construct a dashboard or develop an app.
Assistant in build mode can complete tasks like the following:
- Create tables, charts, controls, and other workbook elements.
- Edit element properties and formatting.
- Organize workbook layout and navigation.
- Add interactive components including filters, tabbed containers, and modals.
- Configure actions that execute in response to specific user activity and system events.
Access Sigma Assistant in a workbook draft
Use any of the following entry points to access Sigma Assistant while working in a workbook draft. Each of these options opens the Assistant panel, where you can choose the mode and enter your instructions.
Empty state workbook
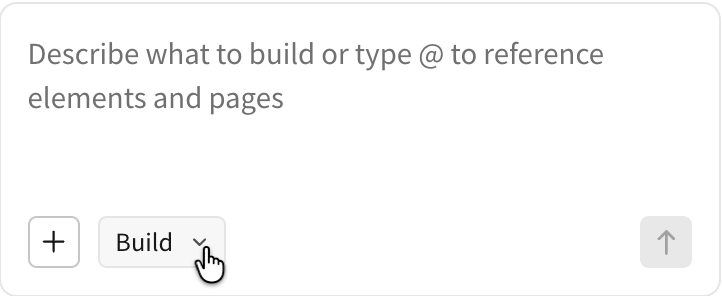
In the empty state of the workbook, enter your instructions in the prompt bar (displayed on the canvas when the workbook contains no content). The Assistant panel opens and responds to your prompt.
Workbook header
In the workbook header, select ![]() Assistant panel, then enter your instructions in the panel's prompt bar.
Assistant panel, then enter your instructions in the panel's prompt bar.
Keyboard shortcut
Use the ⌘ + K (macOS) or Ctrl + K (Windows) keyboard shortcut to open the Assistant panel, then enter your instructions in the prompt bar.
If you're editing a text element, the shortcut opens a modal for adding linked text instead. To open the Assistant panel, click outside the text element.
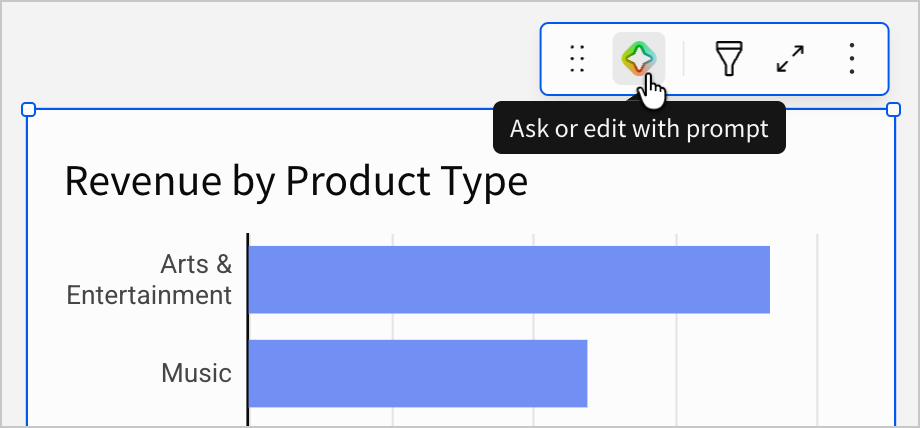
Element toolbar
When available in an element's toolbar, select ![]() Ask or edit with prompt, then enter your instructions in the input field. The Assistant panel opens and responds to your prompt in the context of the selected element.
Ask or edit with prompt, then enter your instructions in the input field. The Assistant panel opens and responds to your prompt in the context of the selected element.
Switch between plan and build modes
In a workbook draft, Sigma Assistant opens in build mode by default. To manually change the mode, select the mode picker in the prompt bar and choose an option.
Assistant can also suggest switching modes when appropriate. For example, in build mode, it might ask if you want to switch to plan mode when your request is ambiguous, involves modifying existing content, or explicitly asks for a plan or recommendation. In plan mode, after proposing a plan, Assistant suggests switching to build mode to execute the proposal.
Assistant retains the context of the conversation when you toggle between plan and build modes.
Attach context to the conversation
Attach context to help Sigma Assistant focus on the right information and produce the most relevant results.
While using Assistant in either plan or build mode, you can attach the following types of context to a prompt:
- Attach a data source to tell Assistant which data to build from or analyze.
- Attach a workbook object to tell Assistant which page or element to answer questions about, build on, or modify.
- Attach an image to provide a visual reference that informs the design or can be added directly to the workbook as an image element or background image.
Attach a data source
Attach a specific table, data model, semantic view, or element as a data source for Sigma Assistant to build from or analyze.
- In the prompt bar, select
 Add > Attach data source, or type
 @, then select Attach data source from the autocomplete menu. - Browse the source picker or search for the name of the relevant data source, then select it.
Assistant uses the attached data source when generating its response. You can attach multiple data sources, and they remain available as context for follow-up questions and requests.
Attach a workbook object
Attach a specific page or element for Sigma Assistant to answer questions about, build on, or modify. You can only attach objects from the current workbook.
- In the prompt bar, type
@and begin typing the name of a page or element. - Select the relevant object from the autocomplete menu to include it as context for your prompt.
Assistant references the attached page or element when generating its response. In the conversation, page and element references appear as clickable links that navigate to the objects in the workbook.
Attach an image
Attach an image to provide Sigma Assistant with a visual reference. You can instruct Assistant to add an attached image to the workbook (e.g., as an image element or container background), or you can prompt Assistant to recreate a design shown in the image (e.g., attach a screenshot of a dashboard from any platform, and Assistant rebuilds it natively in Sigma).
Image guidelines:
- Number of images: Up to eight per prompt
- Supported formats: JPEG, PNG, GIF, and WebP
- Maximum file size: 3.75 MB per image (5 MB after base64 encoding)
To attach an image, use any of the following methods:
- In the prompt bar, select Add > Attach image, then choose an image file.
- Copy an image, then paste it into the prompt bar or plan editor.
- Drag an image, then drop it into the prompt bar or plan editor.
Assistant temporarily stores attached images in memory, and you can preview each one by clicking its chip in the conversation or prompt bar. If Assistant adds an image to the workbook, Sigma uploads it to cloud storage and saves it as a permanent part of the workbook, where it remains available after the conversation ends.
Example use cases and prompts
When editing a workbook draft, you can prompt Sigma Assistant in plan or build mode with a range of questions and instructions. The following use cases include sample prompts you can submit. When Assistant responds and executes the relevant tasks, you can continue the conversation by providing feedback, asking for clarification, or giving further instructions.
Employee engagement survey
Build a multi-page survey app from scratch, then iteratively refine the questions, layout, and analytics.
- "Help me build an employee engagement survey."
- "Add a question that asks about job satisfaction on a scale of 1 to 10 using a suitable control type for input."
- "Rename the survey to Quarterly Employee Survey."
- "Create a dashboard with a KPI showing total number of responses along with charts that visualize the results of each question."
- "Change the job satisfaction chart to a bar chart that shows the number of responses for each score from 1 to 10."
Chart creation and modification
Explore a dataset visually through an evolving single chart, adjusting how the data is sliced and presented.
- "Create a bar chart showing total revenue by product family."
- "Sort the bars so the highest revenue is first."
- "Show this over time instead as a line chart with months on the x-axis."
- "Break the lines down by store region so I can compare them."
- "Smooth out the line and show data points."
Sales performance dashboard
Generate an executive-ready dashboard with summary metrics, trends, and interactive filters.
- "Create a sales dashboard from the Plugs Electronics data."
- "Add a chart showing trailing 12-month revenue."
- "Add a filter for brand."
- "Show the top 10 products by revenue."
- "Make the data page visible to anyone with workbook access."
Input table creation and management
Design a structured input table from scratch with built-in business logic and metadata.
- "Create an input table to track sales opportunities with columns for opportunity name, rep, stage, close date, and ACV."
- "Add a column for deal priority. The options should be High, Medium, and Low."
- "Add a formula column that flags any deal closing within the next 30 days."
- "Rename the ACV column to 'Expected Revenue' and format it as currency."
- "Add system columns for created date and created by."