> For clean Markdown of any page, append .md to the page URL.
> For a complete documentation index, see https://help.sigmacomputing.com/llms.txt.
> For AI client integration (Claude Code, Cursor, etc.), connect to the MCP server at https://help.sigmacomputing.com/_mcp/server.
# Develop plugins for Sigma
## Plugins
Plugins are third-party applications built to add additional functionality into an existing product. Sigma supports plugins for workbooks. Developers build plugins using Sigma’s Plugin API, which communicates data and interaction events between a Sigma workbook and the plugin. Developers host these plugins, embed them in an `iframe` element in Sigma.
## User requirements
The ability to develop and test your plugin in your [Sigma Plugin Dev Playground](/docs/develop-plugins-for-sigma#use-the-development-playground) requires the following:
* You must have access to a Sigma Plugin Dev Playground, created by a user assigned the Admin [account type](/docs/create-and-manage-account-types).
* You must be assigned an [account type](/docs/account-type-and-license-overview) with the **Manage plugins** permission enabled.
* You must be the workbook owner or be granted **Can edit** [access](/docs/folder-and-document-permissions) to the workbook.
* You must develop the plugin using JavaScript, and it must be designed to execute in a web browser environment.
## Create a development project
At Sigma, we use the [React](https://reactjs.org/) libraries for front-end development. We recommend that you use the same environment to develop custom plugins for your organization in Sigma. If you choose to use a different method, ensure that you use JavaScript. Sigma supports both [standard JavaScript API](/docs/plugin-development-api#standard-javascript-api) and [React Hooks API](/docs/plugin-development-api#hooks-api).
### Create a project with React
1. Open your terminal and navigate to the directory where you plan to create your project.
2. Create a new project. We recommend using Vite's create-vite:
`npm create vite@latest`
3. Follow the prompts to create a directory and finish setting up your project.
4. Navigate to the project's main directory.
`cd `
5. Use your package manager to install Sigma’s plugin library. We recommend [yarn](https://yarnpkg.com/).
`yarn add @sigmacomputing/plugin`
6. Spin up your local host.
`yarn && yarn dev`
7. Start developing your plugin using the following tools:
* Get started with [Plugin Development API](/docs/develop-plugins-for-sigma#plugin-development-api).
* Test your plugin directly in a Sigma workbook using the [Sigma Plugin Dev Playground](/docs/develop-plugins-for-sigma#use-the-development-playground).
By default, the Vite local development server is available at [http://localhost:5173](http://localhost:5173/).
## Plugin Development API
To view API documentation for this feature, see [Plugin development API](/docs/plugin-development-api).
Plugin developers need access to a special plugin called Sigma Plugin Dev Playground. Once registered, this plugin points to [http://localhost:5173](http://localhost:5173/). For more information, see [Register a Sigma Plugin Dev Playground](/docs/register-a-sigma-plugin-dev-playground).
If you cannot find this plugin or want a development playground with an alternative default host, contact an admin in your Sigma organization with a request to [register a plugin with your Sigma organization](/docs/register-a-plugin-with-your-sigma-organization), with its production URL set to your preferred development URL.
## Use the development playground
1. Set your plugin’s development URL to [http://localhost:5173](http://localhost:5173/).
2. Run your plugin remotely.
If you followed our recommendations under [Create a Development Project](/docs/develop-plugins-for-sigma#create-a-development-project), enter the following command in your terminal.
`yarn && yarn dev`
3. Create/open a workbook.
4. In the workbook header, click **Edit**.
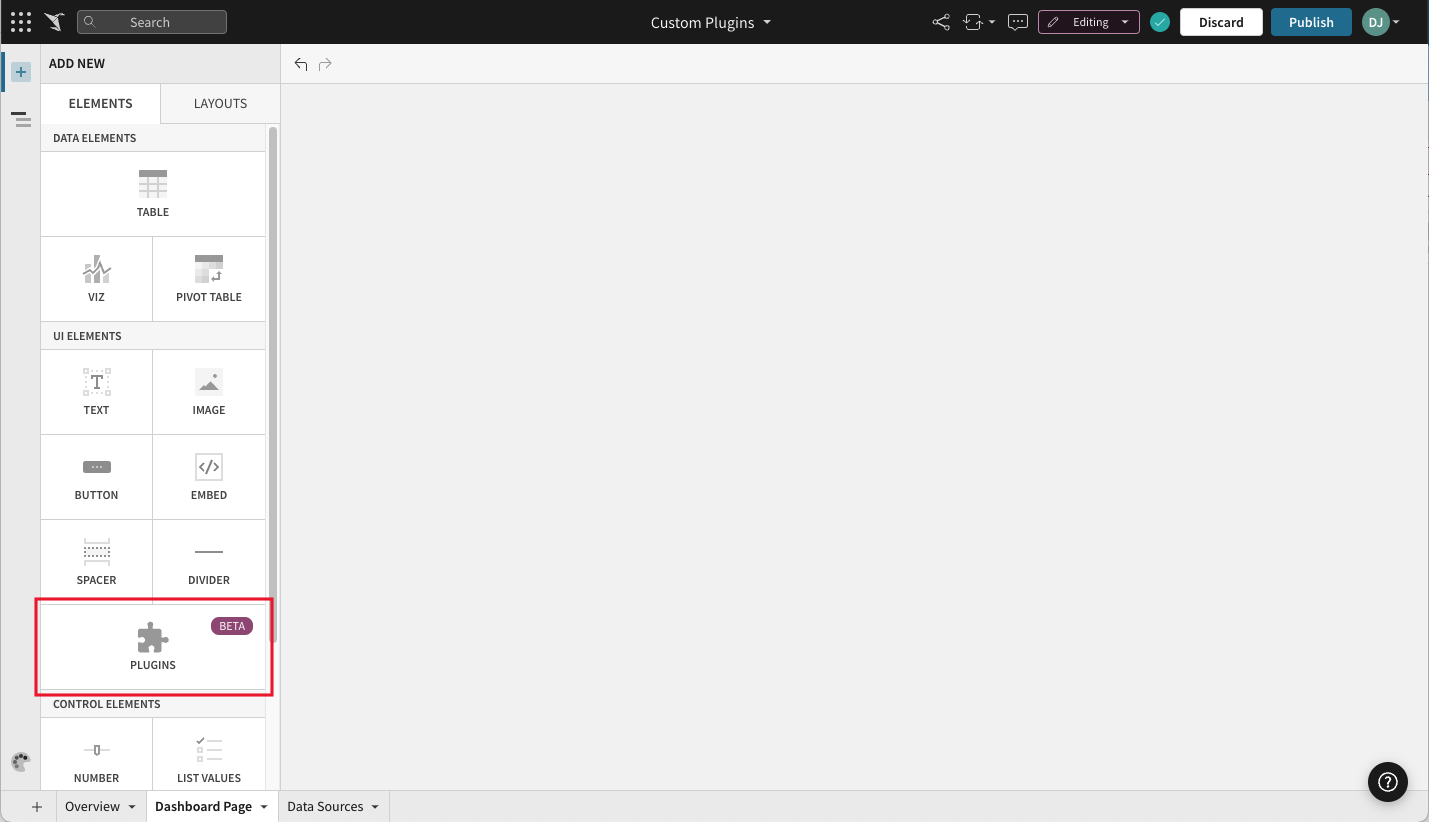
5. Click the + button in the sidebar to open the workbook’s **ADD NEW** panel.
6. Select the **PLUGINS** element type, located under **UI ELEMENTS**.
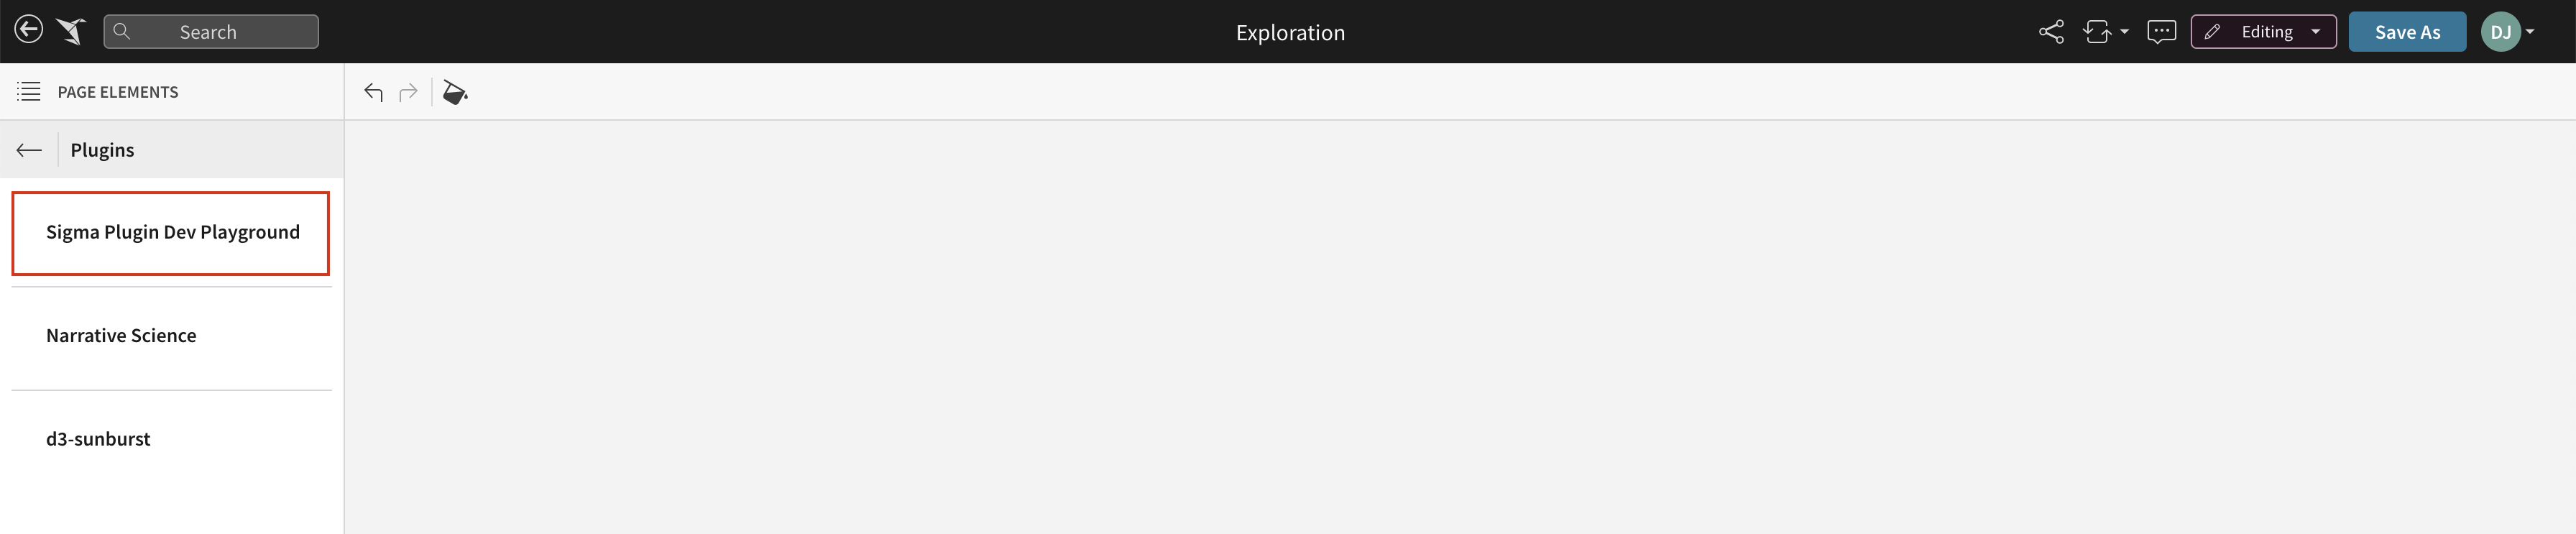
7. The editor panel will show you a list of available plugins. Select **Sigma Plugin Dev Playground**.
Your new plugin element appears on the page. The editor panel will only display content if you have configured your plugin using [Sigma’s plugin Configuration API](/docs/plugin-development-api#configuration-api). Likewise, the element will only display content if your plugin is configured to display content. If you change a plugin's configuration options, input values will need to be re-added in the editor panel.
**Next steps:**
* You can refresh your plugin as you make changes to its code. This option is available from the element’s menu.
* You are responsible for hosting your plugin. When you’re ready to register your plugin, visit Register a Plugin with Sigma.
## Test the plugin in development
1. Start up your development server. If you followed our recommendations under [Create a Development Project](/docs/develop-plugins-for-sigma#create-a-development-project), enter the following command in your terminal:
`yarn && yarn dev`
2. Create or open a workbook.
3. If you want to work with an existing element using the plugin, select that element. Otherwise, create a new plugin-based element.
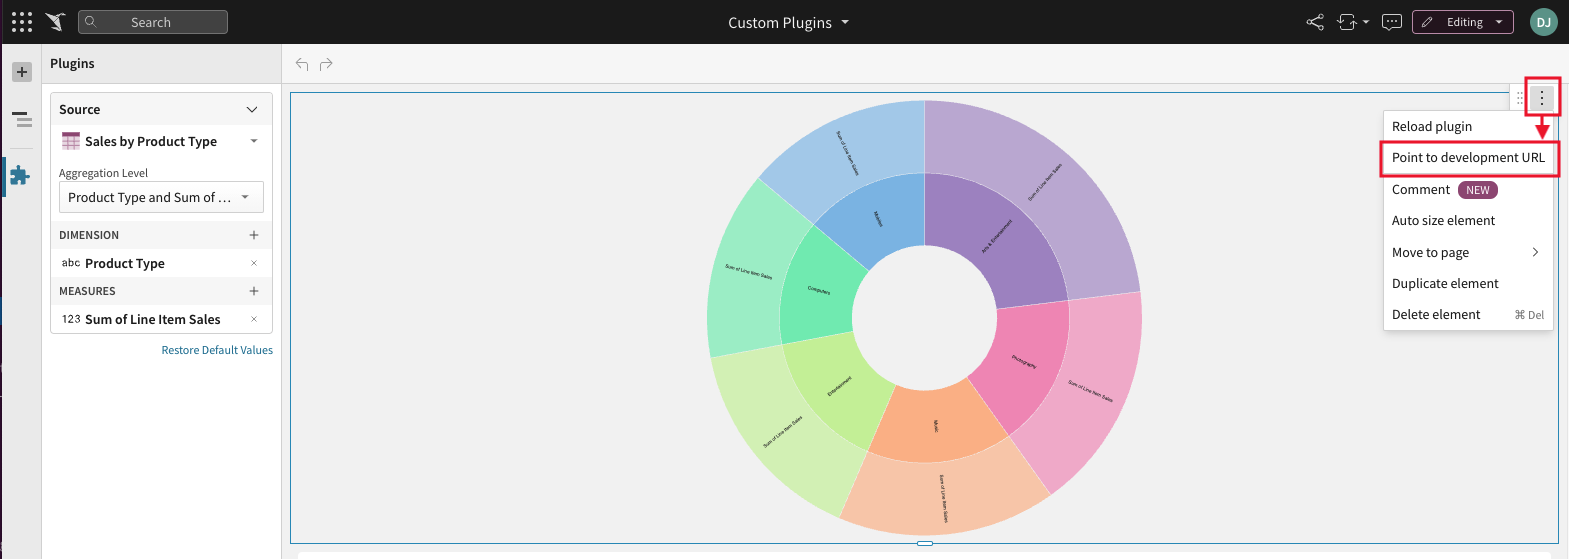
4. Hover over the element and click the vertical ••• icon button in its top right corner.
5. Select **Point to Development URL**.
6. In the **Configure Dev Server** modal, enter your development URL.
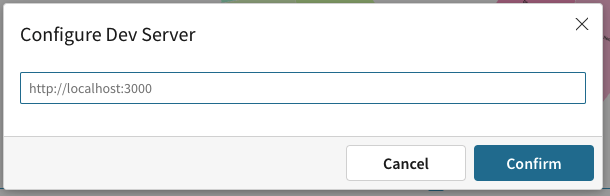
7. Click **Confirm**.
**Next steps**
* Your Sigma plugin element will automatically update to reflect saved changes to your code. There is no need to refresh the Sigma page.
* You can switch back to the production URL at any time, from the same element menu you used to set your temporary development URL (see steps above).
If you change a plugin's configuration options, input values will need to be re-added in the editor panel.
## Host your plugin
As a plugin developer, you are responsible for hosting your plugin. If you’re new to hosting your projects, we recommend these popular hosting platforms: [Heroku](https://devcenter.heroku.com/) and [Netlify](https://www.netlify.com/).
## Related resources
* [Get started with custom plugins](/docs/get-started-with-custom-plugins)
* [Plugin development API](/docs/plugin-development-api)
* [Register a Plugin with your Sigma Organization](/docs/register-a-plugin-with-your-sigma-organization)