Enables all *View* permissions.
*Recommended for users who need view-only access to prepared data and insights.*
| | Act |Enables all *View* and *Act* permissions.
*Recommended for users who need to input, update, and export data.*
| | Analyze |Enables all *View*, *Act*, and *Analyze* permissions.
*Recommended for users who require more deep-dive capabilities without building workbooks themselves.*
| | Build |Enables all *View*, *Act*, and *Analyze* permissions and a selection of *Build* permissions.
*Recommended for users who model, transform, and analyze data.*
| | Admin |Enables all *View*, *Act*, *Analyze*, and *Build* permissions, plus administrative privileges.
*For system administrators who manage organization settings and users.*
| ### Custom account types Custom account types allow you to create additional roles and levels of access. You can enable and disable any combination of permissions to suit the needs of your organization users. ## Create and manage account types The following procedures demonstrate how to create, edit, and delete account types. These tasks involve the account type details and permissions only. For information about assigning account types to users, see [View and manage account type assignments](#view-and-manage-account-type-assignments) in this document. ### Create a new custom account type 1. Go to **Administration** > **Account types**: 1. In the Sigma header, click your user avatar to open the user menu. 2. Select **Administration** to open the **Administration** portal. 3. In the side panel, select **Account types**. 2. In the **Account types** page, click **Create new account type**. 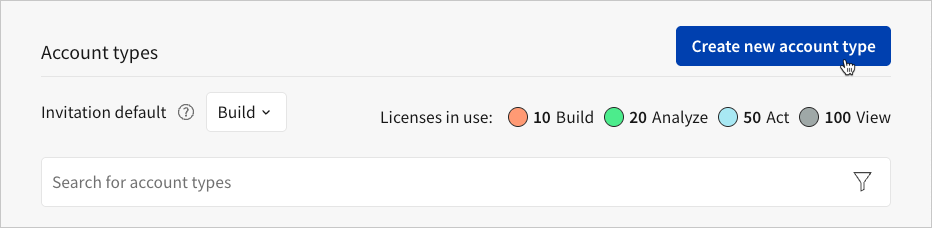 3. In the **New account type** page, configure the custom account type: 1. In the **Name** field, enter a unique name to identify the account type. 2. In the **Description** field, enter a description about the account type (for example, context about its permissions or user role). 3. In the permissions table, select the checkbox for each permission you want to enable. Clear the checkbox for each permission you want to disable. To select all permissions associated with the *View*, *Act*, *Analyze*, or *Build* license tier, select the checkbox in the applicable column header. Sigma automatically assigns a license to the account type based on the highest license tier of the enabled permissions. You can view the assigned license next to the account type name and description. 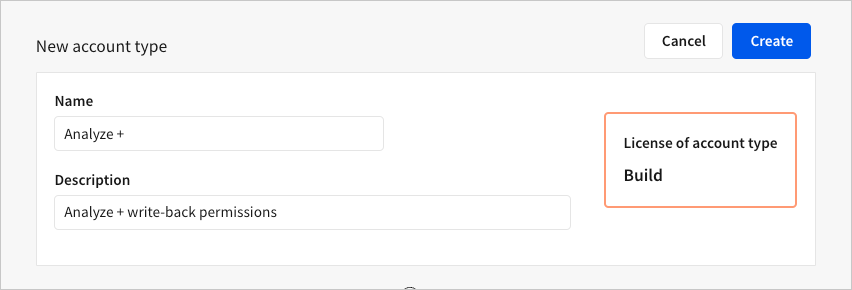 4. Click **Create** to save the new account type. ### Edit an existing account type 1. Go to **Administration** > **Account types**: 1. In the Sigma header, click your user avatar to open the user menu. 2. Select **Administration** to open the **Administration** portal. 3. In the side panel, select **Account types**. 2. In the **Account types** page, search or browse the list of account types and select the one you want to edit. You cannot edit the default *Admin* account type. 3. In the account type’s overview, click **Edit**. 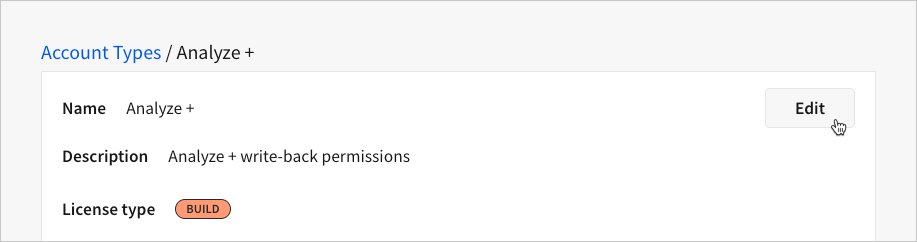 4. In the **Edit account type** page, edit the account type details and permissions as needed, then click **Save** to update the account type. ### Delete an existing custom account type 1. Go to **Administration** > **Account types**: 1. In the Sigma header, click your user avatar to open the user menu. 2. Select **Administration** to open the **Administration** portal. 3. In the side panel, select **Account types**. 2. In the **Account types** page, search or browse the list of account types to locate the one you want to delete, then click **More** and select **Delete**.
You can only delete custom account types. You cannot delete the default *View*, *Act*, *Analyze*, *Build*, and *Admin* account types.
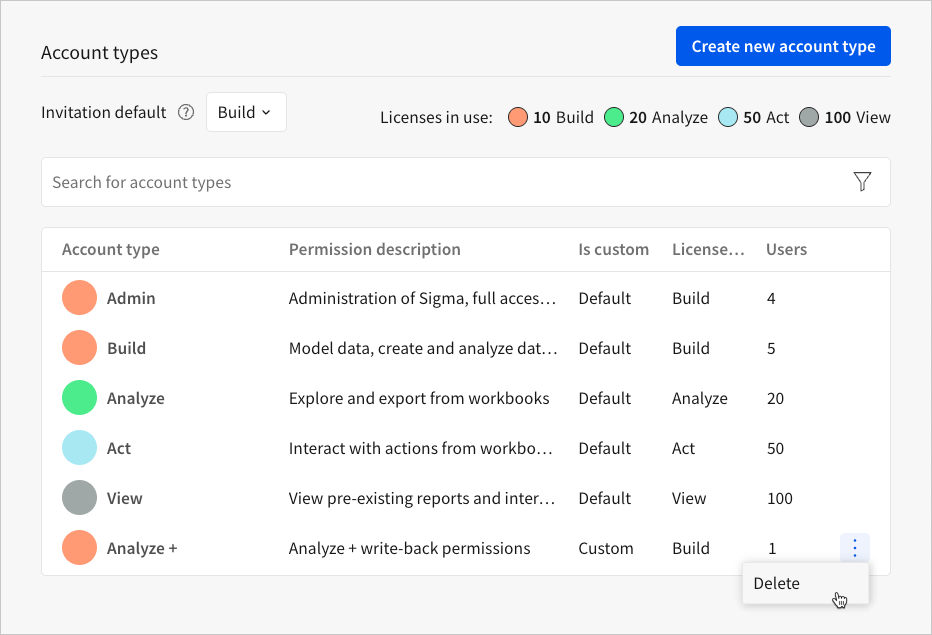
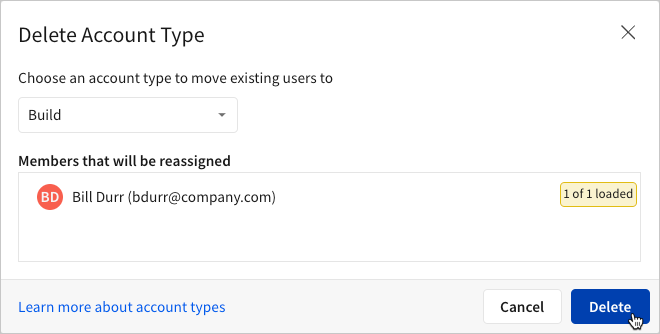
3. In the **Delete Account Type** modal, choose an account type to move assigned users to, then click **Delete**.
## View and manage account type assignments
There are several ways to view and manage account type assignments in Sigma. The following procedures highlight the methods available within the **Administration** > **Account types** page.
### View users assigned a specific account type
1. Go to **Administration** > **Account types**:
1. In the Sigma header, click your user avatar to open the user menu.
2. Select **Administration** to open the **Administration** portal.
3. In the side panel, select **Account types**.
2. In the **Account types** page, search or browse the list of account types and select the one you want to view.
3. In the account type’s overview, go to the **Members Assigned this Account Type** section to view a list of users currently assigned the account type. You can search the list and filter it by date joined, status, and user type.
### Add users to a specific account type
If your organization uses an identity provider (IdP) to manage permissions, you must [assign users to Sigma account types in the IdP](/docs/use-custom-account-types-with-your-idp).
1. Go to **Administration** > **Account types**:
1. In the Sigma header, click your user avatar to open the user menu.
2. Select **Administration** to open the **Administration** portal.
3. In the side panel, select **Account types**.
2. In the **Account types** page, search or browse the list of account types and select the one you want to assign.
3. In the account type’s overview, go to the **Members Assigned this Account Type** section and click **Add members**.
4. In the **Assign Account Type to Existing Members** modal, search for and select one or more users to assign the account type, then click **Confirm**.
Sigma immediately updates the account type assignment and sends an email to the added users to notify them of the change.
### Reassign users from a specific account type
If your organization uses an identity provider (IdP) to manage permissions, you must [reassign Sigma account types in the IdP](/docs/use-custom-account-types-with-your-idp).
1. Go to **Administration** > **Account types**:
1. In the Sigma header, click your user avatar to open the user menu.
2. Select **Administration** to open the **Administration** portal.
3. In the side panel, select **Account types**.
2. In the **Account types** page, search or browse the list of account types and select the one with users you want to reassign.
3. In the account type’s overview, go to the **Members Assigned this Account Type** section, locate the user you want to reassign, then click **More** and select **Reassign account type**.
Alternatively, to bulk reassign users, select the checkbox of each user you want to reassign, then click
**More** and select **Delete**.
You can only delete custom account types. You cannot delete the default *View*, *Act*, *Analyze*, *Build*, and *Admin* account types.

3. In the **Delete Account Type** modal, choose an account type to move assigned users to, then click **Delete**.

## View and manage account type assignments
There are several ways to view and manage account type assignments in Sigma. The following procedures highlight the methods available within the **Administration** > **Account types** page.
### View users assigned a specific account type
1. Go to **Administration** > **Account types**:
1. In the Sigma header, click your user avatar to open the user menu.
2. Select **Administration** to open the **Administration** portal.
3. In the side panel, select **Account types**.
2. In the **Account types** page, search or browse the list of account types and select the one you want to view.
3. In the account type’s overview, go to the **Members Assigned this Account Type** section to view a list of users currently assigned the account type. You can search the list and filter it by date joined, status, and user type.
### Add users to a specific account type
If your organization uses an identity provider (IdP) to manage permissions, you must [assign users to Sigma account types in the IdP](/docs/use-custom-account-types-with-your-idp).
1. Go to **Administration** > **Account types**:
1. In the Sigma header, click your user avatar to open the user menu.
2. Select **Administration** to open the **Administration** portal.
3. In the side panel, select **Account types**.
2. In the **Account types** page, search or browse the list of account types and select the one you want to assign.
3. In the account type’s overview, go to the **Members Assigned this Account Type** section and click **Add members**.
4. In the **Assign Account Type to Existing Members** modal, search for and select one or more users to assign the account type, then click **Confirm**.
Sigma immediately updates the account type assignment and sends an email to the added users to notify them of the change.
### Reassign users from a specific account type
If your organization uses an identity provider (IdP) to manage permissions, you must [reassign Sigma account types in the IdP](/docs/use-custom-account-types-with-your-idp).
1. Go to **Administration** > **Account types**:
1. In the Sigma header, click your user avatar to open the user menu.
2. Select **Administration** to open the **Administration** portal.
3. In the side panel, select **Account types**.
2. In the **Account types** page, search or browse the list of account types and select the one with users you want to reassign.
3. In the account type’s overview, go to the **Members Assigned this Account Type** section, locate the user you want to reassign, then click **More** and select **Reassign account type**.
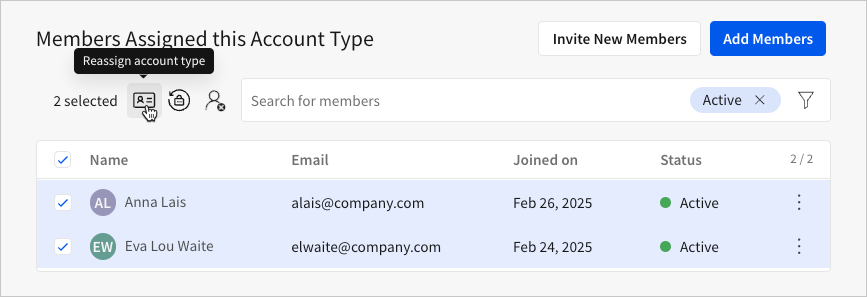
Alternatively, to bulk reassign users, select the checkbox of each user you want to reassign, then click  **Reassign account type**.
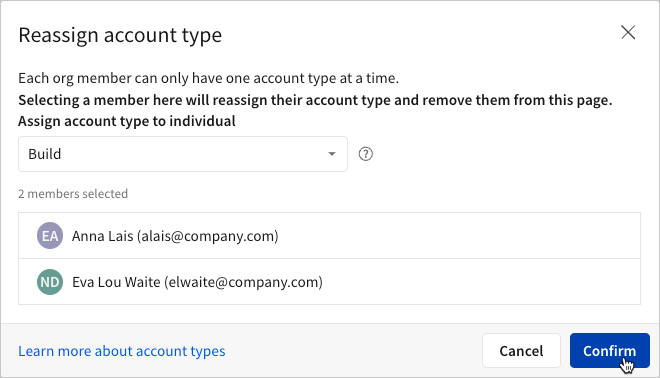
4. In the **Reassign Account Type** modal, select the account type you want to reassign to the users, then click **Confirm**.
Sigma immediately updates the account type assignment and sends an email to the users to notify them of the change.
## Manage default invitation account type
When you invite a new user to your organization, you can select the account type to assign. If you don’t manually select one, Sigma applies the default account type, which you can designate in the **Account Types** page.
The default invitation account type only applies to password-authenticated users [invited directly from the **Administration** portal](/docs/invite-new-organization-members). It doesn't apply when your organization uses [SAML or OAuth authentication methods](/docs/organization-authentication-methods).
1. Go to **Administration** > **Account types**:
1. In the Sigma header, click your user avatar to open the user menu.
2. Select **Administration** to open the **Administration** portal.
3. In the side panel, select **Account types**.
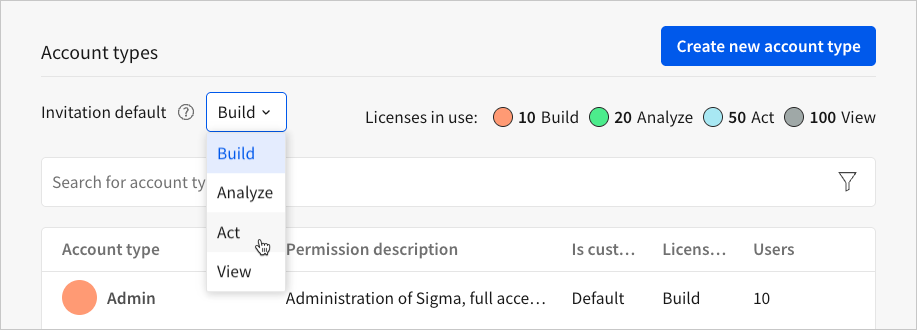
2. In the **Account types** page, select an option in the **Invitation default** field.
Sigma immediately applies the update to the invitation form fields.
**Reassign account type**.

4. In the **Reassign Account Type** modal, select the account type you want to reassign to the users, then click **Confirm**.
Sigma immediately updates the account type assignment and sends an email to the users to notify them of the change.

## Manage default invitation account type
When you invite a new user to your organization, you can select the account type to assign. If you don’t manually select one, Sigma applies the default account type, which you can designate in the **Account Types** page.
The default invitation account type only applies to password-authenticated users [invited directly from the **Administration** portal](/docs/invite-new-organization-members). It doesn't apply when your organization uses [SAML or OAuth authentication methods](/docs/organization-authentication-methods).
1. Go to **Administration** > **Account types**:
1. In the Sigma header, click your user avatar to open the user menu.
2. Select **Administration** to open the **Administration** portal.
3. In the side panel, select **Account types**.
2. In the **Account types** page, select an option in the **Invitation default** field.
Sigma immediately applies the update to the invitation form fields.
