> For clean Markdown of any page, append .md to the page URL.
> For a complete documentation index, see https://help.sigmacomputing.com/llms.txt.
> For AI client integration (Claude Code, Cursor, etc.), connect to the MCP server at https://help.sigmacomputing.com/_mcp/server.
# Connect to Snowflake
Sigma supports secure connections to Snowflake.
For information about Sigma feature compatibility with Snowflake connections, see [Region, warehouse, and feature support](/docs/region-warehouse-and-feature-support).
This document explains how to connect your Sigma organization to a Snowflake account.
If you do not already have a Sigma organization created, you can use Snowflake Partner Connect to create an organization and connect your Snowflake database with just a few clicks. You must have the `ACCOUNTADMIN` role in Snowflake to use Snowflake Partner Connect. To sign up with Snowflake Partner Connect, select Sigma from the Partner Connect list, then click **Connect** in the Connect to Sigma modal.
For an end-to-end walkthrough of an OAuth configuration using Snowflake and Okta, see the Open Authorization (OAuth) QuickStart.
## Requirements
* You must be assigned the **Admin** [account type](/docs/account-type-and-license-overview) or an account type with the **Manage connections** feature permission enabled.
* If you configure Snowflake with key pair authentication, you must know the login\_name of the user associated with the public key, which can be different from the user name. Find the login\_name for any user by running the DESCRIBE USER command in Snowflake. Find all valid names for the DESCRIBE USER command with the ALL\_USER\_NAMES function.
* You must be able to provide the credentials for a Snowflake user granted a role that has `USAGE` privileges to the necessary databases and schemas, and `SELECT` privileges to the necessary tables.
## Considerations when connecting Sigma to Snowflake
Sigma reflects your Snowflake role configurations. If USE SECONDARY ROLES is set to ALL for a user, the user can access data available to secondary roles granted to the user. For more details about primary and secondary roles in Snowflake, see "Authorization through primary role and secondary roles" in the Overview of Access Control in the Snowflake documentation.
When you connect Sigma to Snowflake, choose the most relevant authentication method for your use case:
Authenticate using a private key. The connection uses a service account, and you can delegate user access through that account. Use Sigma user attributes to parameterize the role and warehouse on a per-user or per-team basis.
Recommended when your users don’t have accounts in Snowflake, or when you don’t want your Snowflake policies or grants to be inherited by users in Sigma.
Authenticate to Snowflake using OAuth with a configuration specific to this connection. Users can sign in to Sigma through any method, but when they access data, they authenticate individually to Snowflake.
Recommended when Sigma users have Snowflake accounts and you want the same RBAC and row access policies to apply in Sigma, but you want to use a separate authentication method or OAuth server for Sigma. Required if you use multiple identity providers or want to connect to multiple data platforms using OAuth.
Authenticate to Snowflake using the same OAuth configuration that manages authentication to your Sigma organization. When a user signs in to Sigma with OAuth, Sigma uses their token to automatically sign them in to Snowflake.
Recommended when Sigma users have Snowflake accounts and you want the same RBAC and row access policies to apply in Sigma, and you want to use the same OAuth server for both Sigma and Snowflake.
Sigma queries the Snowflake connection every 24 hours to index the databases, schemas, tables, and views. This process is automated and reads from the Snowflake metadata in the cloud services layer. Under normal usage, this process results in minimal credit consumption; however in cases where there is minimal usage in a 24 hour period, higher credit consumption may occur. Snowflake connections without service accounts and authentication currently aren't indexed for cost reasons. To learn more about the cloud service layer and costs, see Understanding overall cost in the Snowflake documentation.
## Create a Snowflake connection in Sigma
To create a Snowflake connection, perform the following steps in Sigma:
1. [Add a connection and specify connection details](#add-a-connection-and-specify-connection-details)
2. [Specify your connection credentials](#specify-your-connection-credentials)
3. Configure an authentication method:
* [Connect to Snowflake with key pair authentication](#connect-to-snowflake-with-key-pair-authentication)
* [Connect to Snowflake with OAuth](#connect-to-snowflake-with-oauth)
* [Connect to Snowflake with basic authentication](#connect-to-snowflake-with-basic-authentication)
4. (Optional) [Configure write access](#configure-write-access)
5. [Configure connection features](#configure-connection-features)
### Add a connection and specify connection details
1. Click the user icon at the top right of your screen.
The user icon is usually composed of your initials.
2. In the drop-down menu, select **Add connection**. The **Add new connection** page appears.
3. In the **Connection details**, specify the following:
| | |
| -------- | ----------------------------------------------------------------------------------------- |
| **Name** | Enter a **Name** for the new connection. Sigma displays this name in the connection list. |
| **Type** | Select **Snowflake**. |
### Specify your connection credentials
In the **Connection credentials** section, fill out the required fields:
1. (Optional) If you access Snowflake using a proxy server, turn on the **Use Custom Host** toggle, then enter the **Snowflake Custom Host** name.
2. In the **Account** field, enter the Snowflake account name. For details on how to format your account name, see Using an account name as an identifier in the Snowflake documentation.
3. In the **Warehouse** field, enter the name of the warehouse as it is listed in Snowflake. This warehouse is used to run all queries generated from Sigma.
To instead set a different warehouse for different users or teams, you can set the warehouse using user attributes. Turn on the **Set by user attribute** toggle next to the **Warehouse** field . See [Dynamically assign roles used by a connection](/docs/dynamically-assign-roles-used-by-a-connection).
4. If you set your **Warehouse** field using user attributes and you plan to use input tables on this connection, provide a warehouse name in the **Service Account Warehouse** field that a service account can use. For more details, see Warehouse Switching in the Dynamic Role Switching with Snowflake QuickStart.
5. Choose the authentication method that you plan to use to connect to Snowflake. Next to **Authentication**, click the down arrow ( ), then choose your authentication method. For the method that you select, complete the required fields:
* [Connect to Snowflake with key pair authentication](#connect-to-snowflake-with-key-pair-authentication).
* [Connect to Snowflake with OAuth](/docs/connect-to-snowflake-oauth).
* [Connect to Snowflake with basic authentication](#connect-to-snowflake-with-basic-authentication).
Snowflake will no longer be supporting username and password authentication and recommends using key pair authentication or OAuth for programmatic service users. See Snowflake Strengthens Security with Default Multi-Factor Authentication and Stronger Password Policies in the Snowflake blog.
### Connect to Snowflake with key pair authentication
To authenticate the connection using a combination of public and private RSA key pairs, select **Key Pair** as your authentication method.
This method requires that you have a public and private key already created, and a Snowflake user configured with the public key. For instructions, see Key-pair authentication and key-pair rotation in the Snowflake documentation. If you have a multi-factor authentication (MFA) policy applied, exclude this user from the MFA policy. For a full walkthrough of all prerequisite steps, as well as detailed steps on how to rotate your keys, see the Snowflake Key-pair Auth QuickStart.
1. In the **User** field, enter the Snowflake login name that is configured with the public key. Retrieve the login name for a user by running the DESCRIBE USER command in Snowflake.
2. In the **Private key** field, add the private key as a PKCS#8-formatted file (`.p8`) or paste the private key text. The private key must include the header and footer. For example, `-----BEGIN PRIVATE KEY-----` and `-----END PRIVATE KEY-----` for a private key without a passphrase.
3. (Optional) If you configured one, enter the **Private key passphrase**.
4. (Optional) Enter a Snowflake **Role** to be used on this connection. If no role is provided, the user's default role in Snowflake is used.
To dynamically set the role based on a user attribute value assigned in Sigma, turn on the **Set by user attribute** toggle for the **Role** field. See [Dynamically assign roles used by a connection](/docs/dynamically-assign-roles-used-by-a-connection).
Next, see [Configure write access](/docs/connect-to-snowflake#configure-write-access) and [Configure connection features](/docs/connect-to-snowflake#configure-connection-features) for additional options. Or, if you are finished configuring your connection, click **Create** at the top right to create your connection.
### Connect to Snowflake with OAuth
If you want to use OAuth to connect to Snowflake, see [Connect to Snowflake with OAuth](/docs/connect-to-snowflake-oauth).
### Connect to Snowflake with basic authentication
To connect with a username and password, select **Basic Auth** as your authentication method.
Snowflake will block all users, including service users, from using single-factor authentication by late 2026. You must transition to multi-factor authentication by that time. For full details on Snowflake's deprecation plan, see Planning for the deprecation of single-factor password sign-ins.
Sigma recommends transitioning away from using basic authentication when connecting to Snowflake. Some functionality, such as writing Python code, is not available if you use basic authentication to connect to Snowflake. Instead, use key pair or OAuth authentication.
1. In the **User** field, enter a Snowflake login\_name. In Snowflake, login\_name is different from user name. Find login\_name for any user with the describe user command in Snowflake. Find all valid names for the describe user command with the all\_user\_names command in Snowflake.
If you have a multi-factor authentication (MFA) policy applied, exclude this user from the MFA policy.
2. In the **Password** field, enter the Snowflake password associated with the login\_name.
3. \[optional] For **Role**, enter the Snowflake role to be used for this connection. If no role is provided, the user’s default role in Snowflake is used.
To set the role using user attributes, turn on the **Set by user attribute** toggle for the **Role** field. See [Dynamically assign roles used by a connection](/docs/dynamically-assign-roles-used-by-a-connection).
Next, see [Configure write access](#configure-write-access) and [Configure connection features](/docs/connect-to-snowflake#configure-connection-features) for additional options. Or, if you are finished configuring your connection, click **Create** at the top right to create your connection.
### Set up session variables
This documentation describes one or more public beta features that are in development. Beta features are subject to quick, iterative changes; therefore the current user experience in the Sigma service can differ from the information provided in this page.
This page should not be considered official published documentation until Sigma removes this notice and the beta flag on the corresponding feature(s) in the Sigma service. For the full beta feature disclaimer, see [Beta features](/docs/sigma-product-releases#beta-features).
You can set session variables on a Sigma connection to Snowflake. The session variables are set for each query that Sigma runs in Snowflake. For details and an example implementation, see [Specify session variables for a Snowflake connection](/docs/specify-session-variables-for-a-snowflake-connection).
### Configure write access
Write access is required to use any of the following features:
* [CSV upload](/docs/upload-csv-data)
* [Materialization](/docs/materialization)
* [Input tables](/docs/intro-to-input-tables)
* [Warehouse views](/docs/create-and-manage-workbook-warehouse-views)
* [Write Python code](/docs/write-and-run-python-code)
* [Usage dashboard for Sigma Assistant](/docs/configure-a-usage-dashboard-for-assistant)
When you enable write access, binary input and output must be set to the **hex** format. See Binary input and output in the Snowflake documentation.
The steps to configure write access differ depending on the authentication method used for the connection. Follow the instructions that match your authentication option:
* [Configure write access on a connection with Basic Auth or Key Pair Auth](#configure-write-access-on-a-connection-with-basic-auth-or-key-pair-auth)
* [Configure write access on a connection with OAuth](#configure-write-access-on-a-connection-with-oauth)
When you designate a schema as the write access destination, Sigma reserves it for internal write-back objects and doesn’t expose it as a data source in the connection explorer (data catalog). To avoid restricting user access to analytical data, use a dedicated write-back database or schema that doesn’t store data used for analysis and reports.
#### Configure write access on a connection with Basic Auth or Key Pair Auth
Configuring write access requires setting up a dedicated database and schema in Snowflake and granting the necessary privileges.
Before enabling write access, grant the Snowflake user that you use to configure the Sigma connection a role with the following privileges:
| Object | Privilege |
| -------- | ------------------------------------------------------ |
| Database | `USAGE` |
| Schema | `USAGE`, `CREATE TABLE`, `CREATE VIEW`, `CREATE STAGE` |
To perform incremental materialization with dynamic tables, the primary role used by the connection must also be granted the privileges listed in Privileges to create a dynamic table in the Snowflake documentation.
Turn on the **Enable write access** toggle, then configure the following fields:
1. In the **Write database** field, enter the name of the database where Sigma should store write-back data.
2. In the **Write schema** field, enter the database schema where Sigma should store write-back data.
3. \[optional] In the **Materialization warehouse** field, enter a separate warehouse to run queries that perform materialization. If you don't specify a materialization warehouse, Sigma uses the primary warehouse for this connection.
4. \[optional] By default, Sigma uses dynamic tables for incremental materialization. If you do not want to use dynamic tables, turn off the **Use dynamic tables** switch. See [About materialization](/docs/materialization) for more details.
Next, see [Configure connection features](/docs/connect-to-snowflake#configure-connection-features) for additional options. Or, if you are finished configuring your connection, click **Create** at the top right to create your connection.
#### Configure write access on a connection with OAuth
After [setting up OAuth for the connection](/docs/connect-to-snowflake-oauth), configure write access. For information about how write access works for OAuth connections, see [About OAuth with write access](/docs/configure-oauth-with-write-access).
Configuring write access requires setting up a dedicated database and schema in Snowflake and granting the necessary privileges. For a user in Sigma to be able to use any of the features that use write access, their role must be granted the following privileges on the database and schema used as a write destination:
| Object | Privilege |
| -------- | ------------------------------------------------------ |
| Database | `USAGE` |
| Schema | `USAGE`, `CREATE TABLE`, `CREATE VIEW`, `CREATE STAGE` |
To configure write access for your OAuth connection to Snowflake:
1. Turn on the **Enable write access** toggle, then configure the following fields:
1. For **Write destinations**, provide at least one path in the format `DATABASE.SCHEMA` where Snowflake must store write-back data from Sigma objects, including input tables, input table edit logs, warehouse views, materializations, CSV uploads, and usage data for Sigma Assistant.
2. (Optional) Add more destinations as needed, depending on how you want to partition the data that Sigma writes back to your data warehouse. For example, you might create separate destinations for different teams and set up your team and schema permissions to ensure that each team has access to their designated destinations.
3. (Optional) In the **Materialization warehouse** field, enter a separate warehouse to run queries that perform materialization. If you don't specify a materialization warehouse, Sigma uses the primary warehouse for this connection.
4. (Optional) By default, Sigma uses dynamic tables for incremental materialization. If you do not want to use dynamic tables, turn off the **Use dynamic tables** switch. See [About materialization](/docs/materialization) for more details.
2. For additional options, see [Configure connection features](#configure-connection-features). If you are finished configuring your connection, click **Create** at the top right to create your connection.
### Configure connection features
In the **Connection features** section, specify the following:
1. In the **Connection timeout** field, specify the amount of time, in seconds, that Sigma should wait for the query to return results before timing out. The default in 120 seconds. The maximum is 600 seconds (10 minutes).
2. (Optional) If you do not want Sigma to automatically make column names from the data source more readable, turn off the **Use friendly names** toggle. For example, with **Use friendly names** turned on, a database column ORDER\_NUMBER or OrderNumber appears as Order Number.
3. (Optional) In the **Export warehouse** field, enter the name of the virtual warehouse created to run export queries. All scheduled, direct, and on-demand export queries run using the specified warehouse.
The export warehouse inherits the primary warehouse’s connection queue size. To set a different queue size for the export warehouse, contact [Sigma Support](/docs/sigma-support).
### Enable Python
To enable Python on your Snowflake connection, follow the steps to [Set up a Snowflake connection for Python](/docs/set-up-a-snowflake-connection-for-python), including optional Snowflake configuration steps.
### Finish creating your connection
After you specify all of the parameters for the connection, click **Create**.
1. Click **Create** at the top right of the screen to create your connection. Sigma displays a connection summary on the screen.
2. Click **Browse connection**, then click **Grant access** to grant data access for users in your organization. See [Data access overview](/docs/data-permissions-overview).
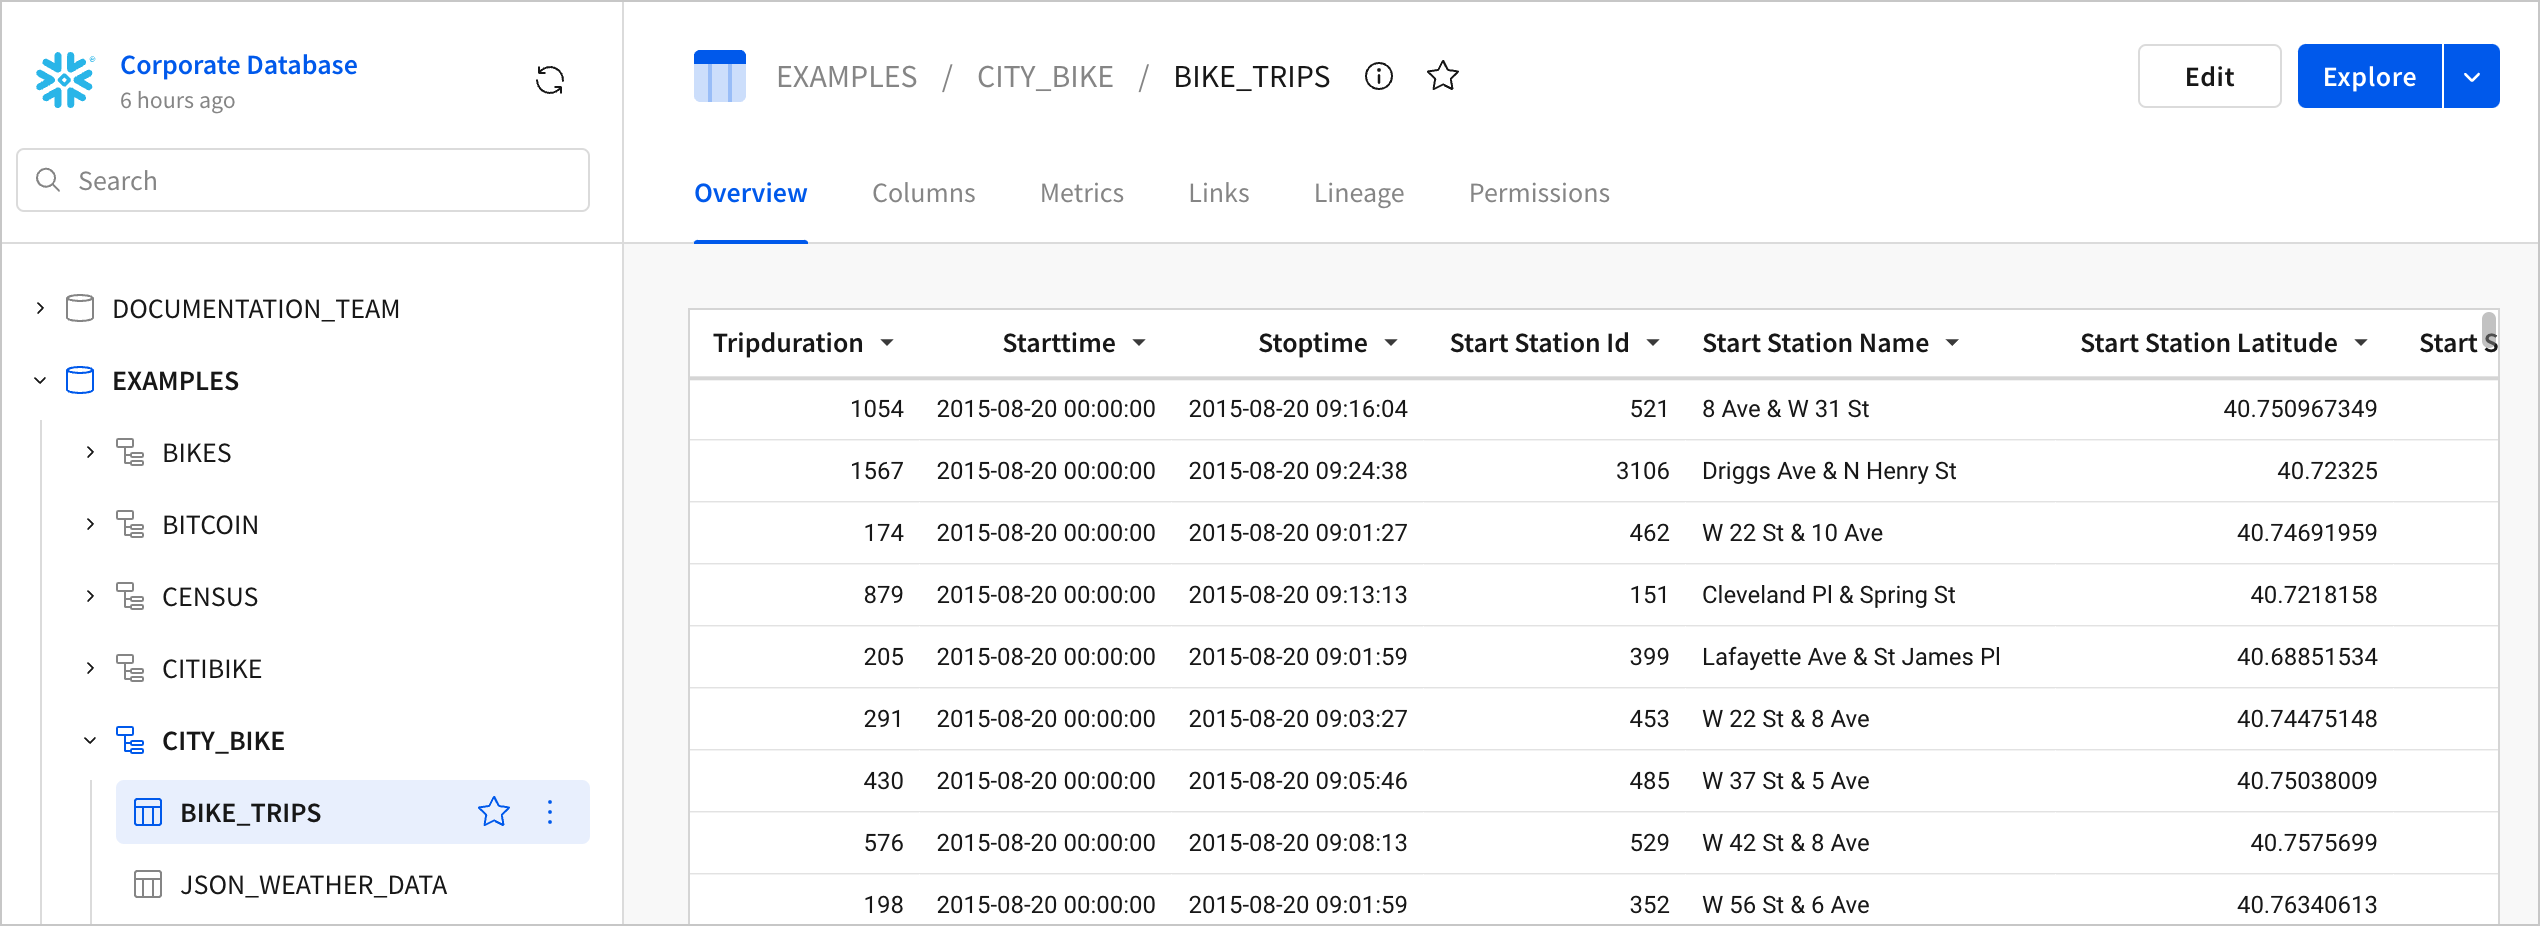
3. Use the navigation in the left panel to explore the schemas and tables in your connection.
## Related resources
* [Troubleshoot your connection](/docs/troubleshoot-your-connection)
* [Set up write access](/docs/set-up-write-access)
* [About OAuth with write access](/docs/configure-oauth-with-write-access)
* [Dynamically assign roles used by a connection](/docs/dynamically-assign-roles-used-by-a-connection)
* [Snowflake usage templates](/docs/snowflake-usage-templates)
), then choose your authentication method. For the method that you select, complete the required fields:
* [Connect to Snowflake with key pair authentication](#connect-to-snowflake-with-key-pair-authentication).
* [Connect to Snowflake with OAuth](/docs/connect-to-snowflake-oauth).
* [Connect to Snowflake with basic authentication](#connect-to-snowflake-with-basic-authentication).
Snowflake will no longer be supporting username and password authentication and recommends using key pair authentication or OAuth for programmatic service users. See Snowflake Strengthens Security with Default Multi-Factor Authentication and Stronger Password Policies in the Snowflake blog.
### Connect to Snowflake with key pair authentication
To authenticate the connection using a combination of public and private RSA key pairs, select **Key Pair** as your authentication method.
This method requires that you have a public and private key already created, and a Snowflake user configured with the public key. For instructions, see Key-pair authentication and key-pair rotation in the Snowflake documentation. If you have a multi-factor authentication (MFA) policy applied, exclude this user from the MFA policy. For a full walkthrough of all prerequisite steps, as well as detailed steps on how to rotate your keys, see the Snowflake Key-pair Auth QuickStart.
1. In the **User** field, enter the Snowflake login name that is configured with the public key. Retrieve the login name for a user by running the DESCRIBE USER command in Snowflake.
2. In the **Private key** field, add the private key as a PKCS#8-formatted file (`.p8`) or paste the private key text. The private key must include the header and footer. For example, `-----BEGIN PRIVATE KEY-----` and `-----END PRIVATE KEY-----` for a private key without a passphrase.
3. (Optional) If you configured one, enter the **Private key passphrase**.
4. (Optional) Enter a Snowflake **Role** to be used on this connection. If no role is provided, the user's default role in Snowflake is used.
To dynamically set the role based on a user attribute value assigned in Sigma, turn on the **Set by user attribute** toggle for the **Role** field. See [Dynamically assign roles used by a connection](/docs/dynamically-assign-roles-used-by-a-connection).
Next, see [Configure write access](/docs/connect-to-snowflake#configure-write-access) and [Configure connection features](/docs/connect-to-snowflake#configure-connection-features) for additional options. Or, if you are finished configuring your connection, click **Create** at the top right to create your connection.
### Connect to Snowflake with OAuth
If you want to use OAuth to connect to Snowflake, see [Connect to Snowflake with OAuth](/docs/connect-to-snowflake-oauth).
### Connect to Snowflake with basic authentication
To connect with a username and password, select **Basic Auth** as your authentication method.
Snowflake will block all users, including service users, from using single-factor authentication by late 2026. You must transition to multi-factor authentication by that time. For full details on Snowflake's deprecation plan, see Planning for the deprecation of single-factor password sign-ins.
Sigma recommends transitioning away from using basic authentication when connecting to Snowflake. Some functionality, such as writing Python code, is not available if you use basic authentication to connect to Snowflake. Instead, use key pair or OAuth authentication.
1. In the **User** field, enter a Snowflake login\_name. In Snowflake, login\_name is different from user name. Find login\_name for any user with the describe user command in Snowflake. Find all valid names for the describe user command with the all\_user\_names command in Snowflake.
If you have a multi-factor authentication (MFA) policy applied, exclude this user from the MFA policy.
2. In the **Password** field, enter the Snowflake password associated with the login\_name.
3. \[optional] For **Role**, enter the Snowflake role to be used for this connection. If no role is provided, the user’s default role in Snowflake is used.
To set the role using user attributes, turn on the **Set by user attribute** toggle for the **Role** field. See [Dynamically assign roles used by a connection](/docs/dynamically-assign-roles-used-by-a-connection).
Next, see [Configure write access](#configure-write-access) and [Configure connection features](/docs/connect-to-snowflake#configure-connection-features) for additional options. Or, if you are finished configuring your connection, click **Create** at the top right to create your connection.
### Set up session variables
This documentation describes one or more public beta features that are in development. Beta features are subject to quick, iterative changes; therefore the current user experience in the Sigma service can differ from the information provided in this page.
This page should not be considered official published documentation until Sigma removes this notice and the beta flag on the corresponding feature(s) in the Sigma service. For the full beta feature disclaimer, see [Beta features](/docs/sigma-product-releases#beta-features).
You can set session variables on a Sigma connection to Snowflake. The session variables are set for each query that Sigma runs in Snowflake. For details and an example implementation, see [Specify session variables for a Snowflake connection](/docs/specify-session-variables-for-a-snowflake-connection).
### Configure write access
Write access is required to use any of the following features:
* [CSV upload](/docs/upload-csv-data)
* [Materialization](/docs/materialization)
* [Input tables](/docs/intro-to-input-tables)
* [Warehouse views](/docs/create-and-manage-workbook-warehouse-views)
* [Write Python code](/docs/write-and-run-python-code)
* [Usage dashboard for Sigma Assistant](/docs/configure-a-usage-dashboard-for-assistant)
When you enable write access, binary input and output must be set to the **hex** format. See Binary input and output in the Snowflake documentation.
The steps to configure write access differ depending on the authentication method used for the connection. Follow the instructions that match your authentication option:
* [Configure write access on a connection with Basic Auth or Key Pair Auth](#configure-write-access-on-a-connection-with-basic-auth-or-key-pair-auth)
* [Configure write access on a connection with OAuth](#configure-write-access-on-a-connection-with-oauth)
When you designate a schema as the write access destination, Sigma reserves it for internal write-back objects and doesn’t expose it as a data source in the connection explorer (data catalog). To avoid restricting user access to analytical data, use a dedicated write-back database or schema that doesn’t store data used for analysis and reports.
#### Configure write access on a connection with Basic Auth or Key Pair Auth
Configuring write access requires setting up a dedicated database and schema in Snowflake and granting the necessary privileges.
Before enabling write access, grant the Snowflake user that you use to configure the Sigma connection a role with the following privileges:
| Object | Privilege |
| -------- | ------------------------------------------------------ |
| Database | `USAGE` |
| Schema | `USAGE`, `CREATE TABLE`, `CREATE VIEW`, `CREATE STAGE` |
To perform incremental materialization with dynamic tables, the primary role used by the connection must also be granted the privileges listed in Privileges to create a dynamic table in the Snowflake documentation.
Turn on the **Enable write access** toggle, then configure the following fields:
1. In the **Write database** field, enter the name of the database where Sigma should store write-back data.
2. In the **Write schema** field, enter the database schema where Sigma should store write-back data.
3. \[optional] In the **Materialization warehouse** field, enter a separate warehouse to run queries that perform materialization. If you don't specify a materialization warehouse, Sigma uses the primary warehouse for this connection.
4. \[optional] By default, Sigma uses dynamic tables for incremental materialization. If you do not want to use dynamic tables, turn off the **Use dynamic tables** switch. See [About materialization](/docs/materialization) for more details.
Next, see [Configure connection features](/docs/connect-to-snowflake#configure-connection-features) for additional options. Or, if you are finished configuring your connection, click **Create** at the top right to create your connection.
#### Configure write access on a connection with OAuth
After [setting up OAuth for the connection](/docs/connect-to-snowflake-oauth), configure write access. For information about how write access works for OAuth connections, see [About OAuth with write access](/docs/configure-oauth-with-write-access).
Configuring write access requires setting up a dedicated database and schema in Snowflake and granting the necessary privileges. For a user in Sigma to be able to use any of the features that use write access, their role must be granted the following privileges on the database and schema used as a write destination:
| Object | Privilege |
| -------- | ------------------------------------------------------ |
| Database | `USAGE` |
| Schema | `USAGE`, `CREATE TABLE`, `CREATE VIEW`, `CREATE STAGE` |
To configure write access for your OAuth connection to Snowflake:
1. Turn on the **Enable write access** toggle, then configure the following fields:
1. For **Write destinations**, provide at least one path in the format `DATABASE.SCHEMA` where Snowflake must store write-back data from Sigma objects, including input tables, input table edit logs, warehouse views, materializations, CSV uploads, and usage data for Sigma Assistant.
2. (Optional) Add more destinations as needed, depending on how you want to partition the data that Sigma writes back to your data warehouse. For example, you might create separate destinations for different teams and set up your team and schema permissions to ensure that each team has access to their designated destinations.
3. (Optional) In the **Materialization warehouse** field, enter a separate warehouse to run queries that perform materialization. If you don't specify a materialization warehouse, Sigma uses the primary warehouse for this connection.
4. (Optional) By default, Sigma uses dynamic tables for incremental materialization. If you do not want to use dynamic tables, turn off the **Use dynamic tables** switch. See [About materialization](/docs/materialization) for more details.
2. For additional options, see [Configure connection features](#configure-connection-features). If you are finished configuring your connection, click **Create** at the top right to create your connection.
### Configure connection features
In the **Connection features** section, specify the following:
1. In the **Connection timeout** field, specify the amount of time, in seconds, that Sigma should wait for the query to return results before timing out. The default in 120 seconds. The maximum is 600 seconds (10 minutes).
2. (Optional) If you do not want Sigma to automatically make column names from the data source more readable, turn off the **Use friendly names** toggle. For example, with **Use friendly names** turned on, a database column ORDER\_NUMBER or OrderNumber appears as Order Number.
3. (Optional) In the **Export warehouse** field, enter the name of the virtual warehouse created to run export queries. All scheduled, direct, and on-demand export queries run using the specified warehouse.
The export warehouse inherits the primary warehouse’s connection queue size. To set a different queue size for the export warehouse, contact [Sigma Support](/docs/sigma-support).
### Enable Python
To enable Python on your Snowflake connection, follow the steps to [Set up a Snowflake connection for Python](/docs/set-up-a-snowflake-connection-for-python), including optional Snowflake configuration steps.
### Finish creating your connection
After you specify all of the parameters for the connection, click **Create**.
1. Click **Create** at the top right of the screen to create your connection. Sigma displays a connection summary on the screen.
2. Click **Browse connection**, then click **Grant access** to grant data access for users in your organization. See [Data access overview](/docs/data-permissions-overview).
3. Use the navigation in the left panel to explore the schemas and tables in your connection.

## Related resources
* [Troubleshoot your connection](/docs/troubleshoot-your-connection)
* [Set up write access](/docs/set-up-write-access)
* [About OAuth with write access](/docs/configure-oauth-with-write-access)
* [Dynamically assign roles used by a connection](/docs/dynamically-assign-roles-used-by-a-connection)
* [Snowflake usage templates](/docs/snowflake-usage-templates)