> For clean Markdown of any page, append .md to the page URL.
> For a complete documentation index, see https://help.sigmacomputing.com/llms.txt.
> For AI client integration (Claude Code, Cursor, etc.), connect to the MCP server at https://help.sigmacomputing.com/_mcp/server.
# Build a progress ring (Beta)
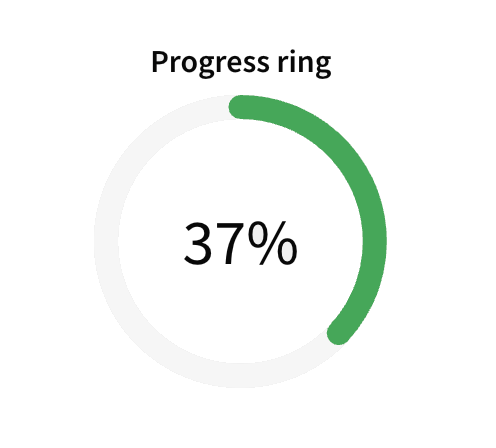
> Add progress rings in Sigma to display goal progress as a percentage or proportion. Track status and budget usage in workbooks and reports.
This documentation describes one or more public beta features that are in development. Beta features are subject to quick, iterative changes; therefore the current user experience in the Sigma service can differ from the information provided in this page.
This page should not be considered official published documentation until Sigma removes this notice and the beta flag on the corresponding feature(s) in the Sigma service. For the full beta feature disclaimer, see [Beta features](/docs/sigma-product-releases#beta-features).
Progress rings display values as a percentage or proportion of a target value or defined goal. Create progress rings to track your status toward a goal, monitor your team's budget usage, and more.
This document describes how to add a progress ring to a workbook or report and introduces key properties and format options to help you get the most out of your charts.
## User requirements
The ability to create progress rings requires the following:
* To create a chart in a workbook, you must be assigned an [account type](/docs/account-type-and-license-overview) with **Full explore** or **Create, edit, and publish workbooks** permission enabled.
* To create a chart in a report, you must be assigned an [account type](/docs/account-type-and-license-overview) with the **Create, edit, and publish reports** permission enabled.
* You must be the workbook/report owner or be granted **Can explore** or **Can edit** [access to the document](/docs/folder-and-document-permissions).
## Create a progress ring
Add a progress ring element to a workbook or report, and configure the required properties:
1. Open a workbook or report in a draft or custom view.
2. In the **Add element** bar, select **UI** and then **Progress ring**.
3. In the **Properties** tab of the editor panel, choose how you want the progress ring to display the configured value:
* To display progress as a percentage, select **Percent**.
* To display progress as a value within a defined range, select **Value**.
4. Select the **Value** field to open the formula bar, and enter a constant value or a dynamic text formula that references a control value or column.
You can use dynamic text to change your progress ring's value based on your workbook's data. For example, if your revenue goal is defined by a control with the ID `revenue-target`, the formula `Sum([Revenue]) / [revenue-target]` can dynamically calculate cumulative revenue as a proportion of that goal. See the [function index](/docs/function-index) for more information on writing formulas in Sigma.
5. (Optional) To change how the value is displayed, use the **Format** options available in the formula bar popover..
6. (Optional) If you selected **Value** in step 3, configure the progress ring's minimum and maximum values in the **Minimum** and **Maximum** fields, using a constant value or a dynamic text formula that references a control value or column.
You can convert a progress ring to a [progress bar](/docs/build-a-progress-bar) while retaining all property and format configurations by selecting **Bar** in the **Properties** tab of the editor panel.
## Customize a progress ring
You can customize a progress ring's appearance by changing its color, stroke, and alignment, adding conditional formatting, and modifying its label, value text, and description.
### Configure the color of a progress ring
You can change the color of a progress ring to fit your workbook or report's theme or to help emphasize different kinds of goals.
1. Select the progress ring you want to modify.
2. In the **Format** tab of the editor panel, select **Ring format** to expand the section.
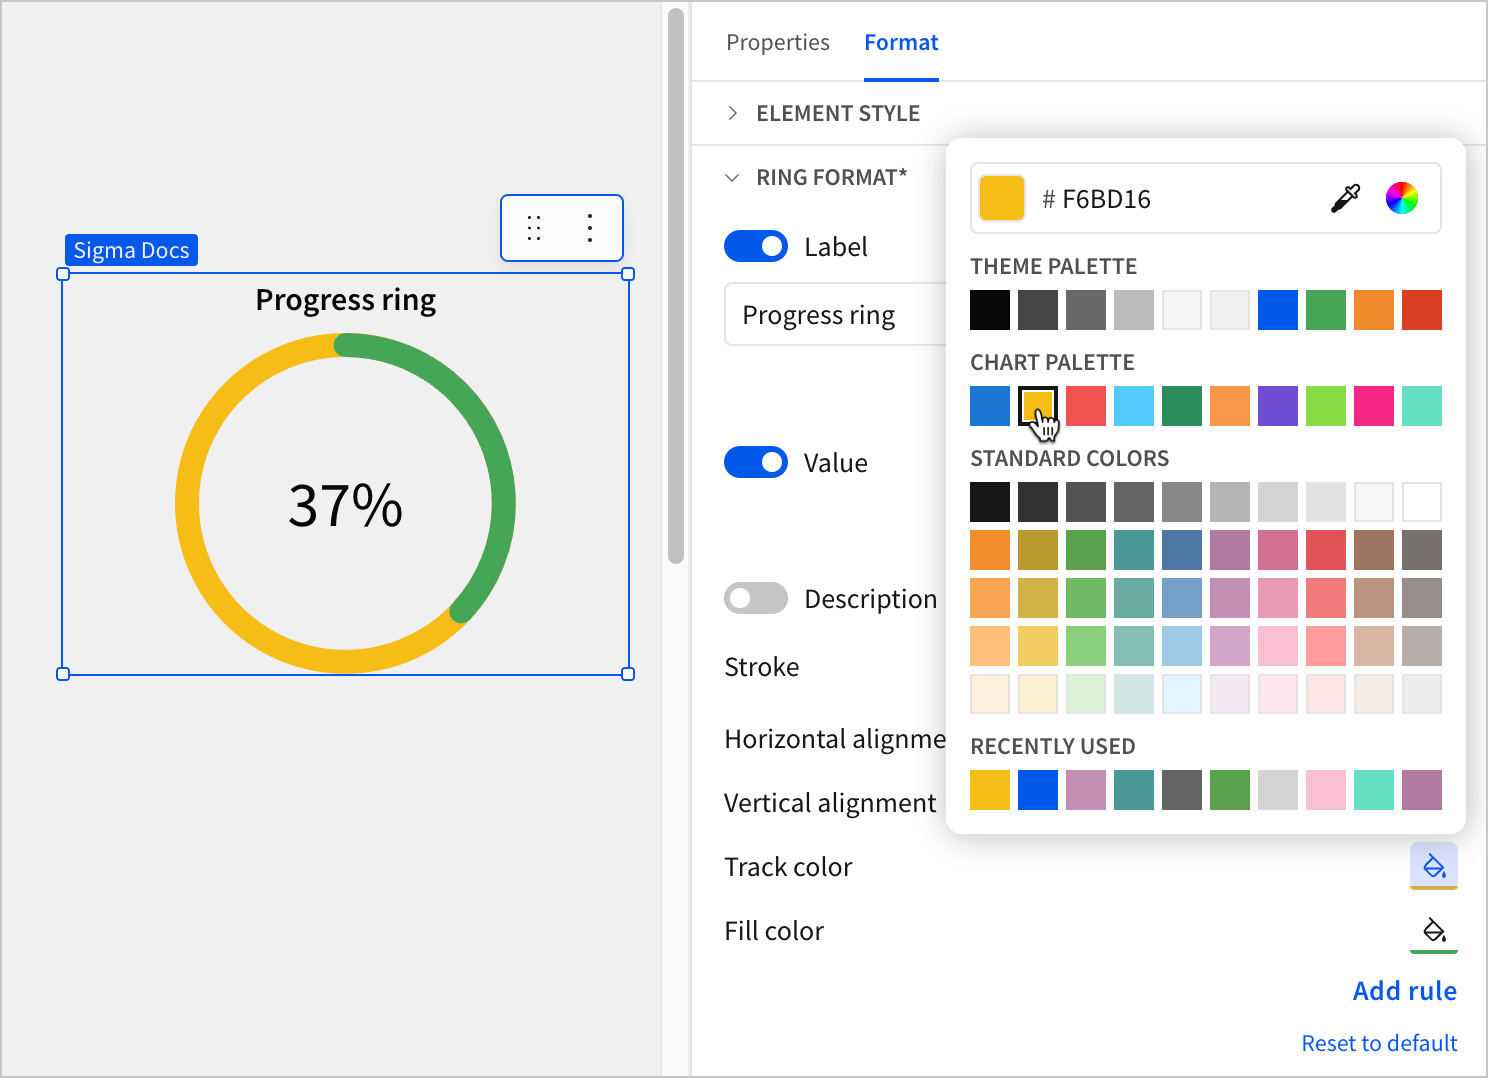
3. Configure the color for the part of the progress ring you want to customize:
* To change the color of the progress fill, select  **Fill color** and choose a color.
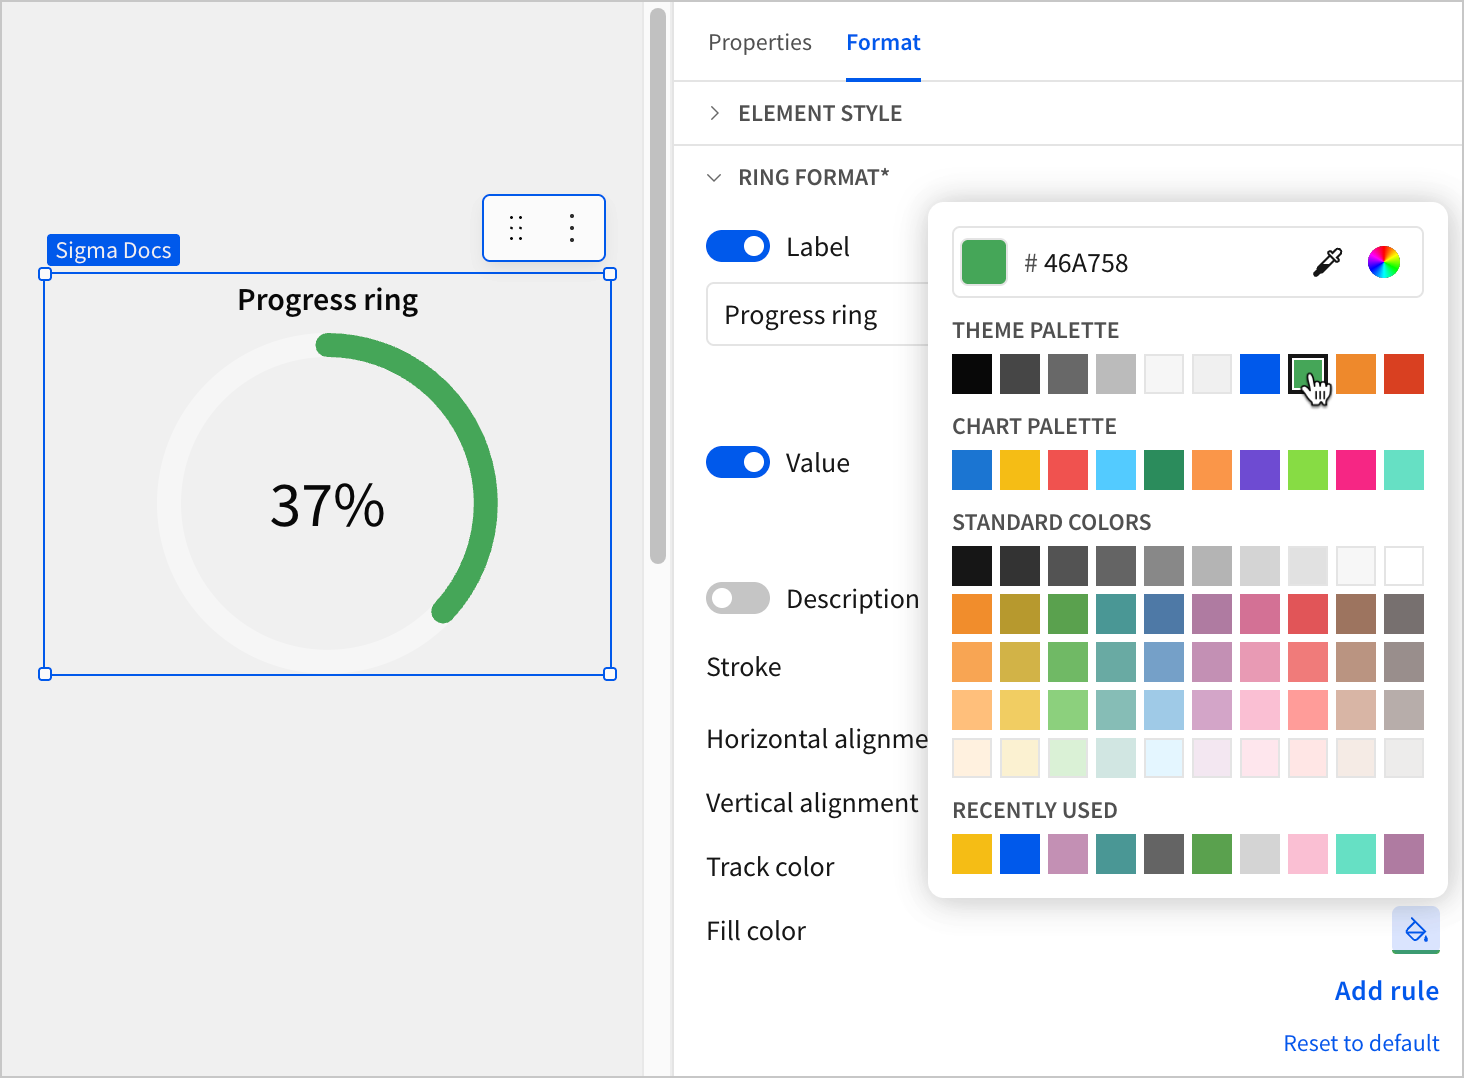
* To change the color of the unfilled part of the ring, select **Track color** and choose a color.
### Add conditional formatting to a progress ring
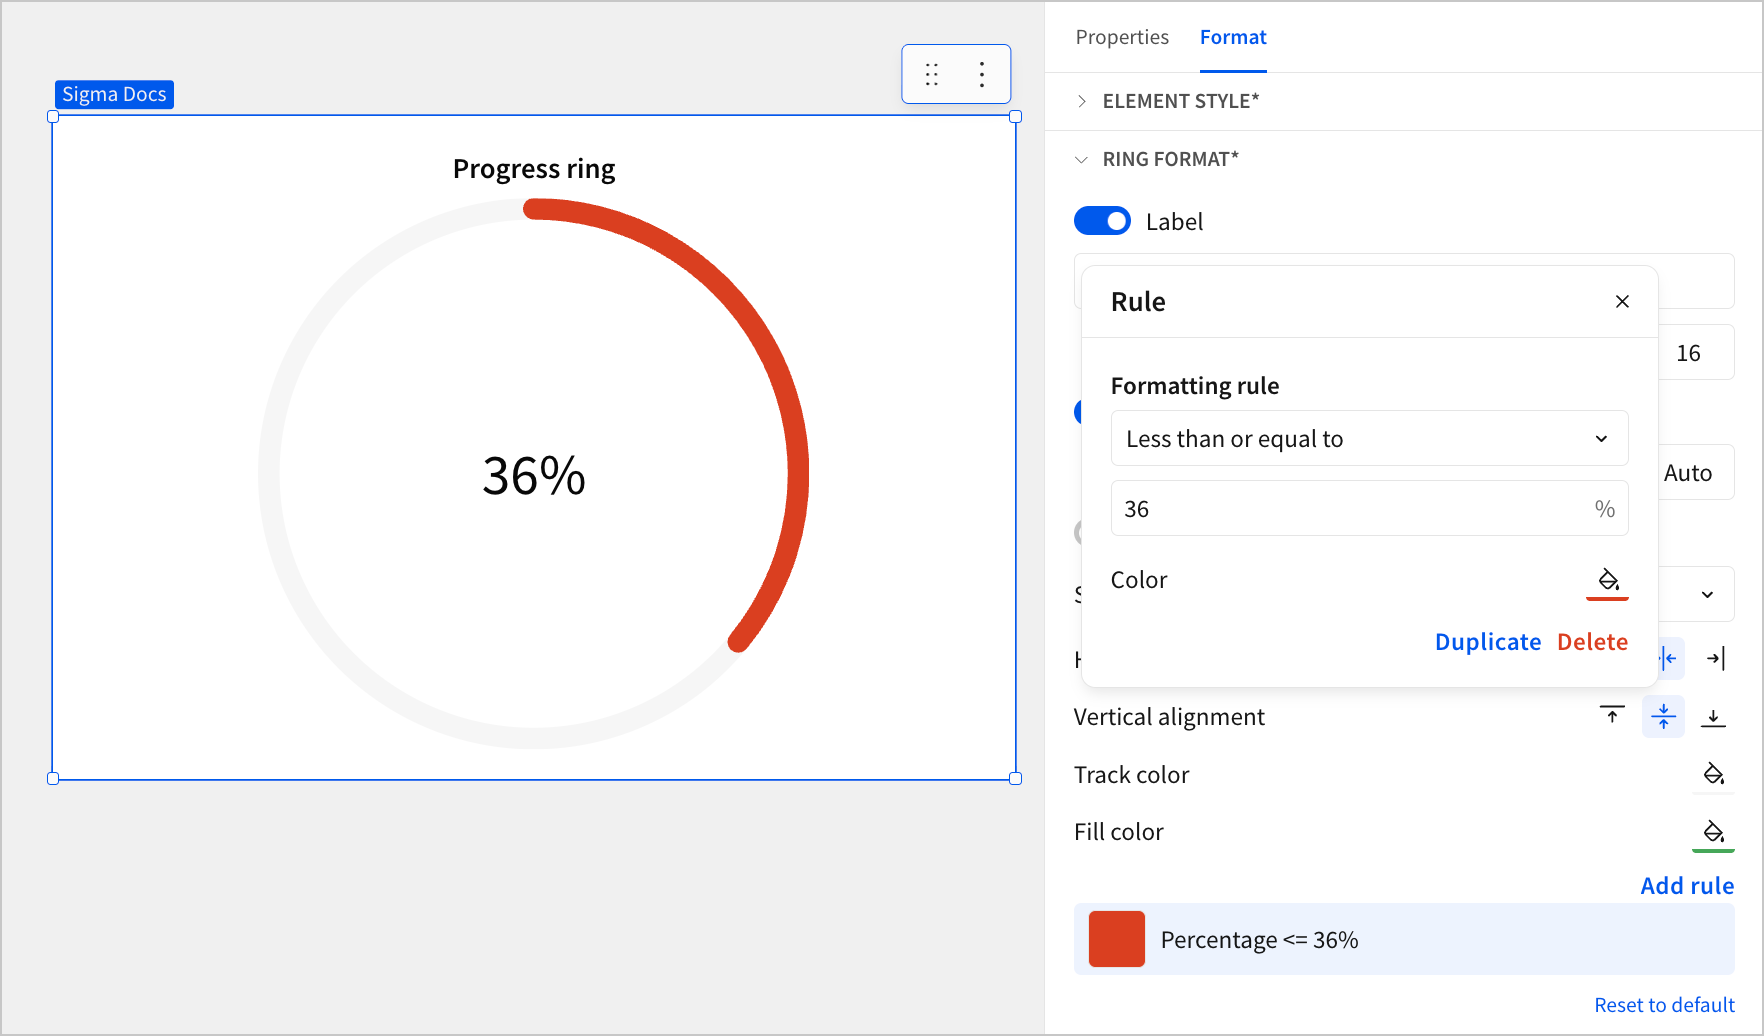
To highlight or emphasize a progress ring's value when it meets a specified condition, you can add a conditional formatting rule:
1. Select the progress ring you want to modify.
2. In the **Format** tab of the editor panel, select **Ring format** to expand the section.
3. Under **Fill color**, select **Add rule**.
4. For **Formatting rule**, configure a condition to evaluate.
5. Select **Color** and choose a color to apply to the progress ring when the configured conditions are met.
### Change the stroke of a progress ring
To change the thickness of the progress ring, modify the stroke:
1. Select the progress ring you want to modify.
2. In the **Format** tab of the editor panel, select **Ring format** to expand the section.
3. Select **Stroke** and, from the dropdown, choose **Thin**, **Medium**, or **Thick**.
### Configure the alignment of a progress ring
You can change the alignment of a progress ring to modify its orientation on the workbook or report page.
1. Select the progress ring you want to modify.
2. In the **Format** tab of the editor panel, select **Ring format** to expand the section.
3. Configure the alignment of the progress ring:
* For **Vertical alignment**, select **Top align**, **Center align**, or **Bottom align**.
* For **Horizontal alignment**, select **Left align**, **Center align**, or **Right align**.
### Customize the label of a progress ring
You can modify the text and appearance of the label for a progress ring, as well as choose whether to display it at all.
1. Select the progress ring you want to modify.
2. In the **Format** tab of the editor panel, select **Ring format** to expand the section.
3. Configure the label:
* To hide the label, turn off the **Label** toggle. To display it again, turn on the **Label** toggle.
* To change the label text, enter the text you want to display in the text field for **Label**.
* To change the font color, select
**Fill color** and choose a color.

* To change the color of the unfilled part of the ring, select **Track color** and choose a color.

### Add conditional formatting to a progress ring
To highlight or emphasize a progress ring's value when it meets a specified condition, you can add a conditional formatting rule:
1. Select the progress ring you want to modify.
2. In the **Format** tab of the editor panel, select **Ring format** to expand the section.
3. Under **Fill color**, select **Add rule**.
4. For **Formatting rule**, configure a condition to evaluate.
5. Select **Color** and choose a color to apply to the progress ring when the configured conditions are met.

### Change the stroke of a progress ring
To change the thickness of the progress ring, modify the stroke:
1. Select the progress ring you want to modify.
2. In the **Format** tab of the editor panel, select **Ring format** to expand the section.
3. Select **Stroke** and, from the dropdown, choose **Thin**, **Medium**, or **Thick**.
### Configure the alignment of a progress ring
You can change the alignment of a progress ring to modify its orientation on the workbook or report page.
1. Select the progress ring you want to modify.
2. In the **Format** tab of the editor panel, select **Ring format** to expand the section.
3. Configure the alignment of the progress ring:
* For **Vertical alignment**, select **Top align**, **Center align**, or **Bottom align**.
* For **Horizontal alignment**, select **Left align**, **Center align**, or **Right align**.
### Customize the label of a progress ring
You can modify the text and appearance of the label for a progress ring, as well as choose whether to display it at all.
1. Select the progress ring you want to modify.
2. In the **Format** tab of the editor panel, select **Ring format** to expand the section.
3. Configure the label:
* To hide the label, turn off the **Label** toggle. To display it again, turn on the **Label** toggle.
* To change the label text, enter the text you want to display in the text field for **Label**.
* To change the font color, select  **Text color** and choose a color by using the color picker, entering a hex code, or choosing from one of the standard colors configured for your workbook or report's theme.
* To change the font weight, select
**Text color** and choose a color by using the color picker, entering a hex code, or choosing from one of the standard colors configured for your workbook or report's theme.
* To change the font weight, select  **Bold** to turn bold formatting on or off.
* To change the font size, select the font size field and select a size from the dropdown.
### Customize the value text of a progress ring
You can modify the appearance of the value text for a progress ring, as well as choose whether to display it at all.
1. Select the progress ring you want to modify.
2. In the **Format** tab of the editor panel, select **Ring format** to expand the section.
3. Configure the value text:
* To hide the value, turn off the **Value** toggle. To display it again, turn on the **Value** toggle.
* To change the font color, select **Text color** and choose a color by using the color picker, entering a hex code, or choosing from one of the standard colors configured for your workbook or report's theme.
* To change the font weight, select **Bold** to turn bold formatting on or off.
* To change the font size, select the font size field and select a size from the dropdown.
### Add a description to a progress ring
You can add a description to a progress ring to add further context or explain the goal it tracks.
1. Select the progress ring you want to modify.
2. In the **Format** tab of the editor panel, select **Ring format** to expand the section.
3. Turn on **Description**.
4. Enter a description for the progress ring, or press `=` to enter a dynamic text formula that references a column or control.
5. (Optional) To customize the text color, size, and weight of the description, use the available formatting options:
* To change the font color, select **Text color** and choose a color by using the color picker, entering a hex code, or choosing from one of the standard colors configured for your workbook or report's theme.
* To change the font weight, select **Bold** to turn bold formatting on or off.
* To change the font size, select the font size field and select a size from the dropdown.
### Additional formatting options for progress rings
Progress rings also support the additional options for customizing [element style](/docs/customize-chart-background-and-style).
## Related resources
* [Intro to charts](/docs/intro-to-visualizations)
* [Create a data element](/docs/create-a-data-element)
* [Build a progress bar (Beta)](/docs/build-a-progress-bar)
**Bold** to turn bold formatting on or off.
* To change the font size, select the font size field and select a size from the dropdown.
### Customize the value text of a progress ring
You can modify the appearance of the value text for a progress ring, as well as choose whether to display it at all.
1. Select the progress ring you want to modify.
2. In the **Format** tab of the editor panel, select **Ring format** to expand the section.
3. Configure the value text:
* To hide the value, turn off the **Value** toggle. To display it again, turn on the **Value** toggle.
* To change the font color, select **Text color** and choose a color by using the color picker, entering a hex code, or choosing from one of the standard colors configured for your workbook or report's theme.
* To change the font weight, select **Bold** to turn bold formatting on or off.
* To change the font size, select the font size field and select a size from the dropdown.
### Add a description to a progress ring
You can add a description to a progress ring to add further context or explain the goal it tracks.
1. Select the progress ring you want to modify.
2. In the **Format** tab of the editor panel, select **Ring format** to expand the section.
3. Turn on **Description**.
4. Enter a description for the progress ring, or press `=` to enter a dynamic text formula that references a column or control.
5. (Optional) To customize the text color, size, and weight of the description, use the available formatting options:
* To change the font color, select **Text color** and choose a color by using the color picker, entering a hex code, or choosing from one of the standard colors configured for your workbook or report's theme.
* To change the font weight, select **Bold** to turn bold formatting on or off.
* To change the font size, select the font size field and select a size from the dropdown.
### Additional formatting options for progress rings
Progress rings also support the additional options for customizing [element style](/docs/customize-chart-background-and-style).
## Related resources
* [Intro to charts](/docs/intro-to-visualizations)
* [Create a data element](/docs/create-a-data-element)
* [Build a progress bar (Beta)](/docs/build-a-progress-bar)