> For clean Markdown of any page, append .md to the page URL.
> For a complete documentation index, see https://help.sigmacomputing.com/llms.txt.
> For AI client integration (Claude Code, Cursor, etc.), connect to the MCP server at https://help.sigmacomputing.com/_mcp/server.
# Add custom page panels to a workbook
You can create custom panels that appear on one or more workbook pages by enabling the page header and page sidebar options. Because the same panel can be enabled on multiple pages, you can present the same content — like [navigation elements](/docs/use-the-navigation-element-to-guide-user-exploration) and branding — across multiple workbook pages.
This document explains how to enable, customize, and manage page panels.
## User requirements
* To configure a page header or page sidebar in a saved or custom view, you must be assigned an account type with the **Full explore** permission, and have **Can explore** access to the workbook.
* To configure a page header or page sidebar in the published version of a workbook, you must be assigned an account type with the **Create, edit, and publish workbooks** permission, and have **Can edit** access to the workbook.
## Add a header to your workbook
Enable a page header for your workbook in workbook settings:
1. Select the background of your workbook. In the side panel, select **Workbook settings**.
2. Open the **Workbook navigation** section.
3. Select the **Page header** checkbox to enable the page header.
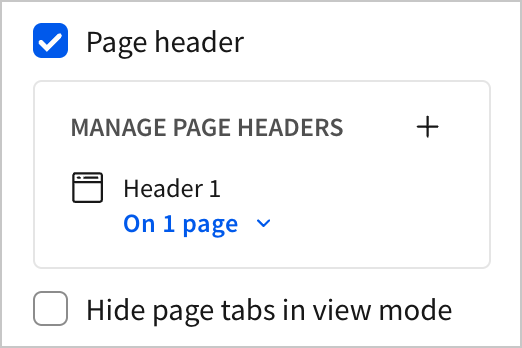
A blank header appears on all workbook pages. To create additional page headers and manage their visibility, see [Manage multiple page panels](#manage-multiple-page-panels).
## Add a sidebar to your workbook
Enable a sidebar for your workbook in workbook settings:
1. Select the background of your workbook. In the side panel, select **Workbook settings**.
2. Open the **Workbook navigation** section.
3. Select the **Page sidebar** checkbox to enable the page sidebar.
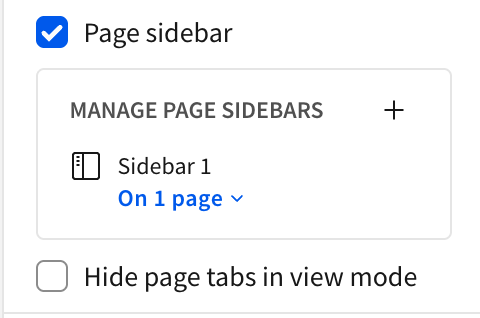
A blank sidebar appears on all workbook pages. To create additional page sidebars and manage their visibility, see [Manage multiple page panels](#manage-multiple-page-panels).
## Manage panels on the same page
You can control how a sidebar and header interact on the same page using workbook settings and the scroll style.
To set the stacking order of the panels:
1. Select the background of your workbook. In the side panel, select **Workbook settings**.
2. Open the **Workbook navigation** section.
3. Select either **Sidebar** or **Header** in the **Primary navigation** setting.
The panel selected in **Primary navigation** overlays the other panel.
If the header and sidebar do not have the same **Scroll style**, the **Primary navigation** setting does not determine which overlays the other. Whichever panel has the **Scroll style** set to **Fixed** overlays the other.
## Customize page panels
### Customize a page header
You can customize the size, scroll style, background color, and contents of a custom page header.
#### Header settings
To resize a custom page header, select the header and use the drag handle on the bottom edge of the header.
You can customize the following setting for a page header in the **Properties** tab of the editor panel:
| Style | Details |
| :--------------- | :----------------------------------------------------------------------------------------------------------------------------- |
| **Scroll style** | Choose between **Fixed** to keep the header on screen as users scroll, or **Scroll** to allow users to scroll past the header. |
You can rename, duplicate, or delete a header in the **Manage header** menu:
1. Select the background of your workbook. In the side panel, select **Workbook settings**.
2. Open the **Workbook navigation** section.
3. Under **Manage page headers**, select  **More options** for the header you want to customize, and select **Rename**, **Duplicate**, or **Delete**.
#### Style a header
In the editor panel, select **Format** to set the style options in each section.
In the **Page header style** section, set the following options:
| Style | Details |
| :------------------- | :------------------------------------------------------------------------------------------------------------------------------------------------------------------ |
| **Background color** | Select
**More options** for the header you want to customize, and select **Rename**, **Duplicate**, or **Delete**.
#### Style a header
In the editor panel, select **Format** to set the style options in each section.
In the **Page header style** section, set the following options:
| Style | Details |
| :------------------- | :------------------------------------------------------------------------------------------------------------------------------------------------------------------ |
| **Background color** | Select  **Background color** and choose a color for the header. |
| **Border style** | Choose between **Line**, **Shadow**, or **None** for the border style. The **Shadow** border style is only available when the **Scroll style** is set to **Fixed**. |
#### Header contents
You can add any element to a page header. Because one header can appear on multiple pages, adding an element to a header makes it visible on every page where that header appears.
There are multiple ways to add an element to a header:
* With the header selected, select an element in the **Add element** bar. The element appears inside the header.
* Select an element from the workbook page. Drag and drop the element inside the header.
### Customize a page sidebar
You can customize the size, scroll style, background color, and contents of a page sidebar.
#### Sidebar settings
You can customize the following settings for a page sidebar in the **Properties** tab of the editor panel:
| Style | Details |
| :--------------- | :------------------------------------------------------------------------------------------------------------------------------------------------ |
| **Scroll style** | Choose between **Fixed** to keep the sidebar in place as users scroll the main page, or **Scroll** to make the sidebar scroll with the main page. |
| **Width** | Choose between **Small**, **Medium**, and **Large** for the width of the sidebar. |
You can rename, duplicate, or delete a sidebar in the **Manage page sidebars** menu:
1. Select the background of your workbook. In the side panel, select **Workbook settings**.
2. Open the **Workbook navigation** section.
3. Under **Manage page sidebars**, select **More options** for the sidebar you want to customize, and select **Rename**, **Duplicate**, or **Delete**.
#### Style a sidebar
In the editor panel, select **Format** to set the style options in each section.
In the **Page sidebar style** section, set the following options:
| Style | Details |
| :------------------- | :------------------------------------------------------------------------------------------------------------------------------------------------------------------ |
| **Background color** | Select **Background color** and choose a color for the sidebar. |
| **Border style** | Choose between **Line** or **None**. |
#### Sidebar contents
You can add any element to a page sidebar. Because one sidebar can appear on multiple pages, adding an element to a sidebar makes it visible on every page where that sidebar appears.
There are multiple ways to add an element to a sidebar:
* With the sidebar selected, select an element in the **Add element** bar. The element appears inside the sidebar.
* Select an element from the workbook page. Drag and drop the element inside the sidebar.
### Add a background image to a page panel
To add a background image to a page panel:
1. Select the panel.
2. In the editor panel, select **Format** and open the **Background image** section.
3. Select **Upload image** and select an image file from the file browser.
4. Select a **Sizing** option for the image:
| Sizing option | Description |
| :---------------- | :---------------------------------------------------------------------------------- |
| **Shrink to fit** | Downsize the image to keep it entirely visible within the panel. |
| **Scale to fit** | Expand the image to the maximum size, keeping it entirely visible within the panel. |
| **Cover** | Expand the image so that the entire panel is covered, even if it requires cropping. |
| **Original** | Maintain the original image dimensions regardless of the size of the panel. |
5. (Optional) Turn on the **Tile** toggle to repeat the image across the panel until it covers the entire area.
6. Configure the alignment of the background image:
* **Horizontal**: Select the horizontal alignment of the background image within the panel, by choosing one of **Left align**, **Center align**, or **Right align**.
* **Vertical**: Select the vertical alignment of the background image within the panel, by choosing one of **Top align**, **Center align**, or **Bottom align**.
## Manage multiple page panels
You can create multiple page headers and page sidebars in the same workbook and choose which pages each panel appears on.
### View pages by panel
To view which pages a header is assigned to:
1. Select the background of your workbook.
2. In the side panel, select **Workbook settings**.
3. Open the **Workbook navigation** section.
4. Under **Manage page headers**, open the menu option for the number of pages with that header.
5. In the **Go to** menu, you can see the list of pages that header is assigned to.
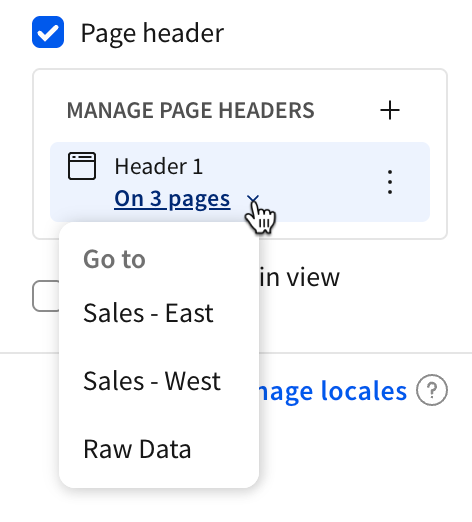
To view which pages a sidebar is assigned to:
1. Select the background of your workbook.
2. In the side panel, select **Workbook settings**.
3. Open the **Workbook navigation** section.
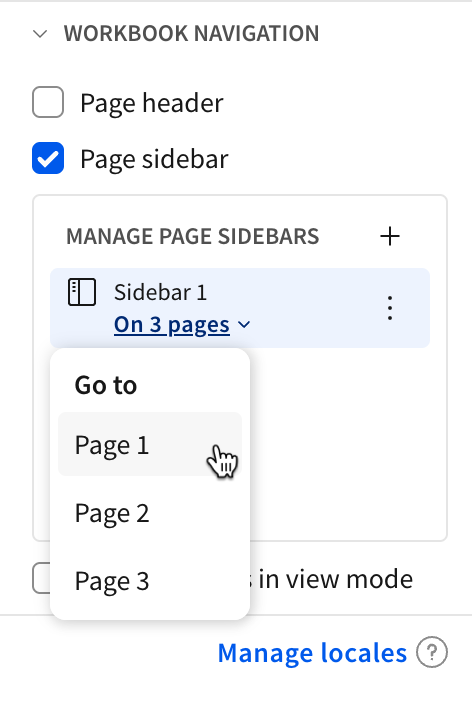
4. Under **Manage page sidebars**, open the menu option for the number of pages with that sidebar.
5. In the **Go to** menu, you can see the list of pages that sidebar is assigned to.
### Add a new panel
To create a new header:
1. Select the background of your workbook. In the side panel, select **Workbook settings**.
2. Open the **Workbook navigation** section.
3. Under **Manage page headers**, select
**Background color** and choose a color for the header. |
| **Border style** | Choose between **Line**, **Shadow**, or **None** for the border style. The **Shadow** border style is only available when the **Scroll style** is set to **Fixed**. |
#### Header contents
You can add any element to a page header. Because one header can appear on multiple pages, adding an element to a header makes it visible on every page where that header appears.
There are multiple ways to add an element to a header:
* With the header selected, select an element in the **Add element** bar. The element appears inside the header.
* Select an element from the workbook page. Drag and drop the element inside the header.
### Customize a page sidebar
You can customize the size, scroll style, background color, and contents of a page sidebar.
#### Sidebar settings
You can customize the following settings for a page sidebar in the **Properties** tab of the editor panel:
| Style | Details |
| :--------------- | :------------------------------------------------------------------------------------------------------------------------------------------------ |
| **Scroll style** | Choose between **Fixed** to keep the sidebar in place as users scroll the main page, or **Scroll** to make the sidebar scroll with the main page. |
| **Width** | Choose between **Small**, **Medium**, and **Large** for the width of the sidebar. |
You can rename, duplicate, or delete a sidebar in the **Manage page sidebars** menu:
1. Select the background of your workbook. In the side panel, select **Workbook settings**.
2. Open the **Workbook navigation** section.
3. Under **Manage page sidebars**, select **More options** for the sidebar you want to customize, and select **Rename**, **Duplicate**, or **Delete**.
#### Style a sidebar
In the editor panel, select **Format** to set the style options in each section.
In the **Page sidebar style** section, set the following options:
| Style | Details |
| :------------------- | :------------------------------------------------------------------------------------------------------------------------------------------------------------------ |
| **Background color** | Select **Background color** and choose a color for the sidebar. |
| **Border style** | Choose between **Line** or **None**. |
#### Sidebar contents
You can add any element to a page sidebar. Because one sidebar can appear on multiple pages, adding an element to a sidebar makes it visible on every page where that sidebar appears.
There are multiple ways to add an element to a sidebar:
* With the sidebar selected, select an element in the **Add element** bar. The element appears inside the sidebar.
* Select an element from the workbook page. Drag and drop the element inside the sidebar.
### Add a background image to a page panel
To add a background image to a page panel:
1. Select the panel.
2. In the editor panel, select **Format** and open the **Background image** section.
3. Select **Upload image** and select an image file from the file browser.
4. Select a **Sizing** option for the image:
| Sizing option | Description |
| :---------------- | :---------------------------------------------------------------------------------- |
| **Shrink to fit** | Downsize the image to keep it entirely visible within the panel. |
| **Scale to fit** | Expand the image to the maximum size, keeping it entirely visible within the panel. |
| **Cover** | Expand the image so that the entire panel is covered, even if it requires cropping. |
| **Original** | Maintain the original image dimensions regardless of the size of the panel. |
5. (Optional) Turn on the **Tile** toggle to repeat the image across the panel until it covers the entire area.
6. Configure the alignment of the background image:
* **Horizontal**: Select the horizontal alignment of the background image within the panel, by choosing one of **Left align**, **Center align**, or **Right align**.
* **Vertical**: Select the vertical alignment of the background image within the panel, by choosing one of **Top align**, **Center align**, or **Bottom align**.
## Manage multiple page panels
You can create multiple page headers and page sidebars in the same workbook and choose which pages each panel appears on.
### View pages by panel
To view which pages a header is assigned to:
1. Select the background of your workbook.
2. In the side panel, select **Workbook settings**.
3. Open the **Workbook navigation** section.
4. Under **Manage page headers**, open the menu option for the number of pages with that header.
5. In the **Go to** menu, you can see the list of pages that header is assigned to.

To view which pages a sidebar is assigned to:
1. Select the background of your workbook.
2. In the side panel, select **Workbook settings**.
3. Open the **Workbook navigation** section.
4. Under **Manage page sidebars**, open the menu option for the number of pages with that sidebar.
5. In the **Go to** menu, you can see the list of pages that sidebar is assigned to.

### Add a new panel
To create a new header:
1. Select the background of your workbook. In the side panel, select **Workbook settings**.
2. Open the **Workbook navigation** section.
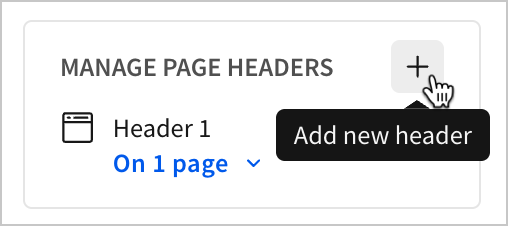
3. Under **Manage page headers**, select  **Add new header**.
To create a new sidebar:
1. Select the background of your workbook. In the side panel, select **Workbook settings**.
2. Open the **Workbook navigation** section.
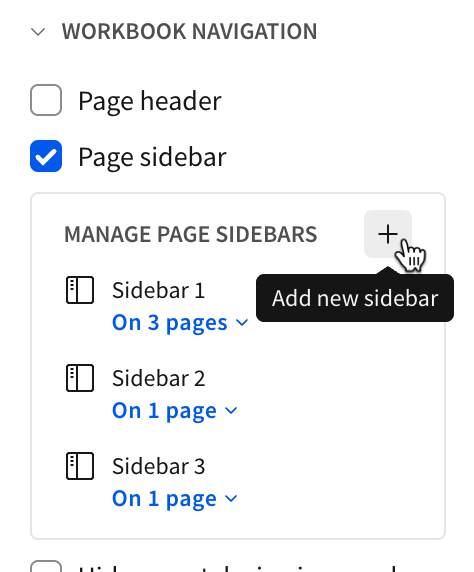
3. Under **Manage page sidebars**, select **Add new sidebar**.
### Set the panel for a page
To set which header is visible on a page:
1. Navigate to the page you want to set the header for.
2. Select the background of the workbook.
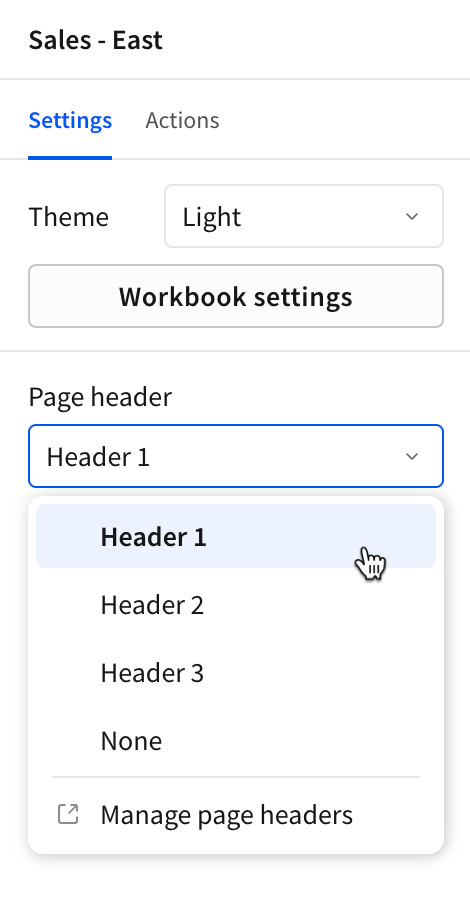
3. In the side panel, open the **Page header** dropdown.
4. Select the header to be visible on the page.
To set which sidebar is visible on a page:
1. Navigate to the page you want to set the sidebar for.
2. Select the background of the workbook.
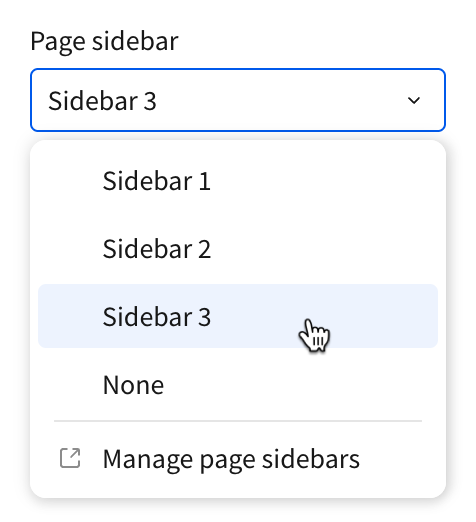
3. In the side panel, open the **Page sidebar** dropdown.
4. Select the sidebar to be visible on the page.
## Manage mobile layout
You can see how header and sidebar layouts render for mobile users, even while building in the desktop view.
To preview mobile layout:
1. Open the draft of a workbook.
2. In the document header, next to the **Publish** button, select
**Add new header**.

To create a new sidebar:
1. Select the background of your workbook. In the side panel, select **Workbook settings**.
2. Open the **Workbook navigation** section.
3. Under **Manage page sidebars**, select **Add new sidebar**.

### Set the panel for a page
To set which header is visible on a page:
1. Navigate to the page you want to set the header for.
2. Select the background of the workbook.
3. In the side panel, open the **Page header** dropdown.
4. Select the header to be visible on the page.

To set which sidebar is visible on a page:
1. Navigate to the page you want to set the sidebar for.
2. Select the background of the workbook.
3. In the side panel, open the **Page sidebar** dropdown.
4. Select the sidebar to be visible on the page.

## Manage mobile layout
You can see how header and sidebar layouts render for mobile users, even while building in the desktop view.
To preview mobile layout:
1. Open the draft of a workbook.
2. In the document header, next to the **Publish** button, select  > **Switch to mobile view**.
3. Select
> **Switch to mobile view**.
3. Select  to preview the primary panel.
4. If sidebar is the primary panel, select
to preview the primary panel.
4. If sidebar is the primary panel, select  **Expand page header** to preview the header. If header is the primary panel, select
  **Expand page sidebar** to preview the sidebar.
The mobile preview opens for the selected panel.
## Example: Use a page header and navigation element to create a custom navigation bar
You can use a page header and navigation element to create a custom navigation bar for your workbook. The navigation element provides a list of destinations for users to explore, and the page header keeps the navigation bar visible as users switch pages and scroll.
### Setup
To follow along with this example step-by-step, create a new workbook with the following pages:
* Sales - East
* Sales - West
* Raw Data

### Add a page header
To start, enable a page header for the workbook:
1. Select the background of your workbook. In the side panel, select **Workbook settings**.
2. Open the **Workbook navigation** section.
3. Select the **Page header** checkbox.
A page header appears on all workbook pages. You can confirm this by going to **Workbook settings** > **Workbook navigation** > **Manage page headers** and opening the **On 3 pages** dropdown for the header. Though you can create multiple headers, this example uses one shared header for all workbook pages.

### Add a navigation element to the header
Now, add a navigation element to the page header to make it available across all workbook pages:
1. Select the header.
2. In the **Add element** bar, select **Layout** > **Navigation**.
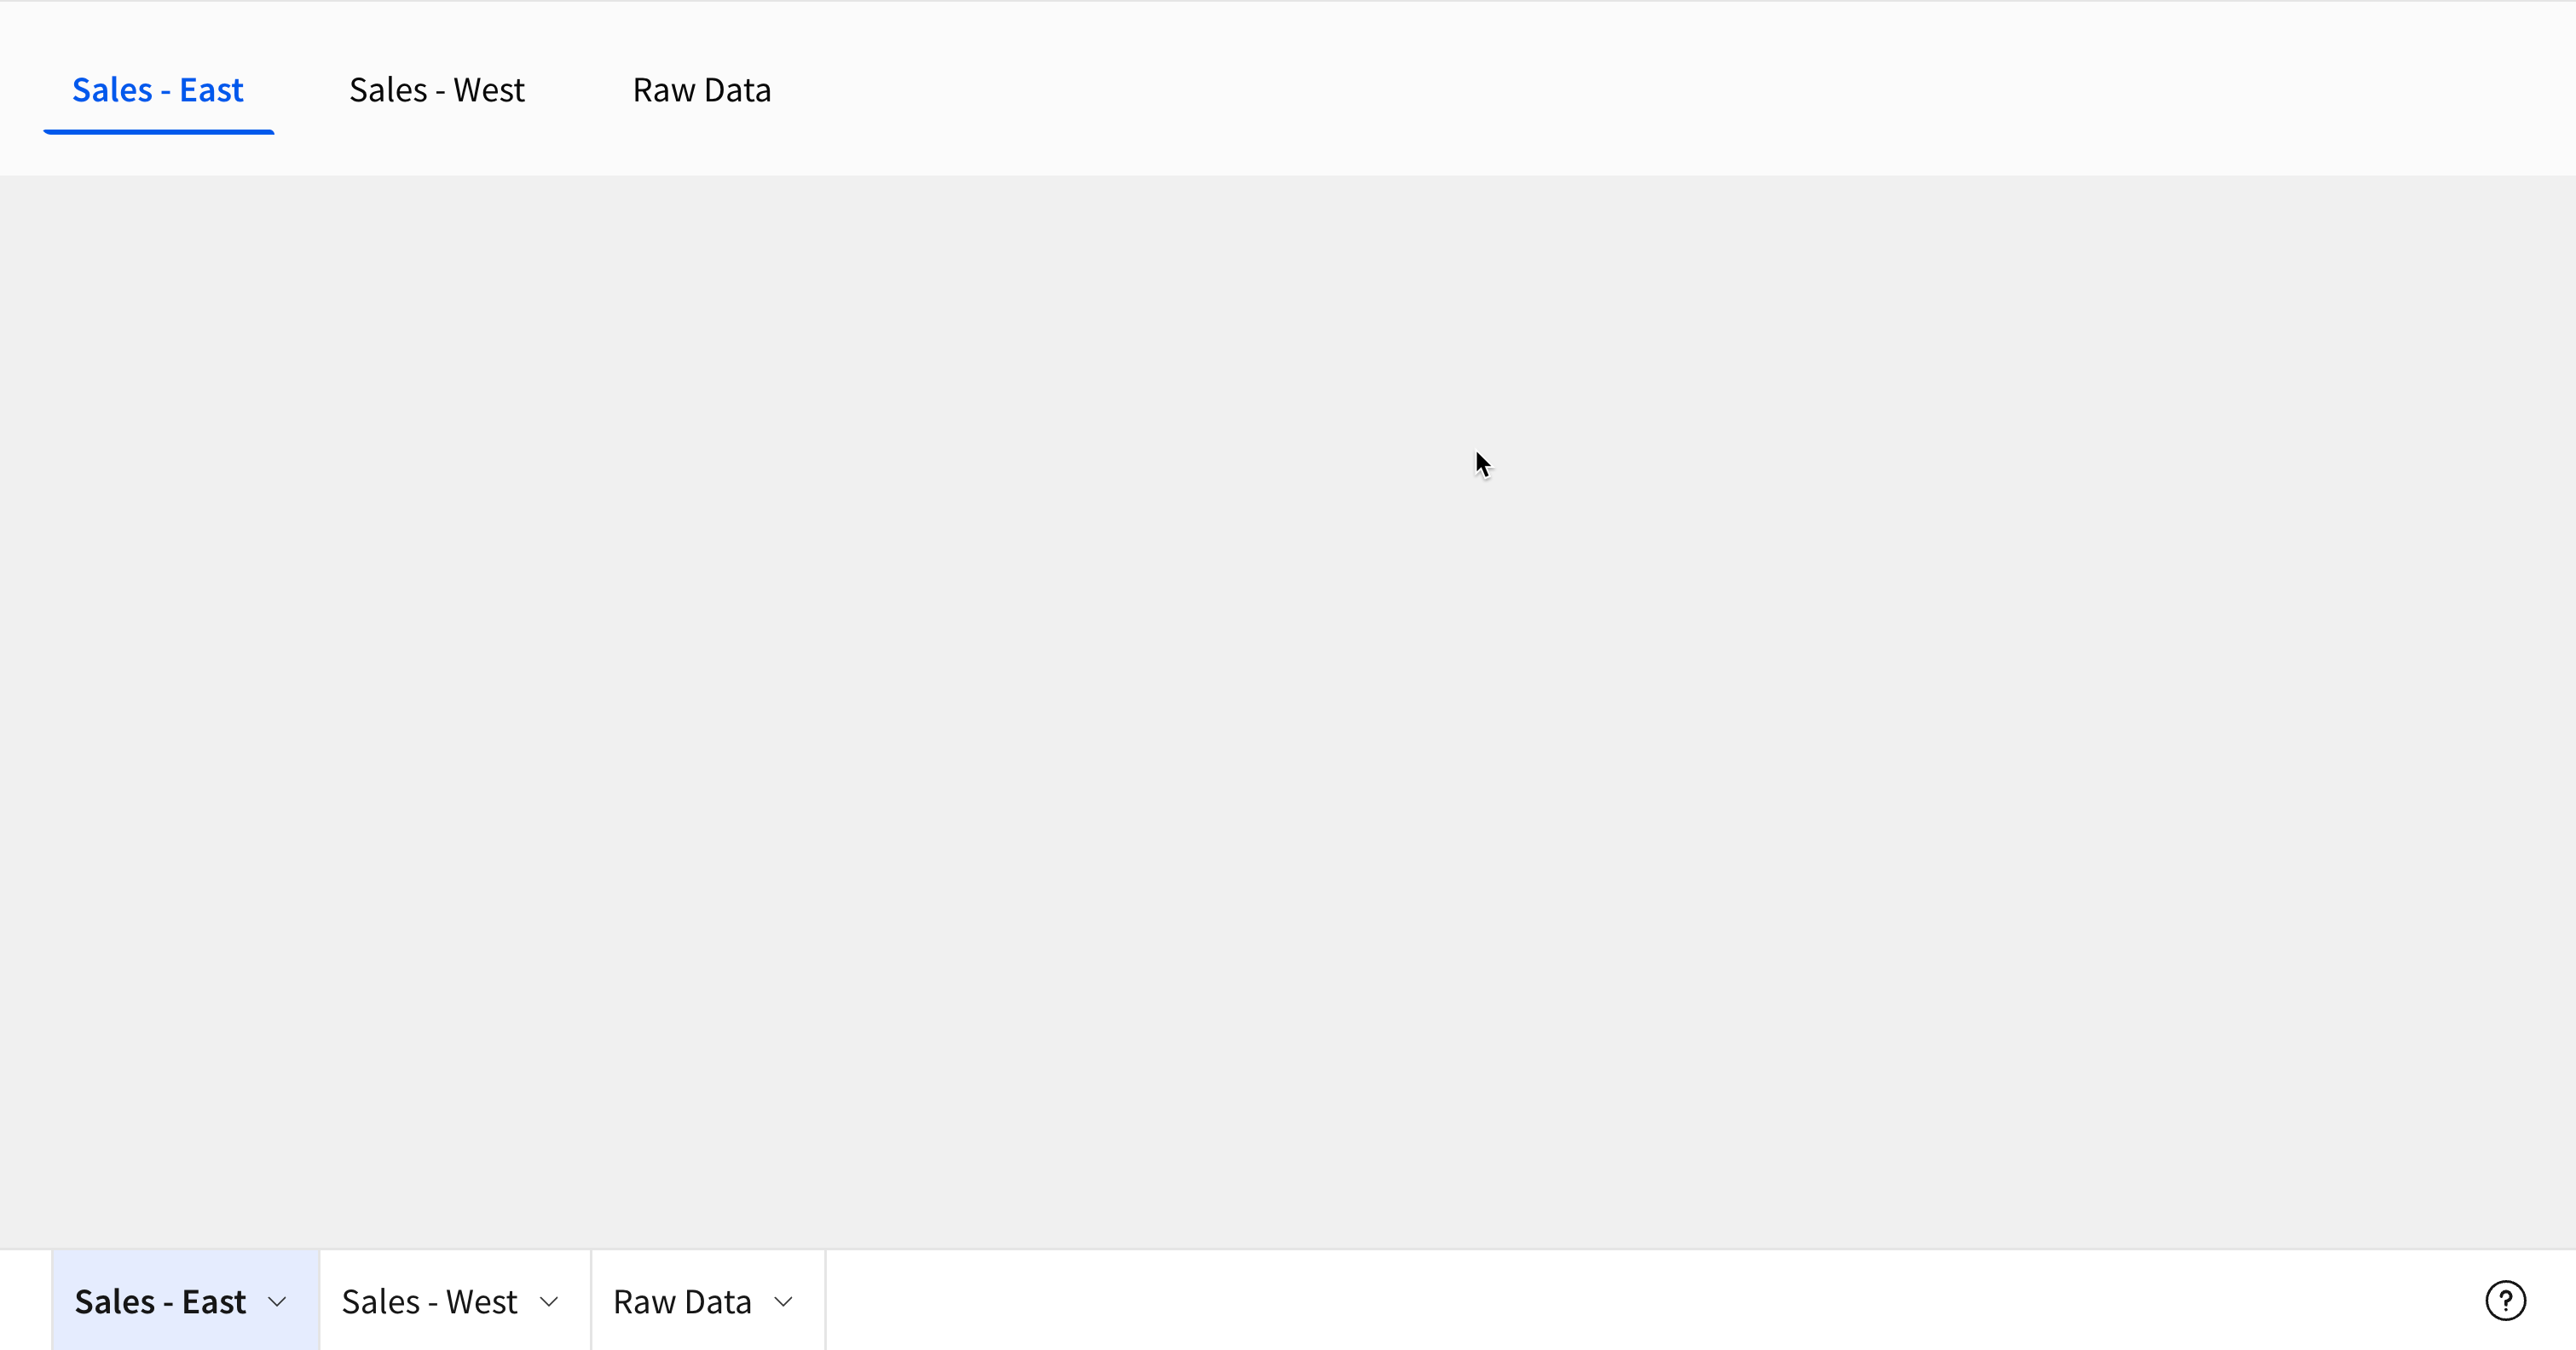
The navigation element appears in the header. By default, it populates with the current workbook pages as the navigation options.
### Hide the workbook page tabs
Because the page header and navigation element appear across all workbook pages, a user can navigate the workbook without the workbook page tabs. You can hide the workbook page tabs to create a cleaner interface for users.
1. Select the workbook page.
2. In the editor panel, under **Settings**, select **Workbook settings**.
3. Open the **Workbook navigation** section.
4. Select the **Hide page tabs in view mode** checkbox.
5. In the confirmation modal, select **Confirm**.
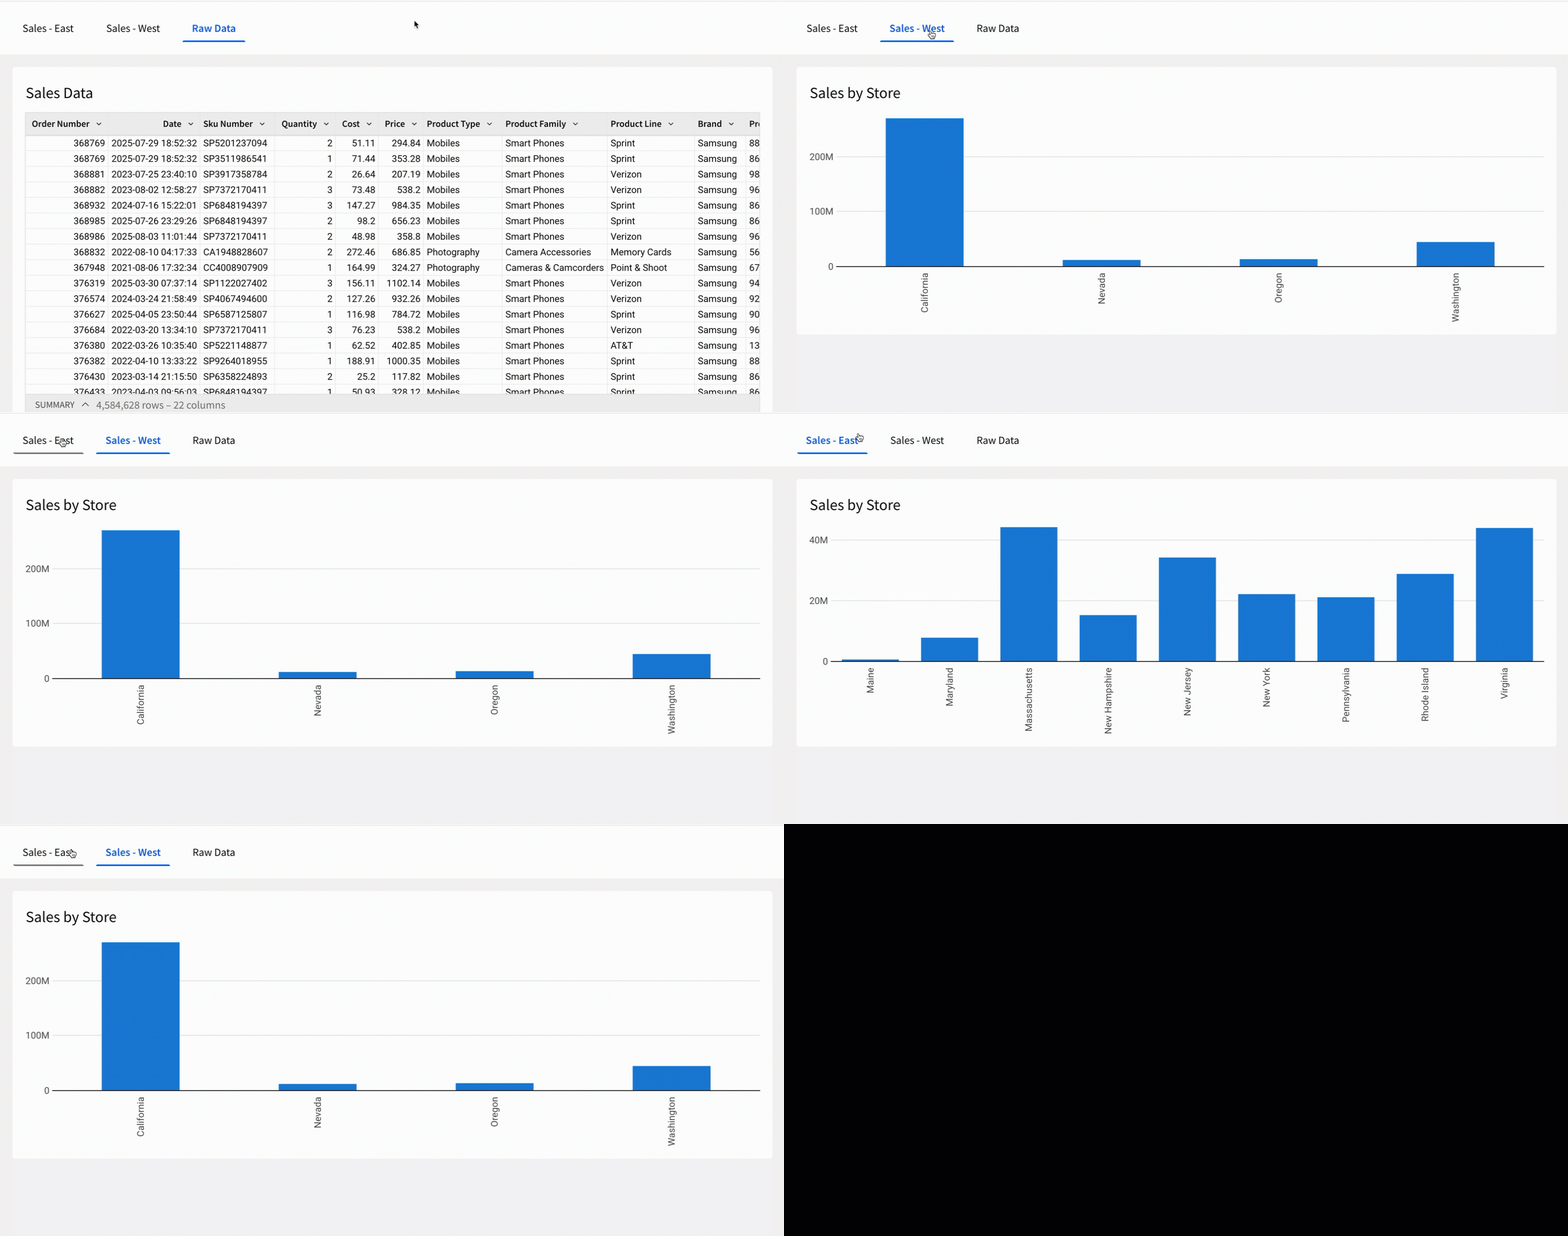
From here, you can customize the navigation options by adding external links, submenus, and more as you need. Because the workbook page tabs are hidden, you don't have to worry about potential user confusion that might arise from the navigation element and page tabs differing.
Hiding page tabs does not prevent users from navigating to the page from a direct link, and is not a security feature. To restrict access to data, use a data model with row-level security or column-level security. For more information, see [Set up row-level security](/docs/set-up-row-level-security) and [Configure column-level security](/docs/column-level-security).
**Expand page sidebar** to preview the sidebar.
The mobile preview opens for the selected panel.
## Example: Use a page header and navigation element to create a custom navigation bar
You can use a page header and navigation element to create a custom navigation bar for your workbook. The navigation element provides a list of destinations for users to explore, and the page header keeps the navigation bar visible as users switch pages and scroll.
### Setup
To follow along with this example step-by-step, create a new workbook with the following pages:
* Sales - East
* Sales - West
* Raw Data

### Add a page header
To start, enable a page header for the workbook:
1. Select the background of your workbook. In the side panel, select **Workbook settings**.
2. Open the **Workbook navigation** section.
3. Select the **Page header** checkbox.
A page header appears on all workbook pages. You can confirm this by going to **Workbook settings** > **Workbook navigation** > **Manage page headers** and opening the **On 3 pages** dropdown for the header. Though you can create multiple headers, this example uses one shared header for all workbook pages.

### Add a navigation element to the header
Now, add a navigation element to the page header to make it available across all workbook pages:
1. Select the header.
2. In the **Add element** bar, select **Layout** > **Navigation**.
The navigation element appears in the header. By default, it populates with the current workbook pages as the navigation options.

### Hide the workbook page tabs
Because the page header and navigation element appear across all workbook pages, a user can navigate the workbook without the workbook page tabs. You can hide the workbook page tabs to create a cleaner interface for users.
1. Select the workbook page.
2. In the editor panel, under **Settings**, select **Workbook settings**.
3. Open the **Workbook navigation** section.
4. Select the **Hide page tabs in view mode** checkbox.
5. In the confirmation modal, select **Confirm**.

From here, you can customize the navigation options by adding external links, submenus, and more as you need. Because the workbook page tabs are hidden, you don't have to worry about potential user confusion that might arise from the navigation element and page tabs differing.
Hiding page tabs does not prevent users from navigating to the page from a direct link, and is not a security feature. To restrict access to data, use a data model with row-level security or column-level security. For more information, see [Set up row-level security](/docs/set-up-row-level-security) and [Configure column-level security](/docs/column-level-security).